Exciting News: Our New Embroidery Web Shop is Launching Soon!
We’ve been stitching together something truly special, and we can’t wait to share it with you! Our brand-new web shop is on its way, bringing you a carefully curated selection of embroidery kits, fabrics, tools, and more—all designed to spark creativity and enhance your stitching experience.
Whether you’re a seasoned embroiderer or just starting your journey, our shop will be your go-to destination for high-quality materials and inspiring designs. We’ve worked hard to source the best fabrics, threads, and accessories so that every stitch feels just right.
But this isn’t just a shop—it’s a community. We believe embroidery is more than a craft; it’s a mindful, expressive art form that connects people through creativity. That’s why our web shop will also feature interactive elements, from expert tips to exclusive workshop opportunities, helping you grow and refine your skills.
As we count down to launch day, stay tuned for sneak peeks, special promotions, and behind-the-scenes stories! Sign up for our newsletter or follow us on social media to be the first to know when we go live.
We can’t wait to welcome you into this new chapter—happy stitching!
Exploring Creativity Through Textiles: A Journey in Experimental Embroidery
Fabric printing
Introduction
Embroidery is often seen as a meticulous craft, steeped in tradition—but what happens when you break the rules, experiment with unconventional materials, and push the boundaries of textile art? That’s exactly what my **Creative Textiles Course** sets out to explore.
This course is designed for those who want to go beyond traditional embroidery techniques, blending texture, layering, and mixed-media elements to create truly unique textile art. Whether you’re an experienced embroiderer looking to experiment or a creative soul eager to try something new, this course is your gateway to discovery.
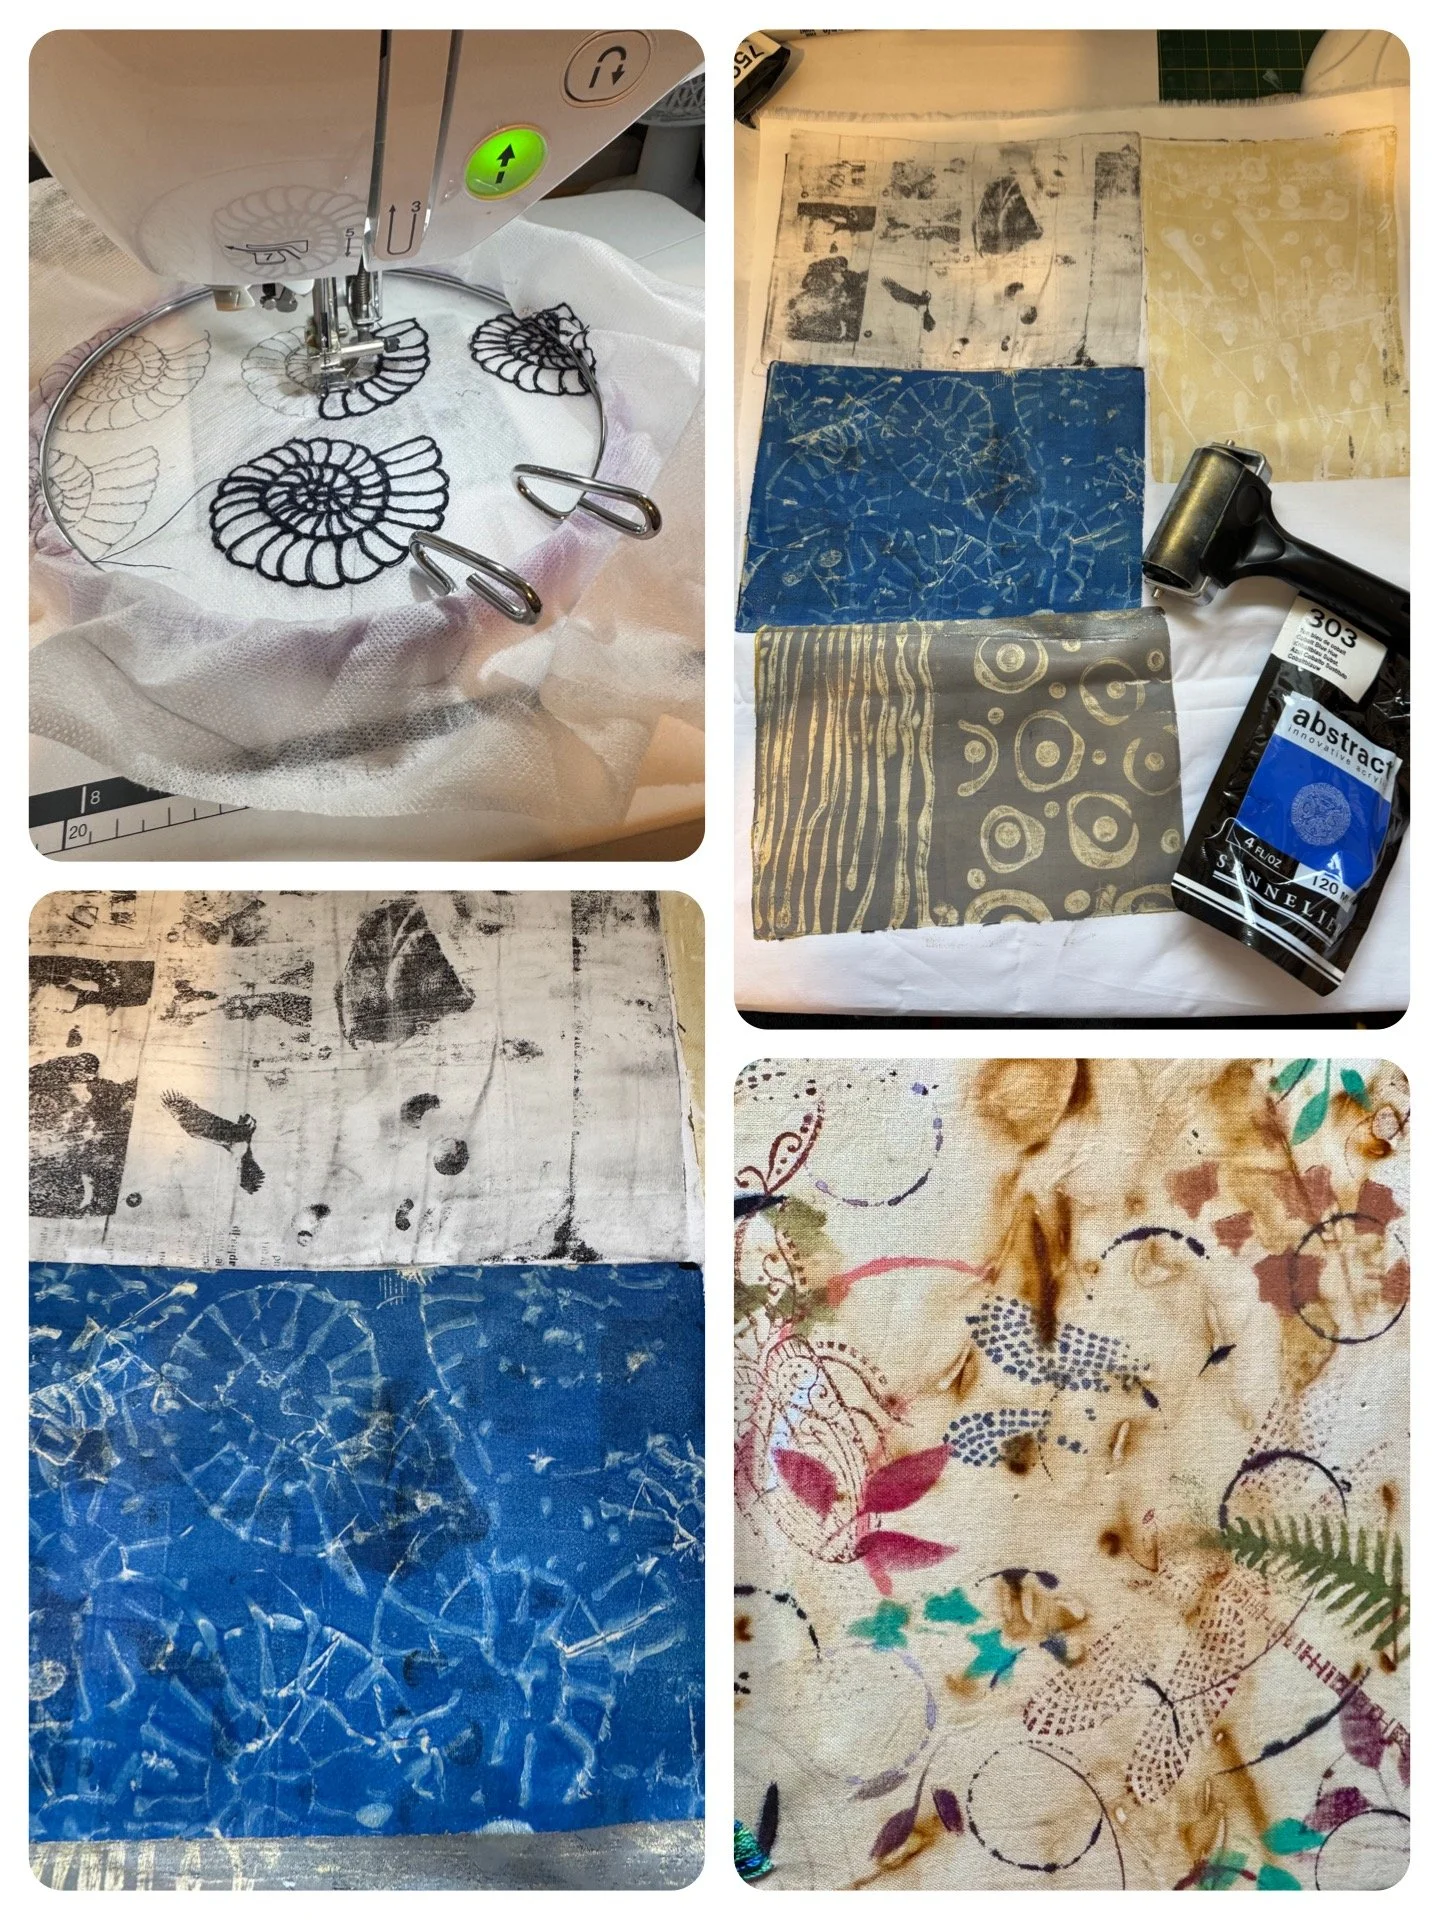
Fabric printing and painting
What Makes This Course Special?
Unlike conventional embroidery classes, this course focuses on exploration and experimentation. You’ll get hands-on experience working with a variety of materials, learning how to manipulate fabric, layer textures, and incorporate unexpected elements into your embroidery.
We’ll delve into the creative process, helping you develop your artistic voice by embracing spontaneity, abstraction, and innovative textile techniques.
Techniques & Materials You'll Explore
Throughout the course, you'll be introduced to a range of exciting techniques, including:
- Fabric manipulation – exploring folds, gathers, and layering.
- Mixed-media embroidery – combining traditional stitching with paper, wire, and unconventional textiles.
- Textural experimentation – creating depth and dimension through creative stitch work.
- Interactive design – allowing movement, light, or transformation in textile art.
Creative Freedom & Community Engagement
One of the most rewarding aspects of this course is the collaborative and inspiring environment. Whether you’re stitching for mindfulness, artistic exploration, or to discover new techniques, you’ll be surrounded by like-minded creators who share a passion for textiles.
You’ll also have the chance to work on small collaborative projects, swap ideas, and challenge yourself creatively in ways you never expected.
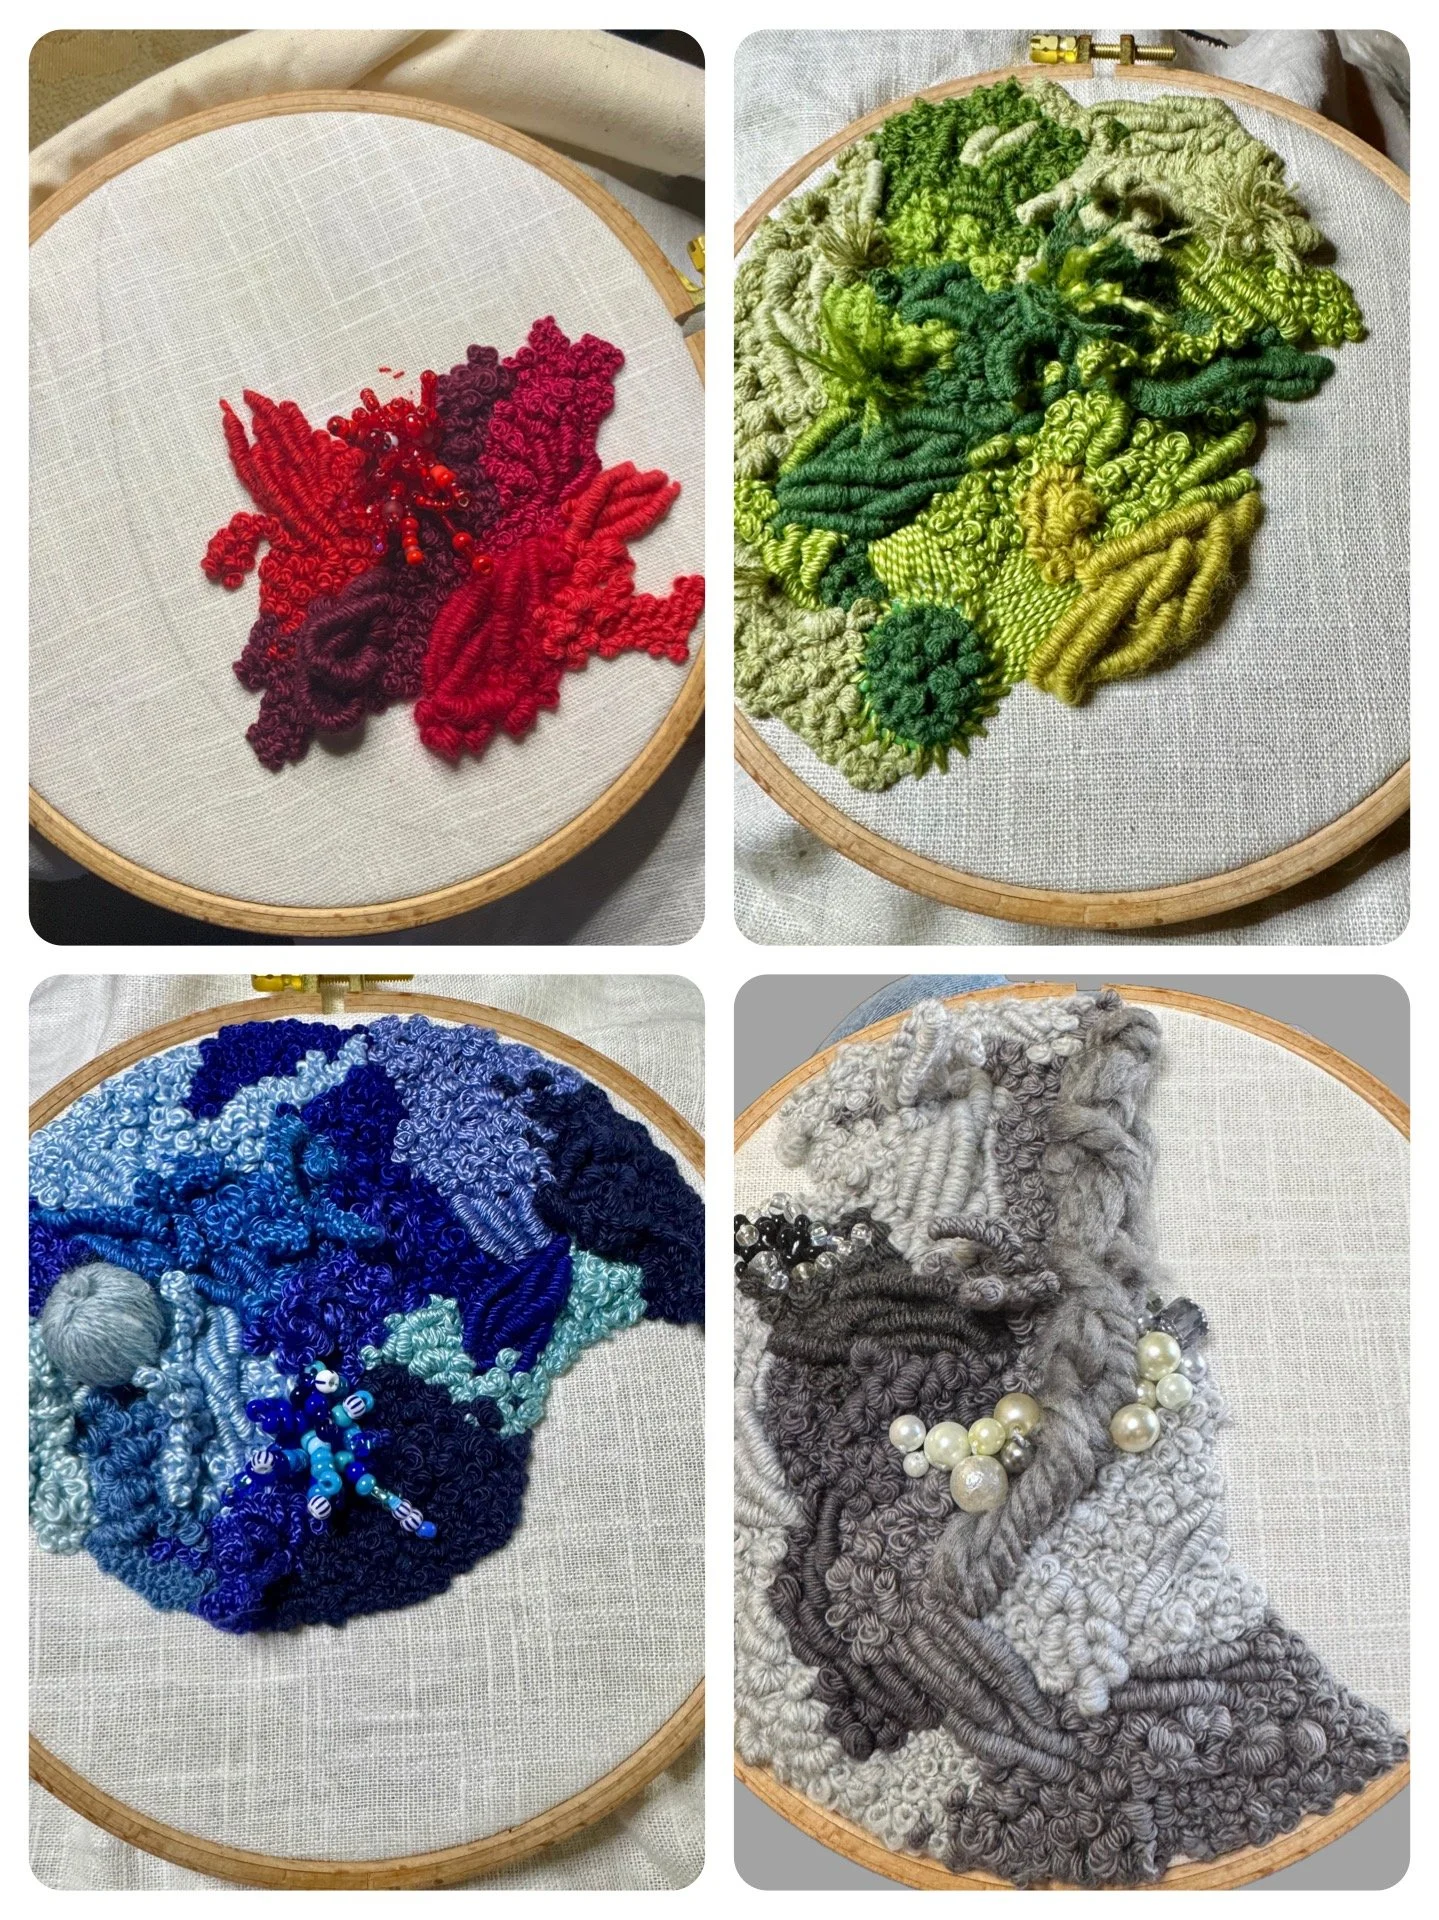
Embroidering Texture
If you’re ready to push the boundaries of embroidery and explore textiles in an entirely new way, this course is for you. Come with an open mind, a love for creativity, and a willingness to experiment.
📍 Book your spot now and let’s stitch beyond tradition!
Book your space here: https://debdaysewingroom.com/product/creative-textile-embroidery-exploration-course/


Book review
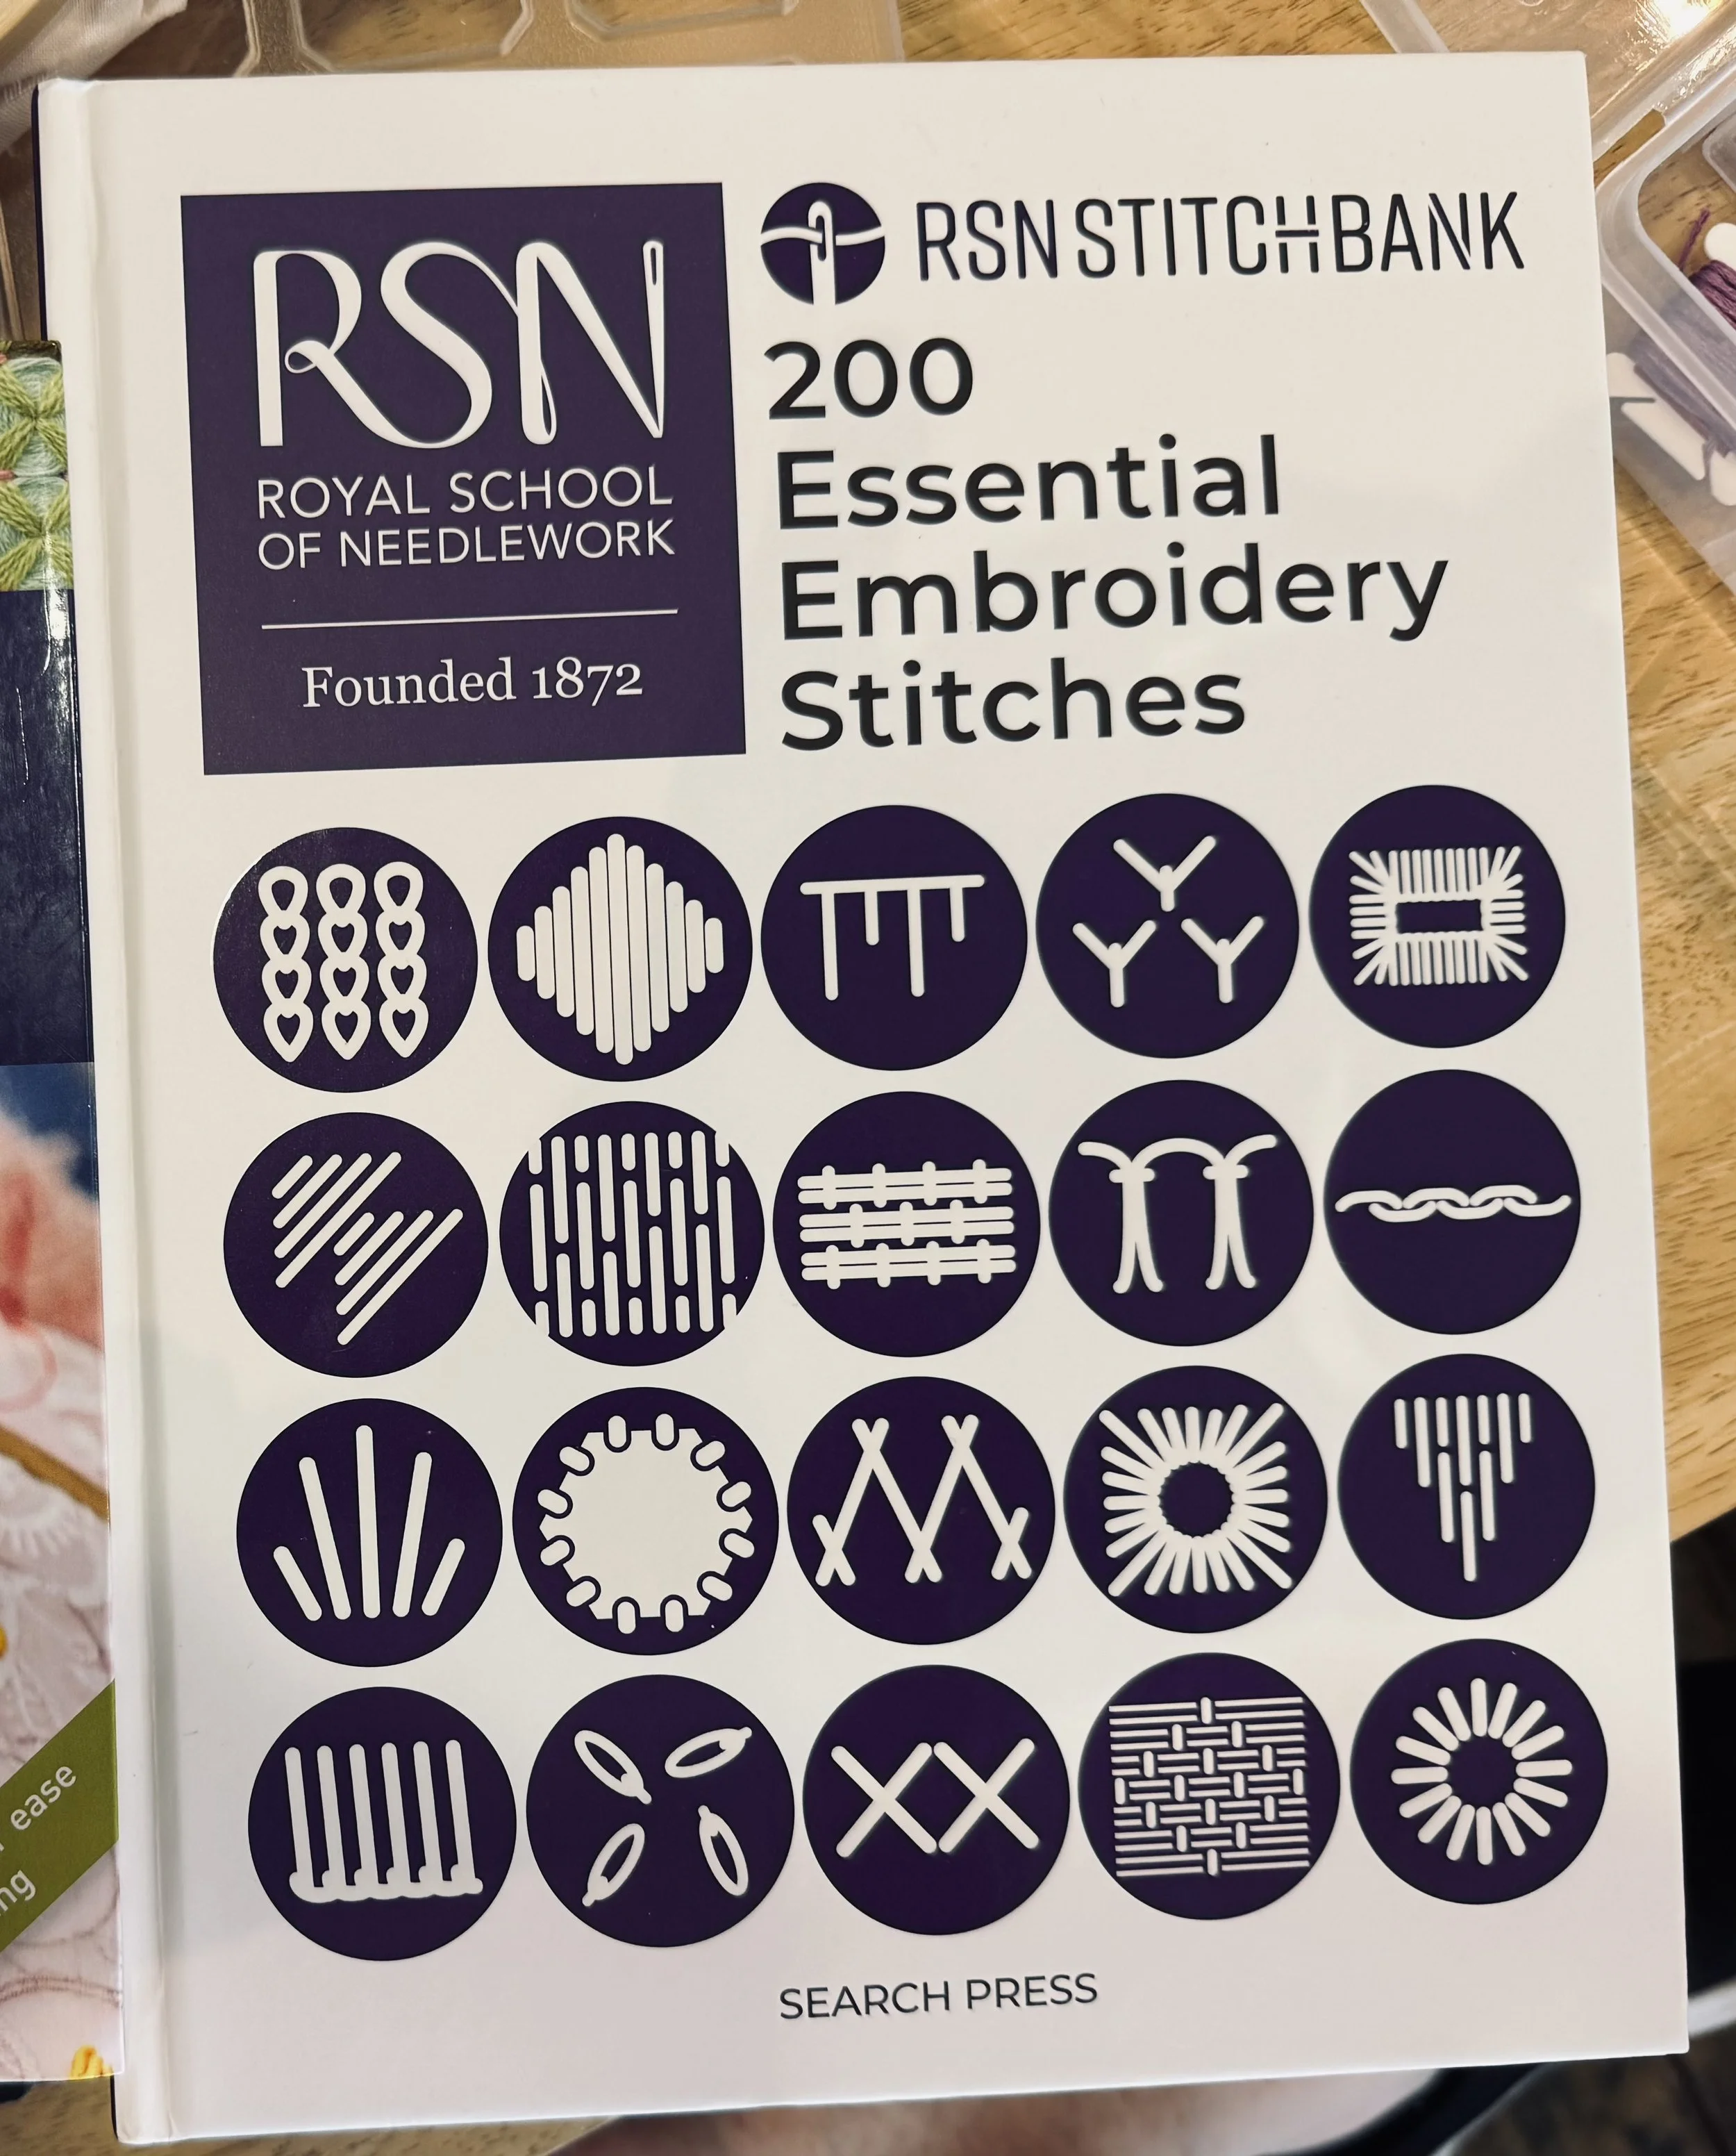
RSN Stitch Bank: 200 Essential Embroidery Stitches – The Royal School of Needlework
This wonderful and very educational book from the RSN encompasses everything I love about embroidery. The RSN stitch bank is a wonderful resource for any embroiderer, it has 200 stitch guides guiding you through how you create the stitches, including clear diagrams and pictures.
This resource is essential for needle workers of all abilities alongside the website The RSN Stitchbank there is every kind of stitch and more.
What Makes This Book Stand Out?
- Detailed Instructions & Illustrations– Each of the 200 stitches is accompanied by step-by-step guidance, clear illustrations, and high-quality images, making it easy to follow
Wide Range of Techniques– The book covers everything from foundational stitches like running stitch and French knots to advanced techniques such as three-dimensional stitches and cutwork
Historical Insights – RSN has included fascinating historical context, showcasing embroidery’s evolution and significance over time
Organized for Easy Reference – Stitches are categorized by function, helping embroiderers quickly find the right technique for their projects
A Resource for All Levels – Whether you're refining your craft or exploring new stitches, this book provides inspiration and practical knowledge
Final Thoughts
For embroidery enthusiasts, this book is a valuable addition to any collection. It not only teaches techniques but also celebrates the artistry and heritage of embroidery. this could be a fantastic resource for beginners and experienced stitchers.
Here’s a link to purchase the book here
News So Far….
News so far…
A round up of the last months news including news of the new website, shop and embroidery kits
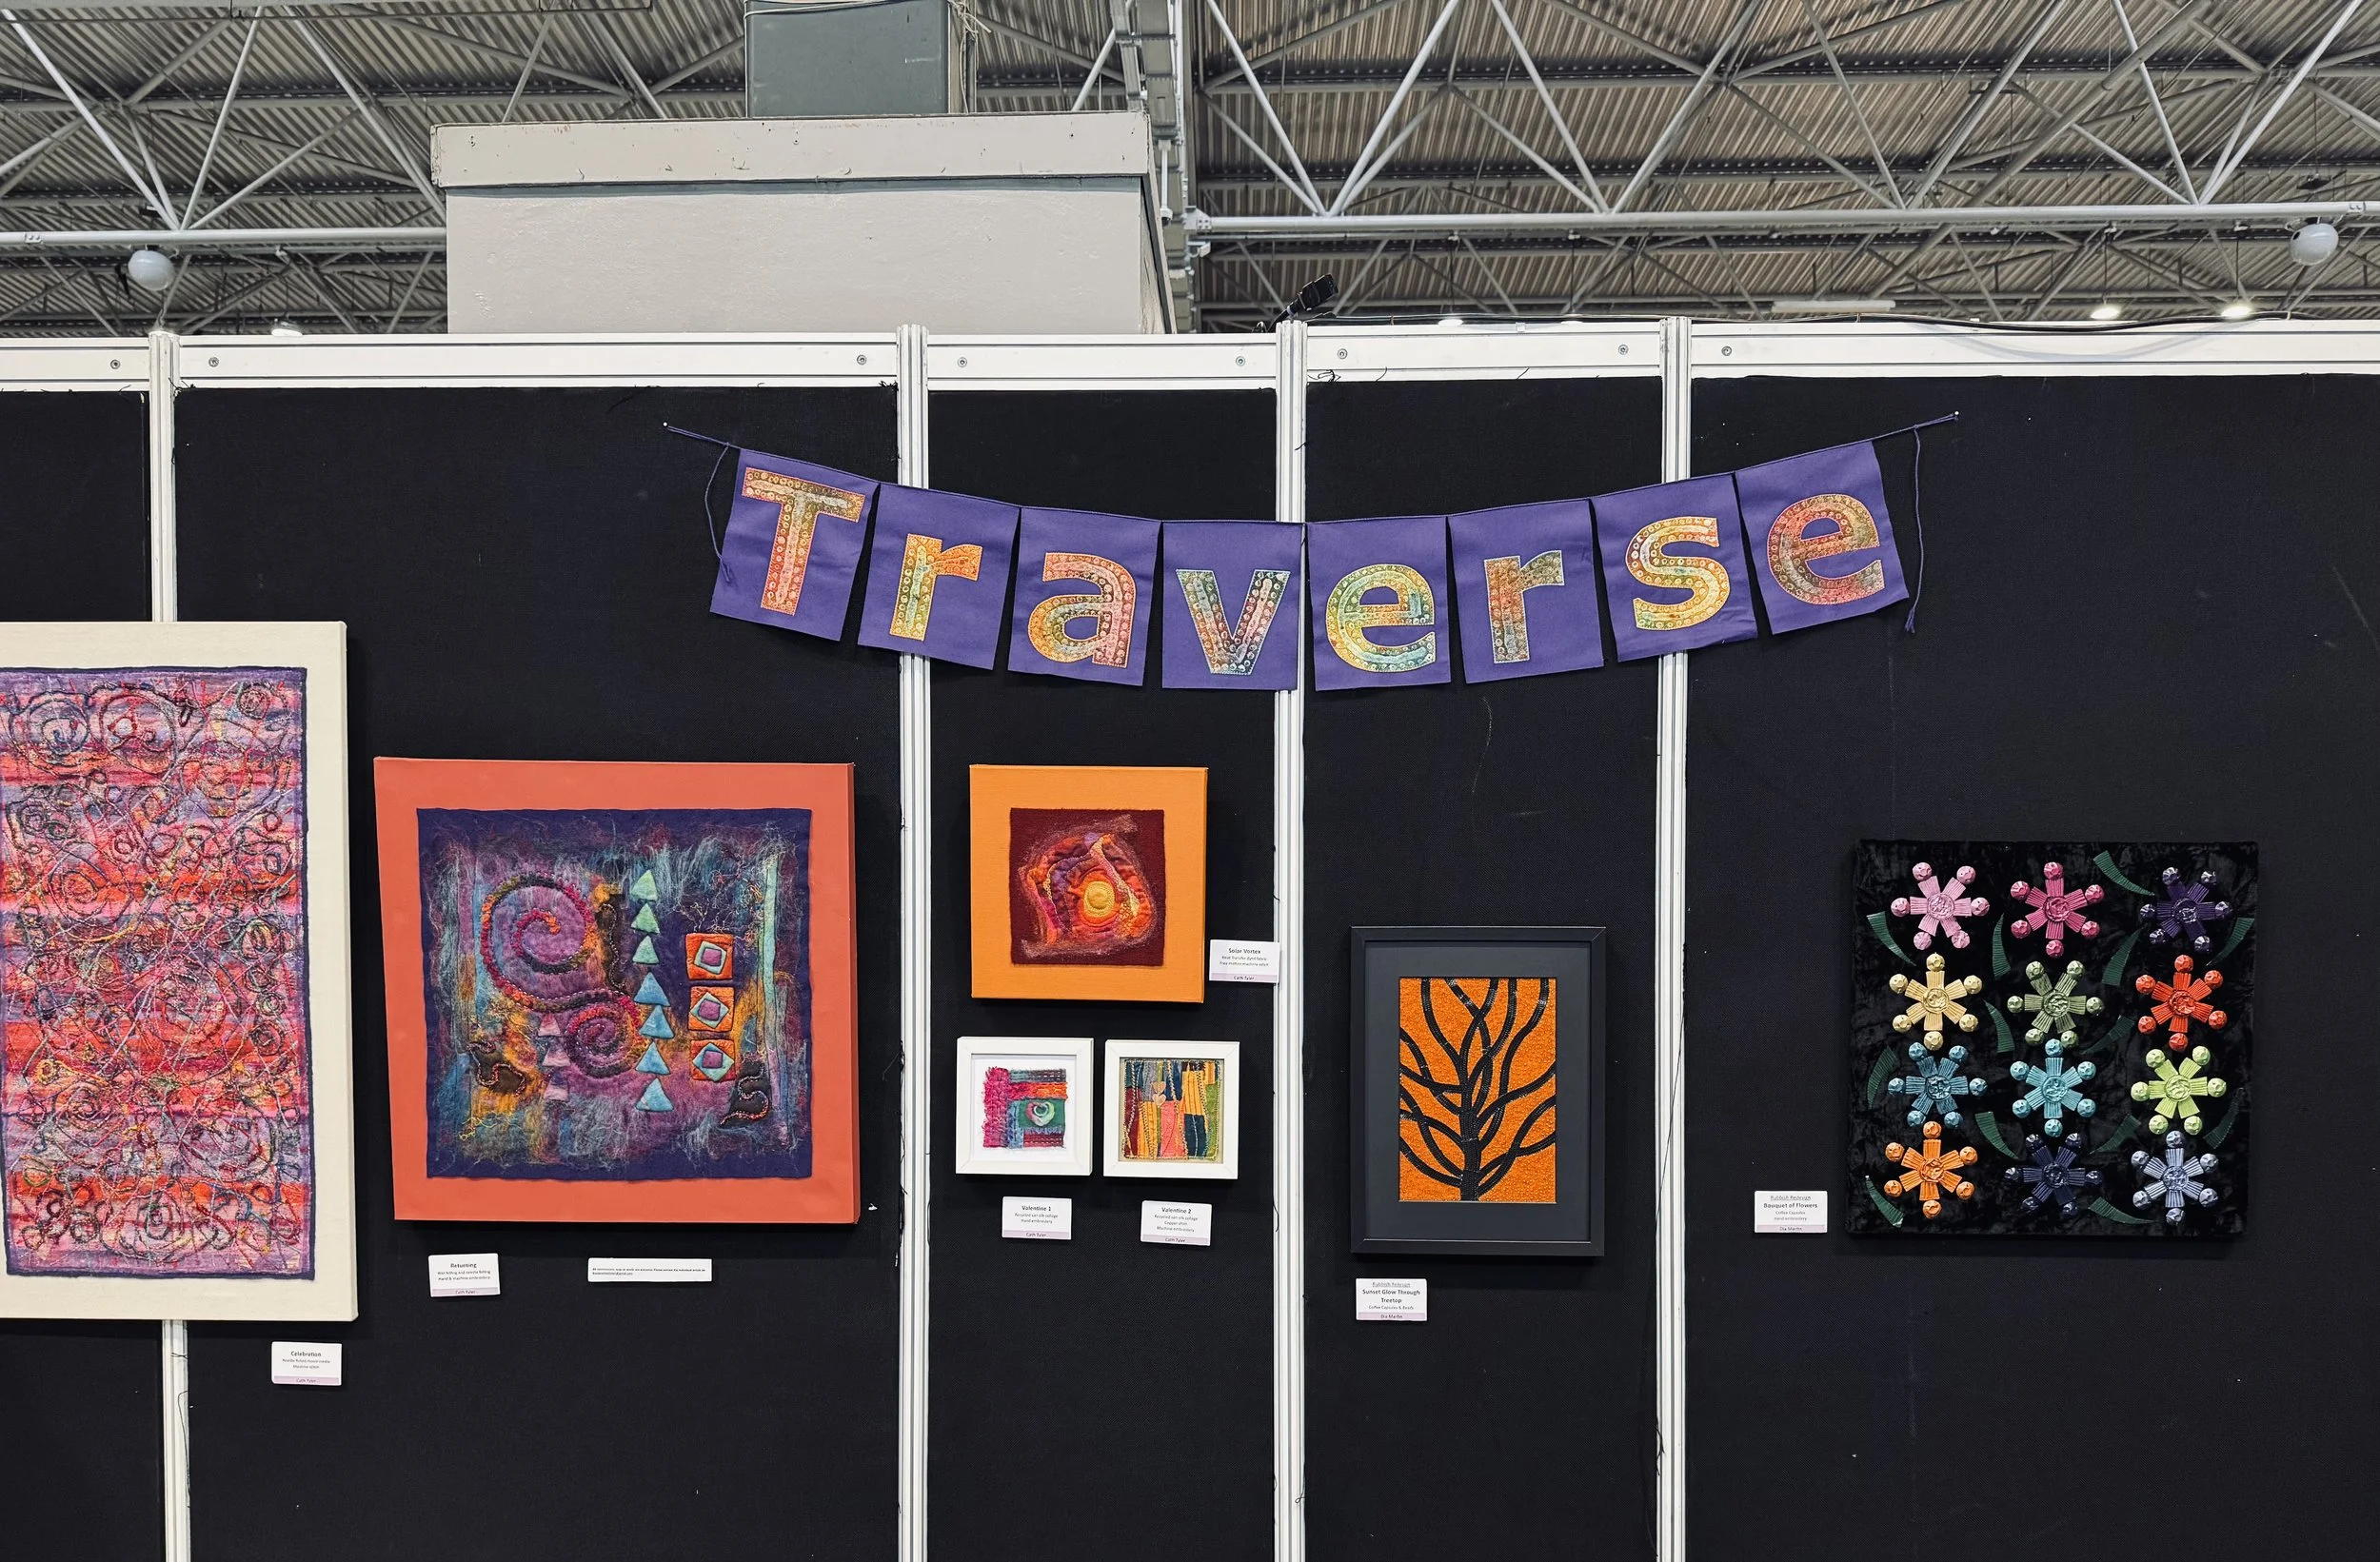
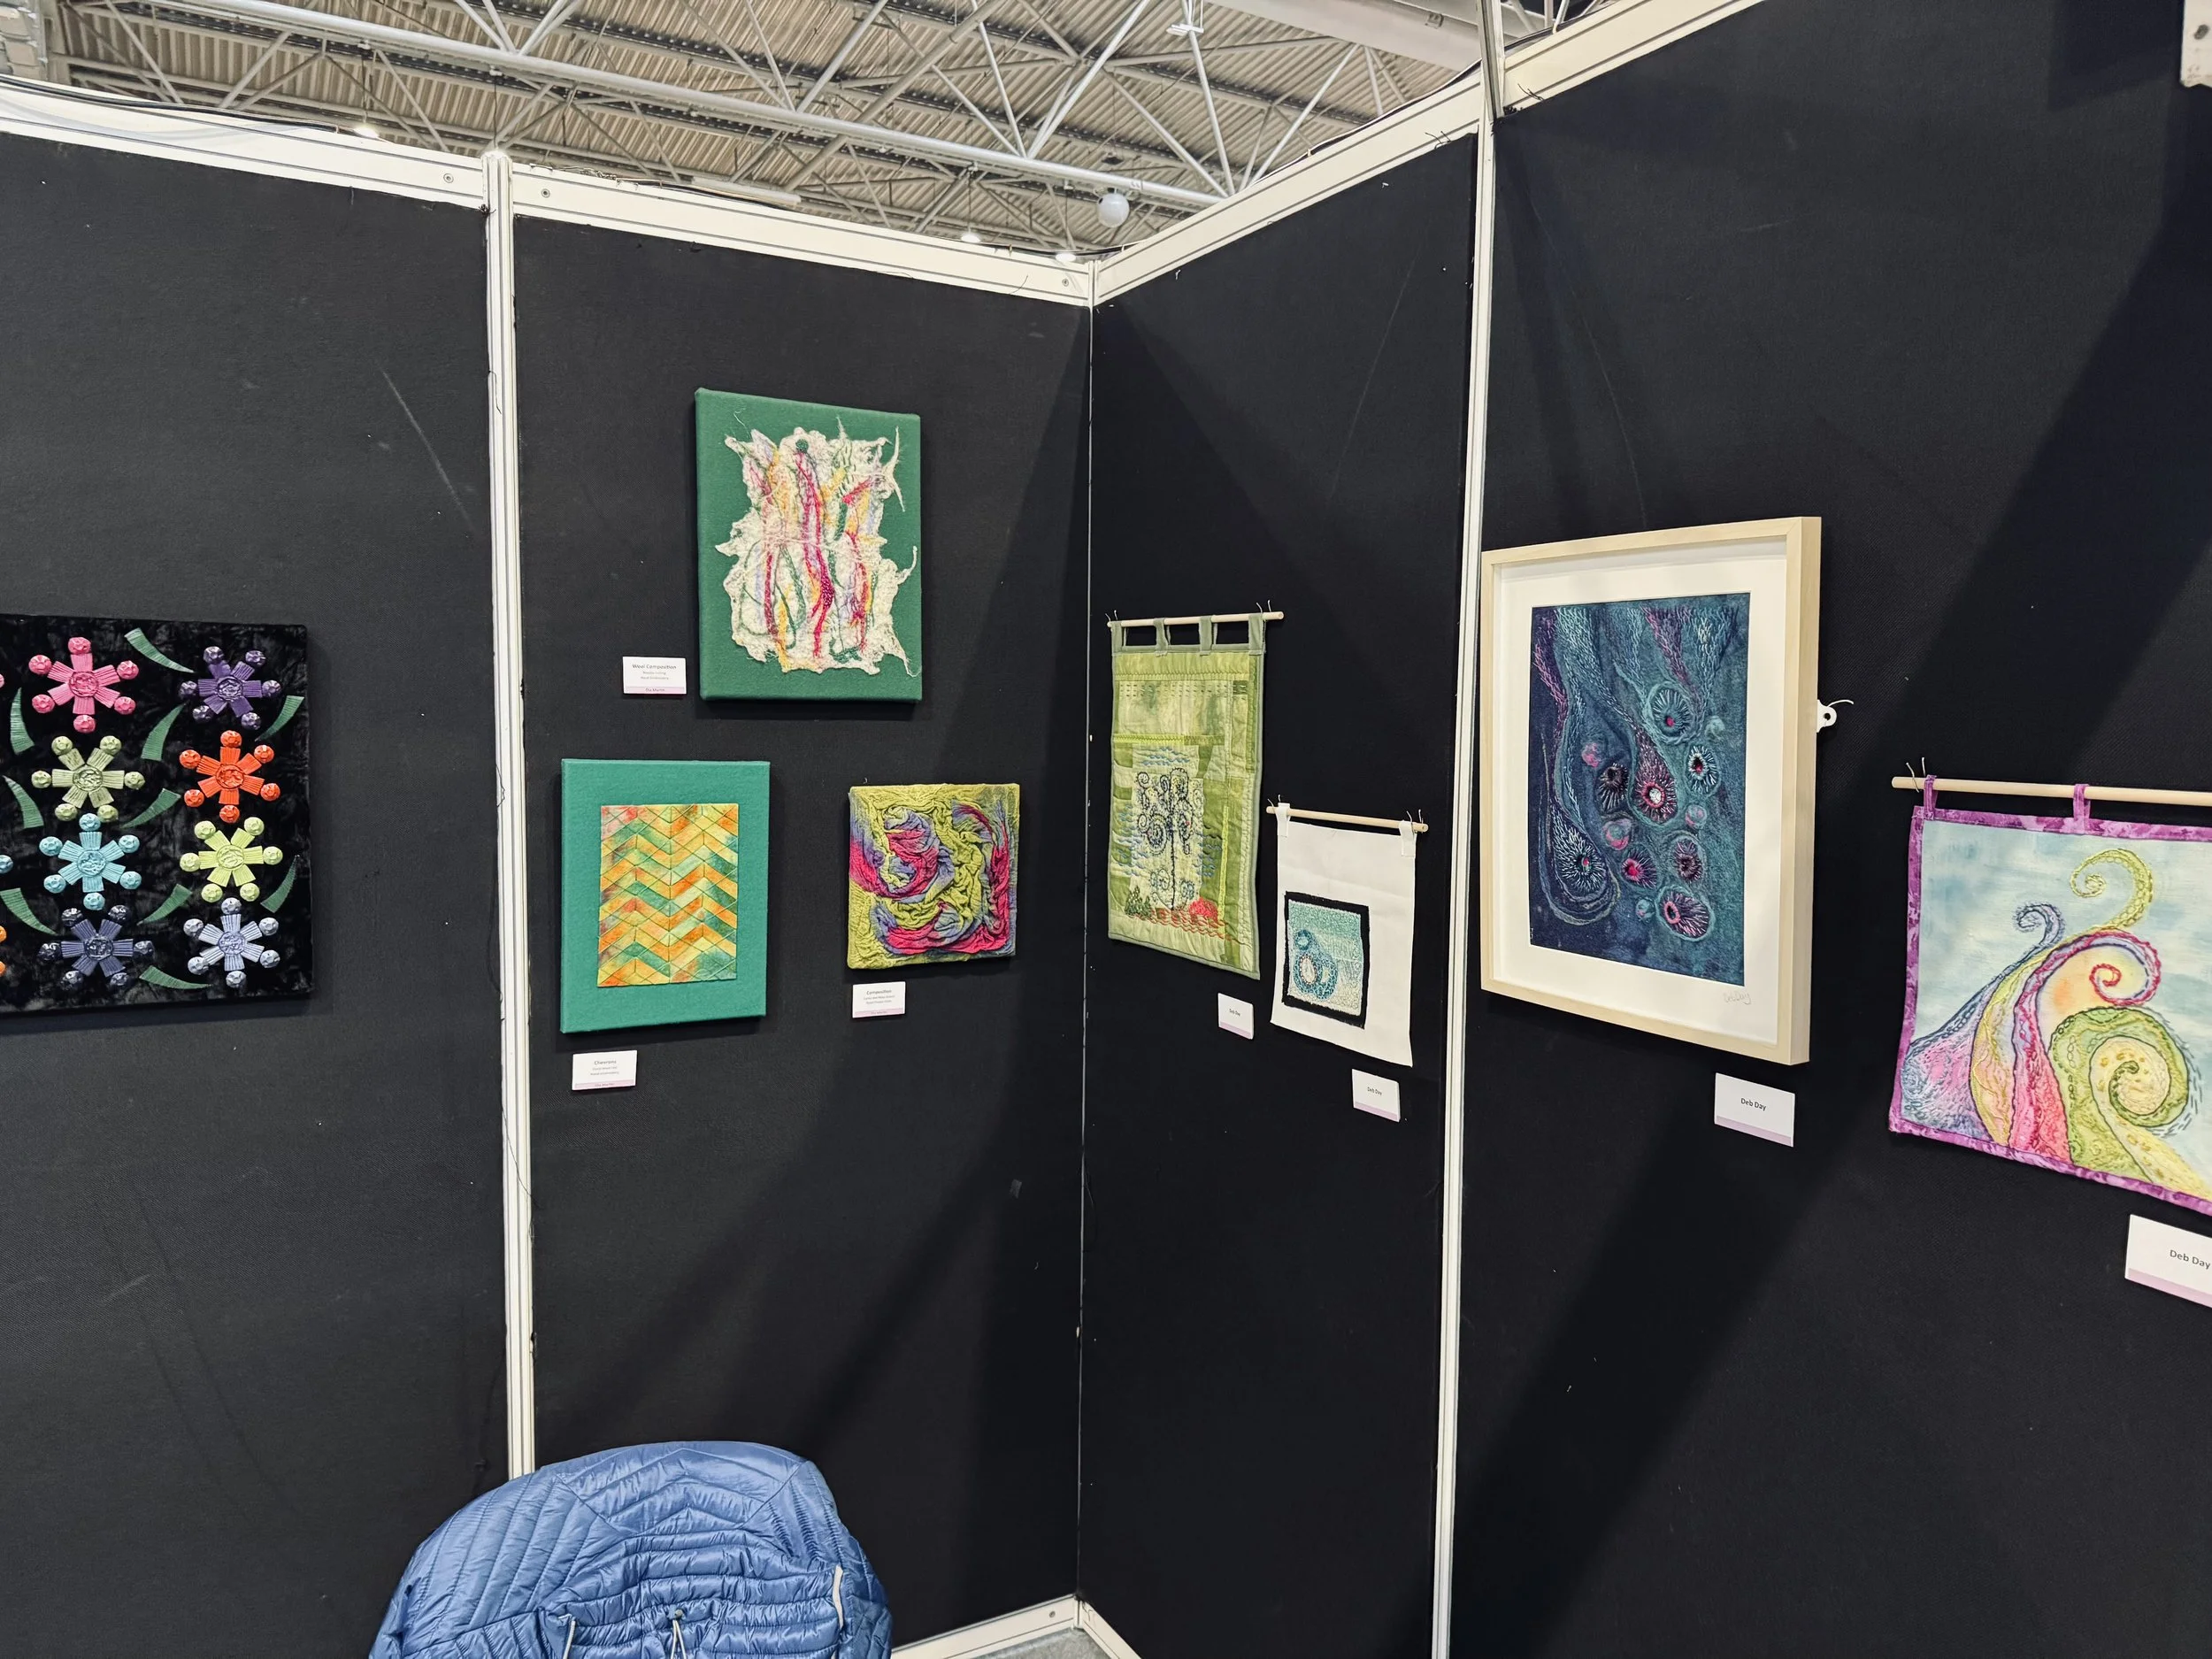
It’s been a busy time at The Manbroiderer towers, with the exhibition at The Creative Craft Show at the N.E.C Birmingham last month that saw my work exhibited alongside my friends at Traverse Textile Art Group.

I Managed to see the truly spectacular Red Dress exhibit which is absolutely breath taking. Also the National Embroidery Awards exhibits that showcased the amazing talents of so many textile artists in one place.

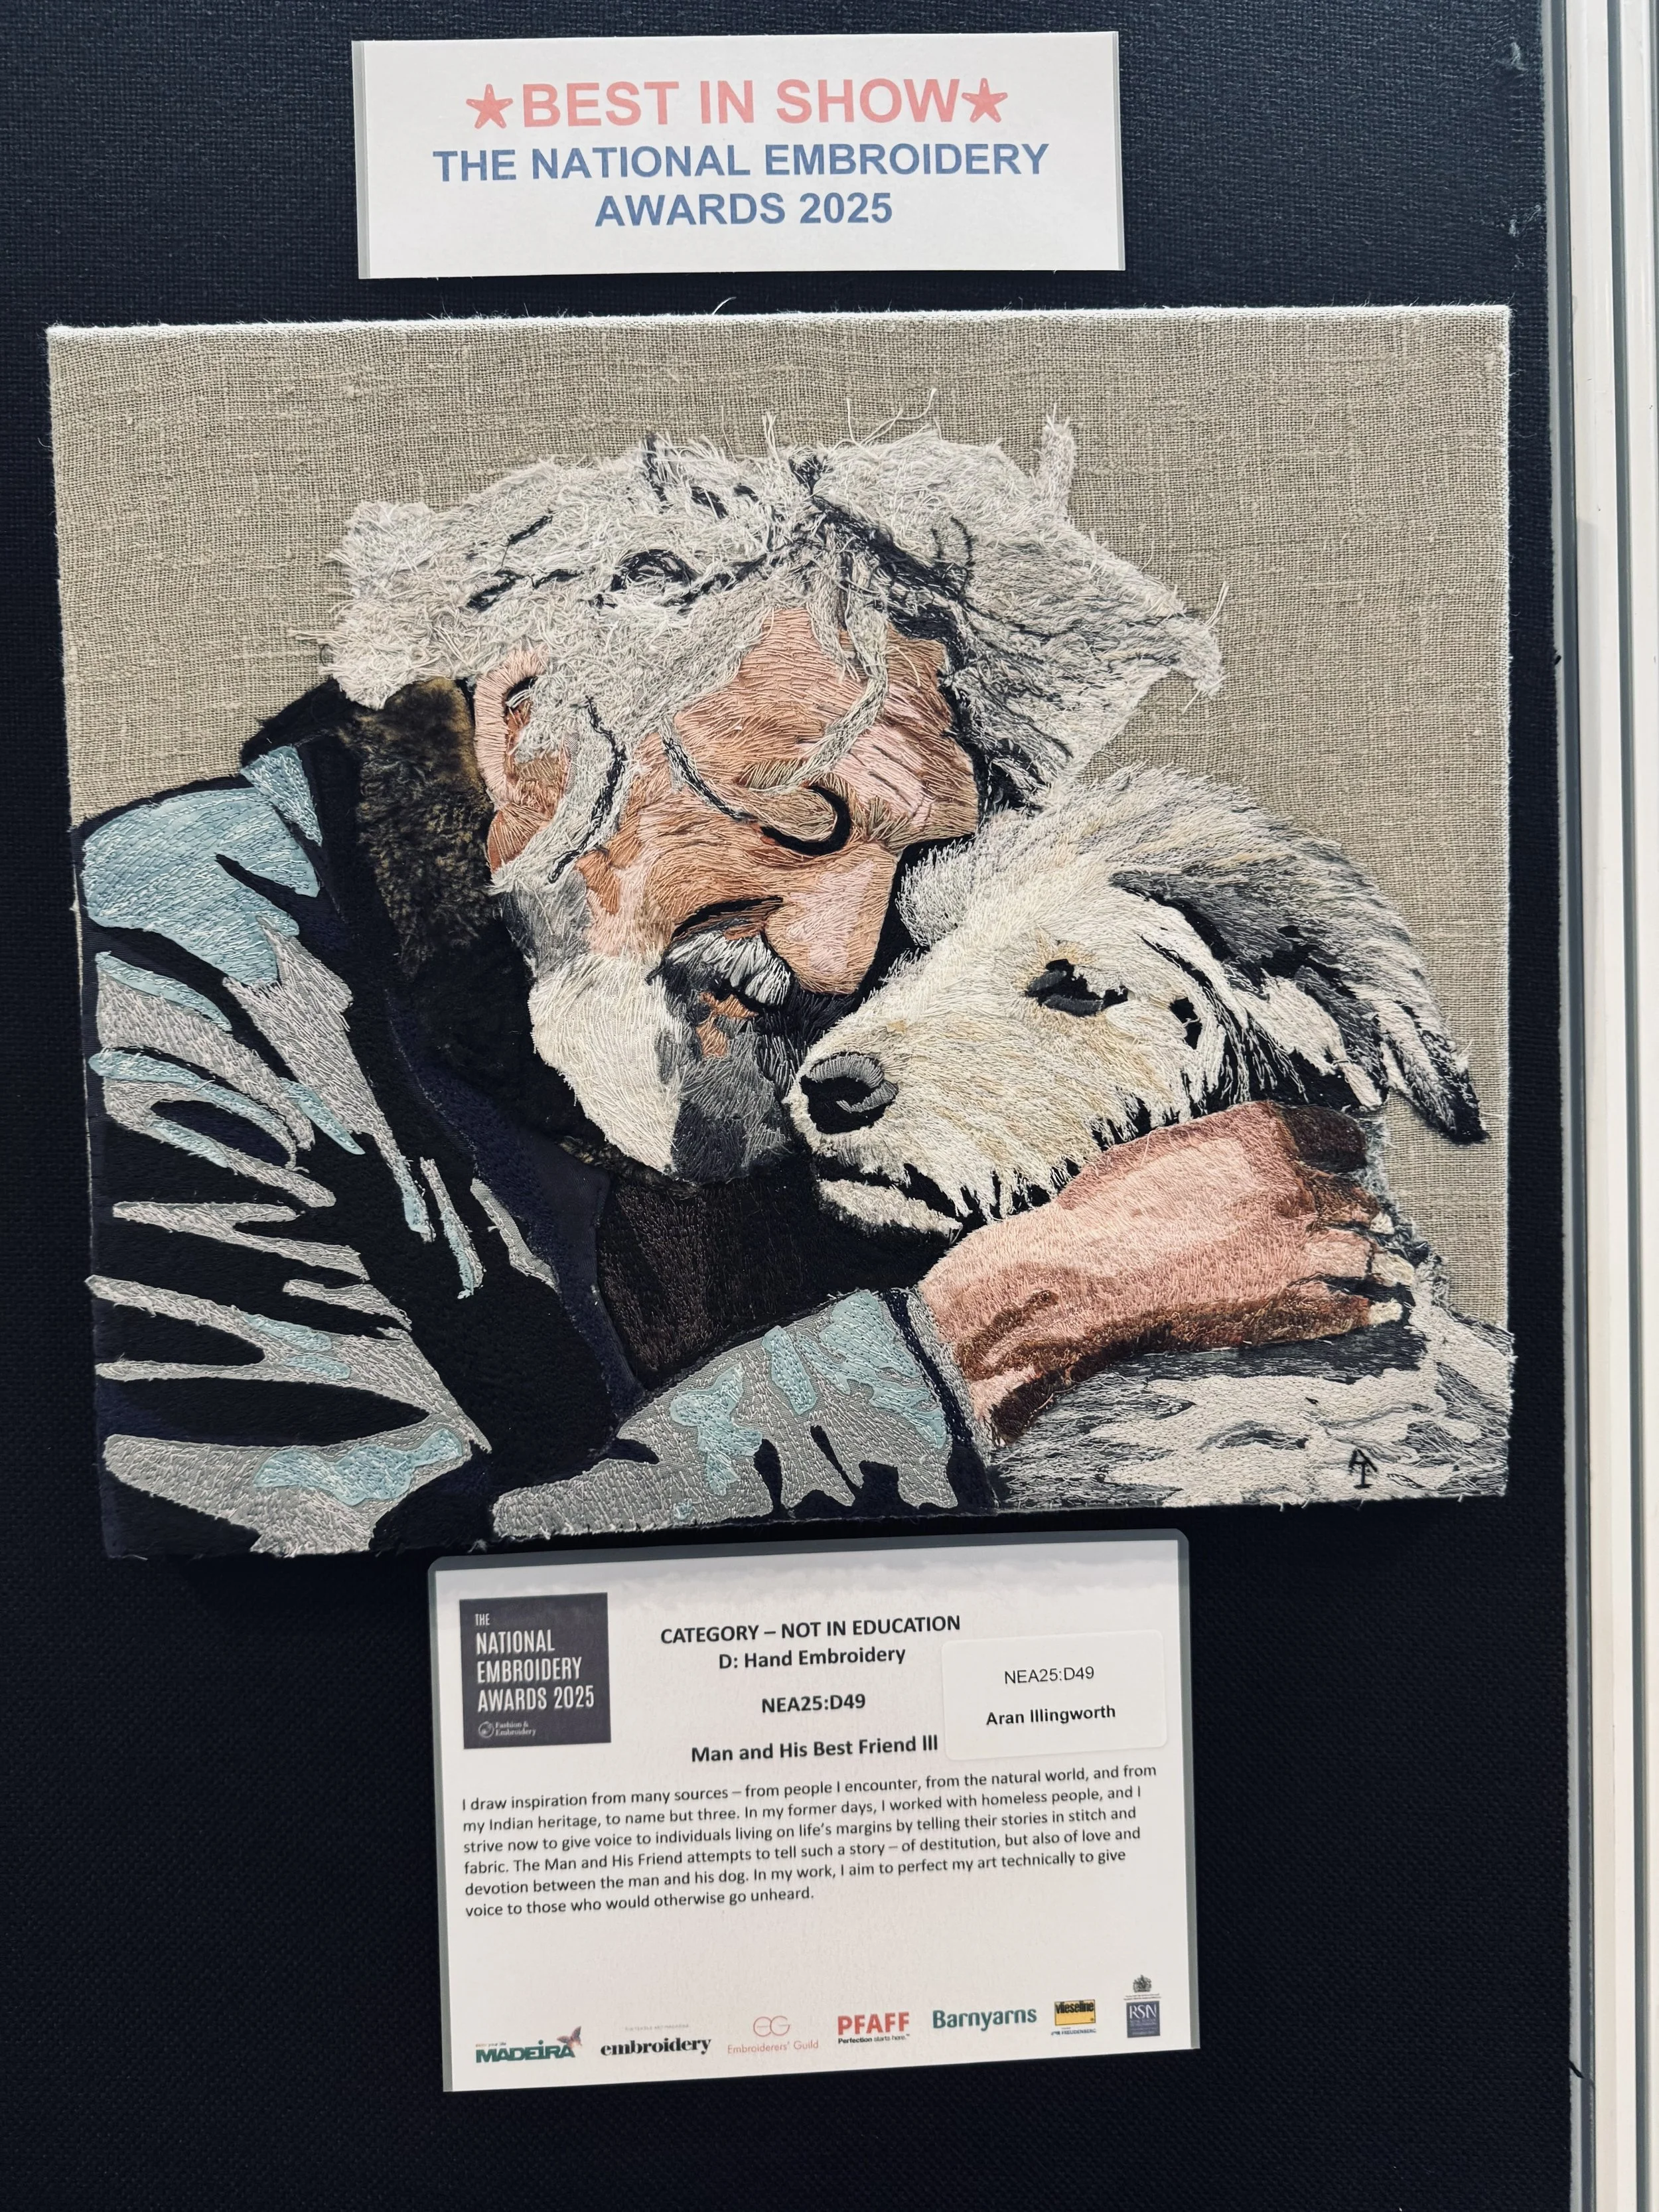

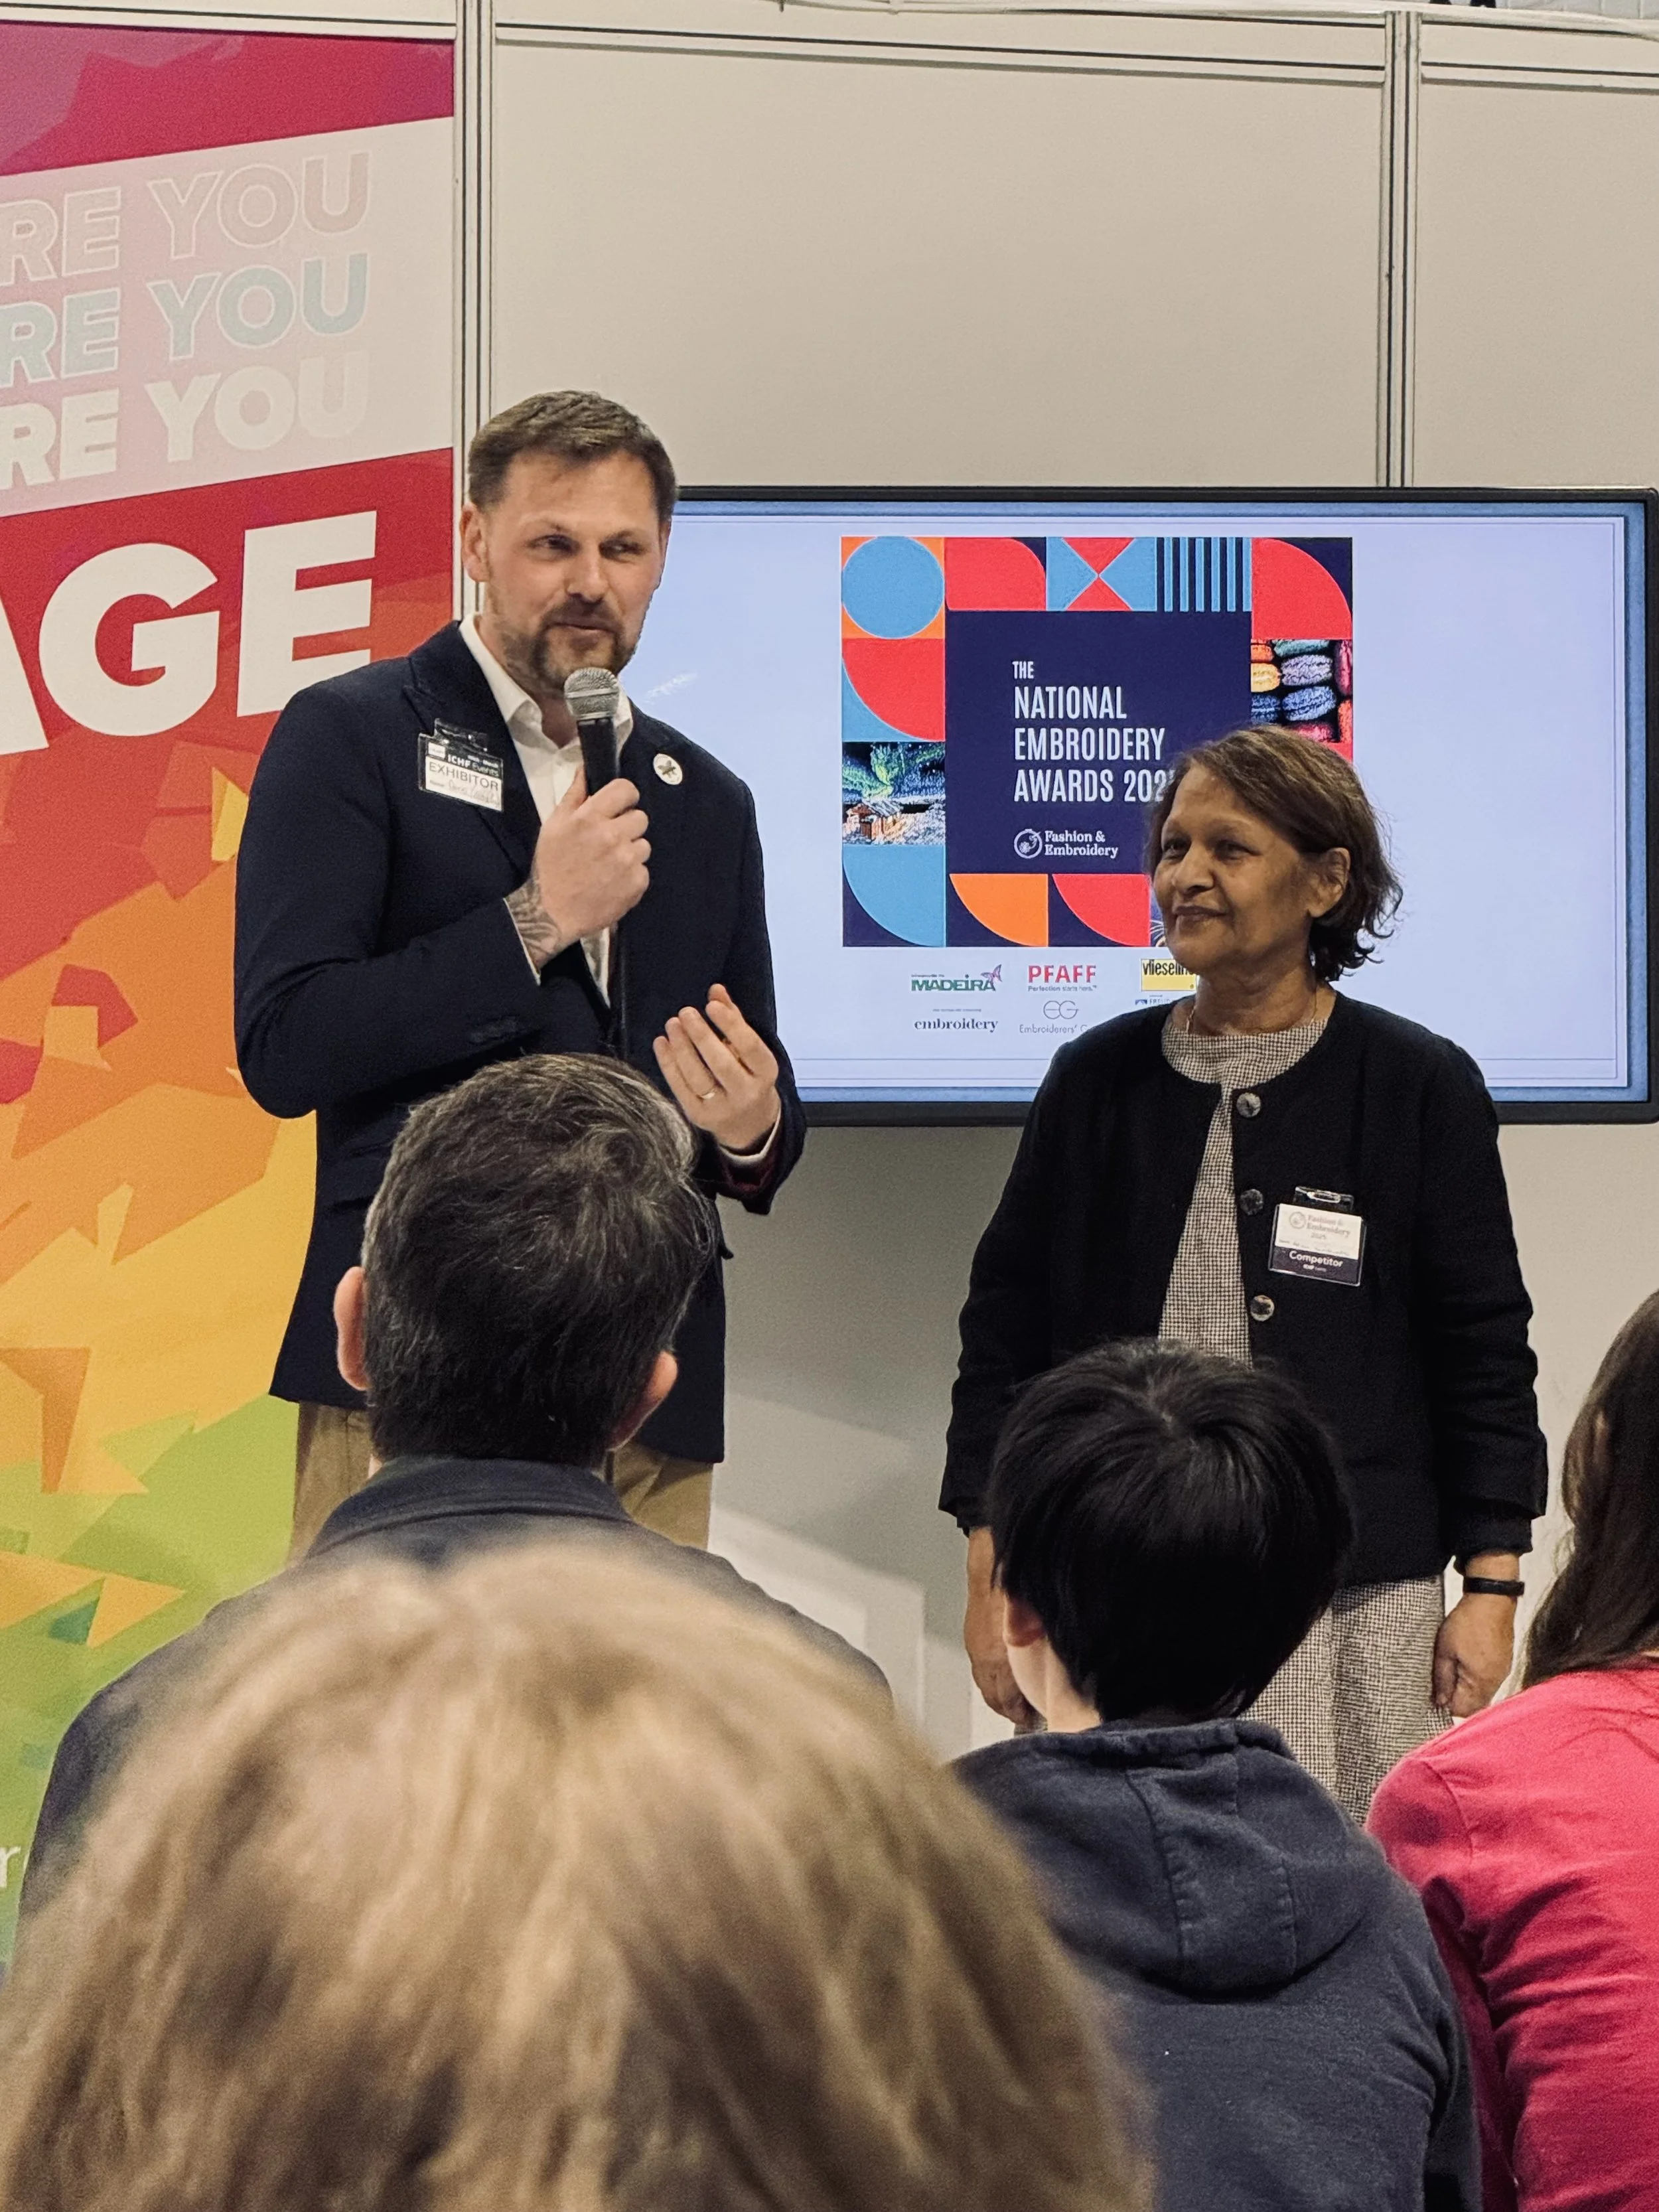

The best part of the show was meeting all of you, it was lovely to catch up with so many of you and find out what you are all up to and the exciting projects you are working on. If you didn’t see my photos and videos of the winners, please check out The Manbroiderer on Facebook to see all of the images I took at the show.
I have also launched my shiny new website that will include my blog, and news of current events, exhibitions, and my available work as well as a fully stocked shop where you can purchase all of your embroidery supplies at the best prices possible.
This ties very nicely into my next piece of news which is my lovely embroidery kits I’ve been working hard to get released. There will be two new kits released onto the site by the end of April, so keep an eye on www.themanbroiderer.com for the release, There are two test shots below of the finished designs, you don’t want to miss them.
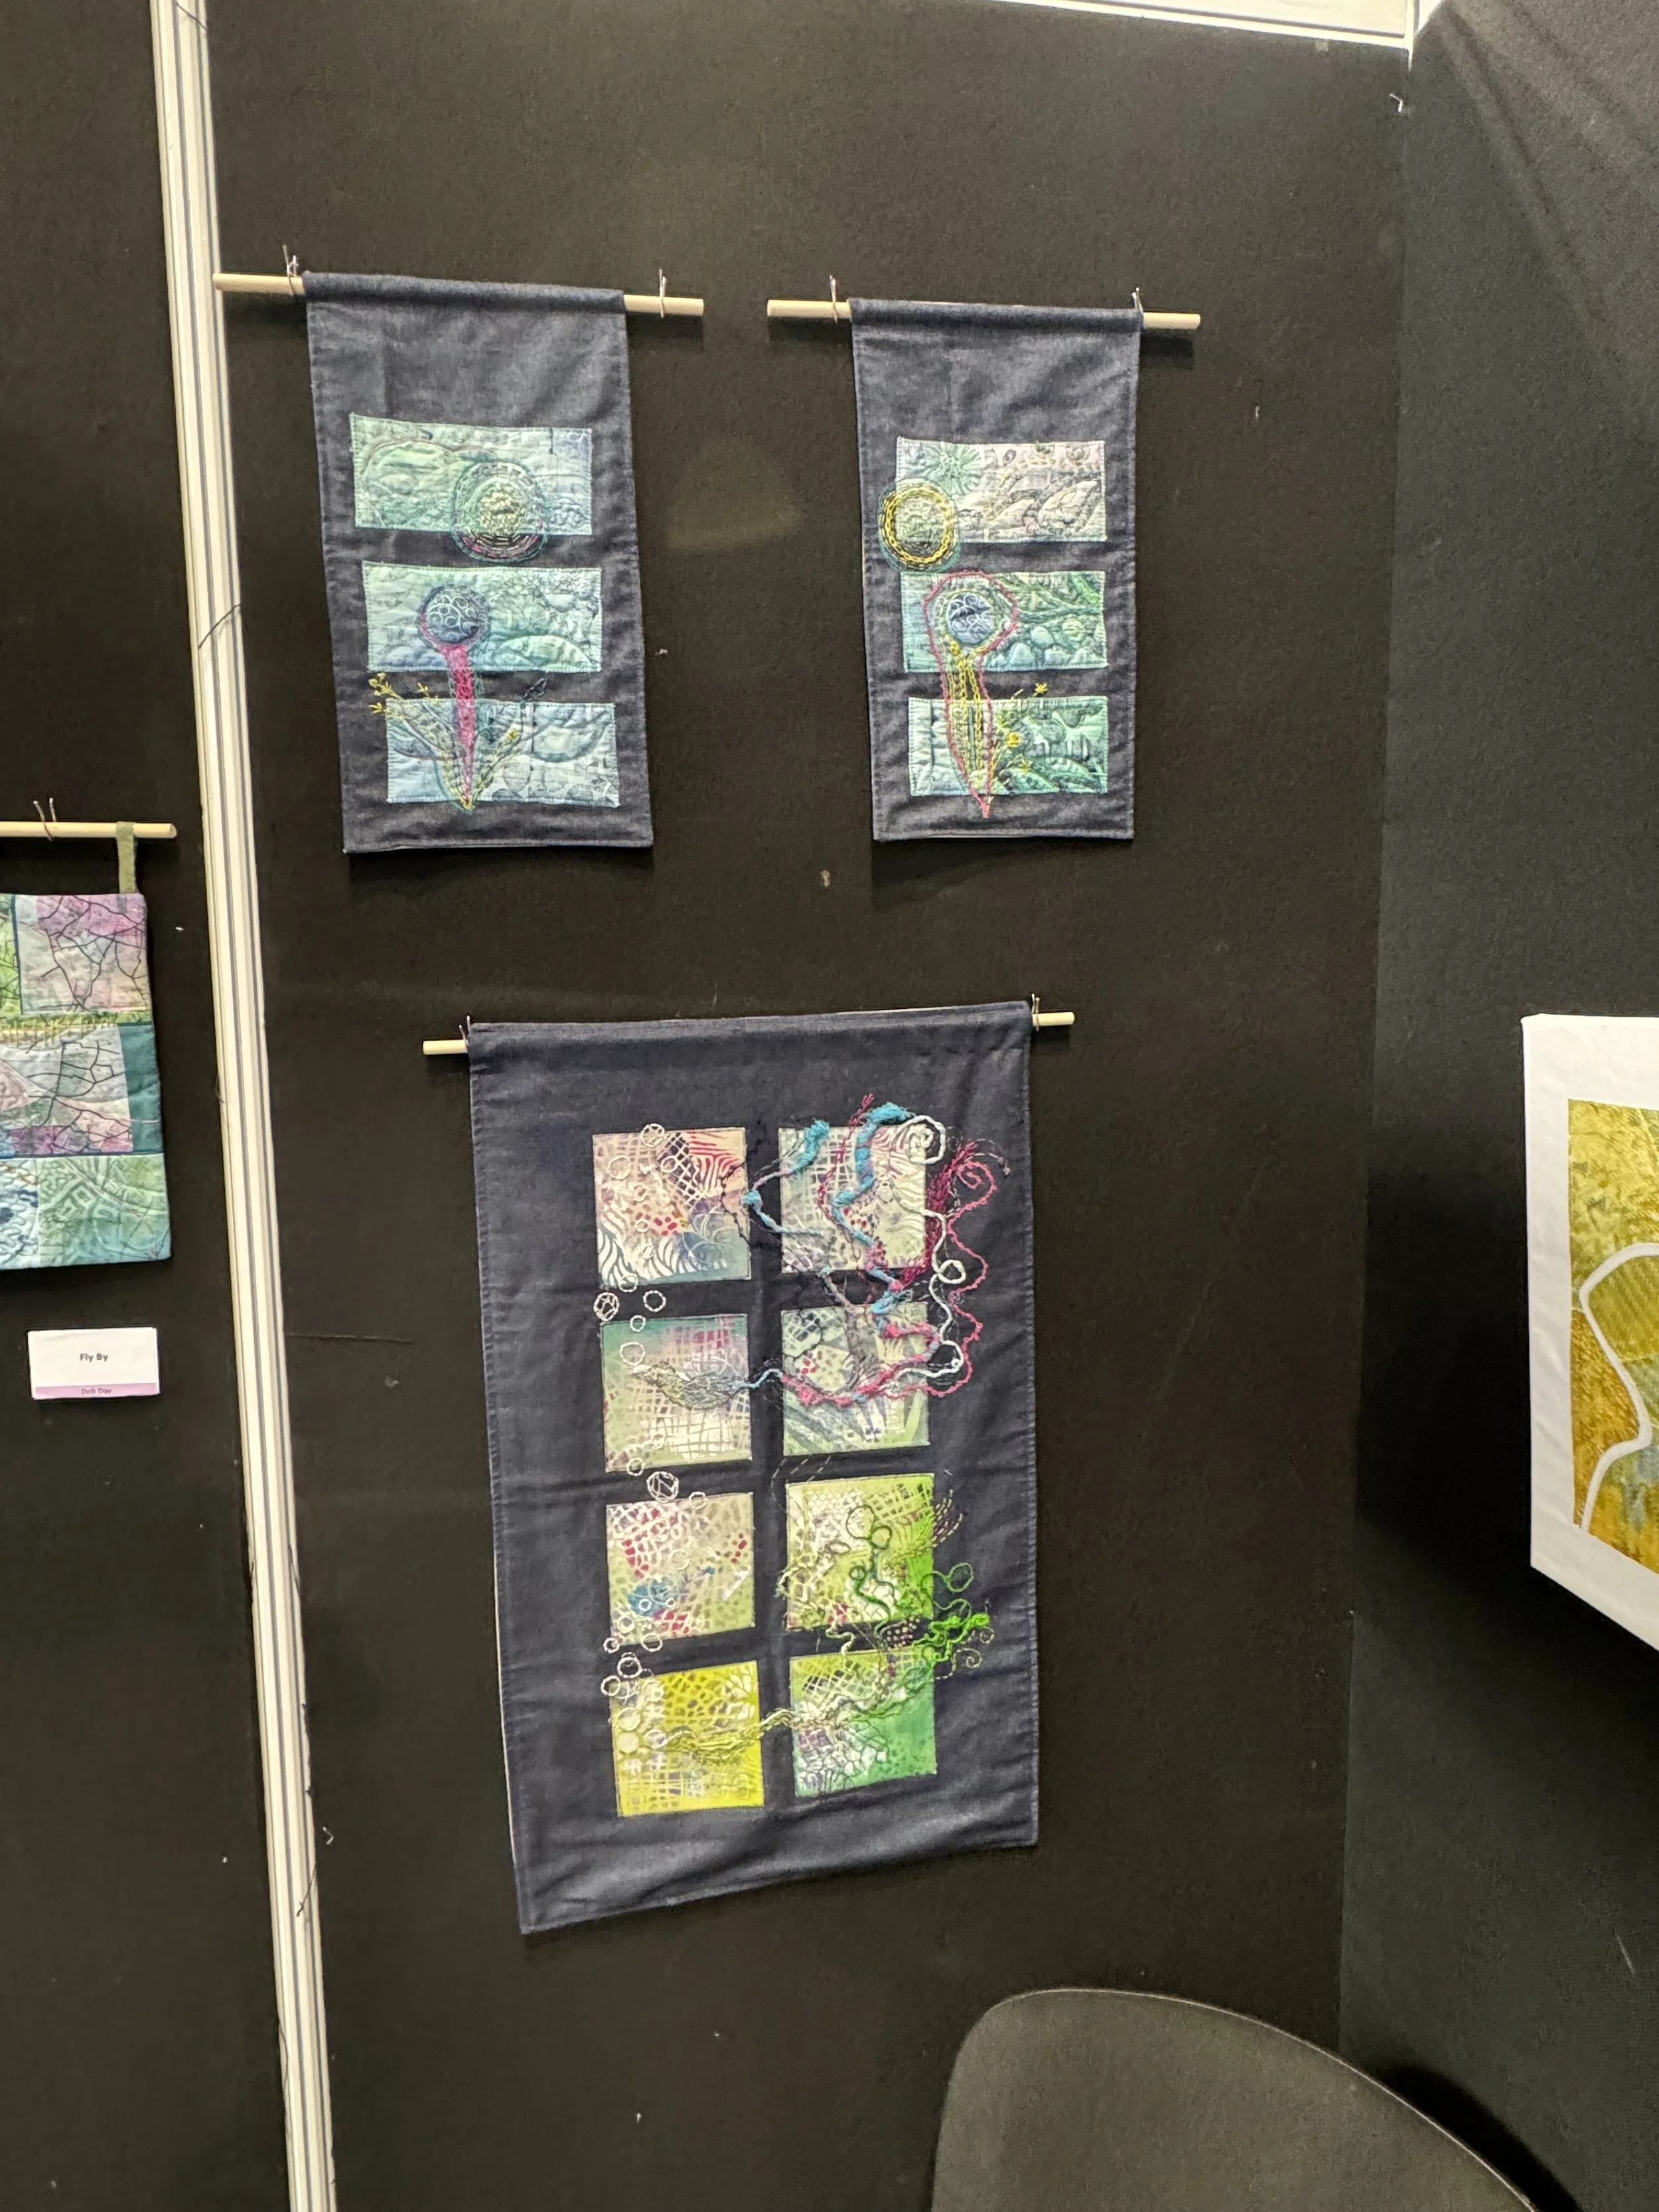
Explorations in Textiles
Explorations in textiles, my journey on an experimental textile course

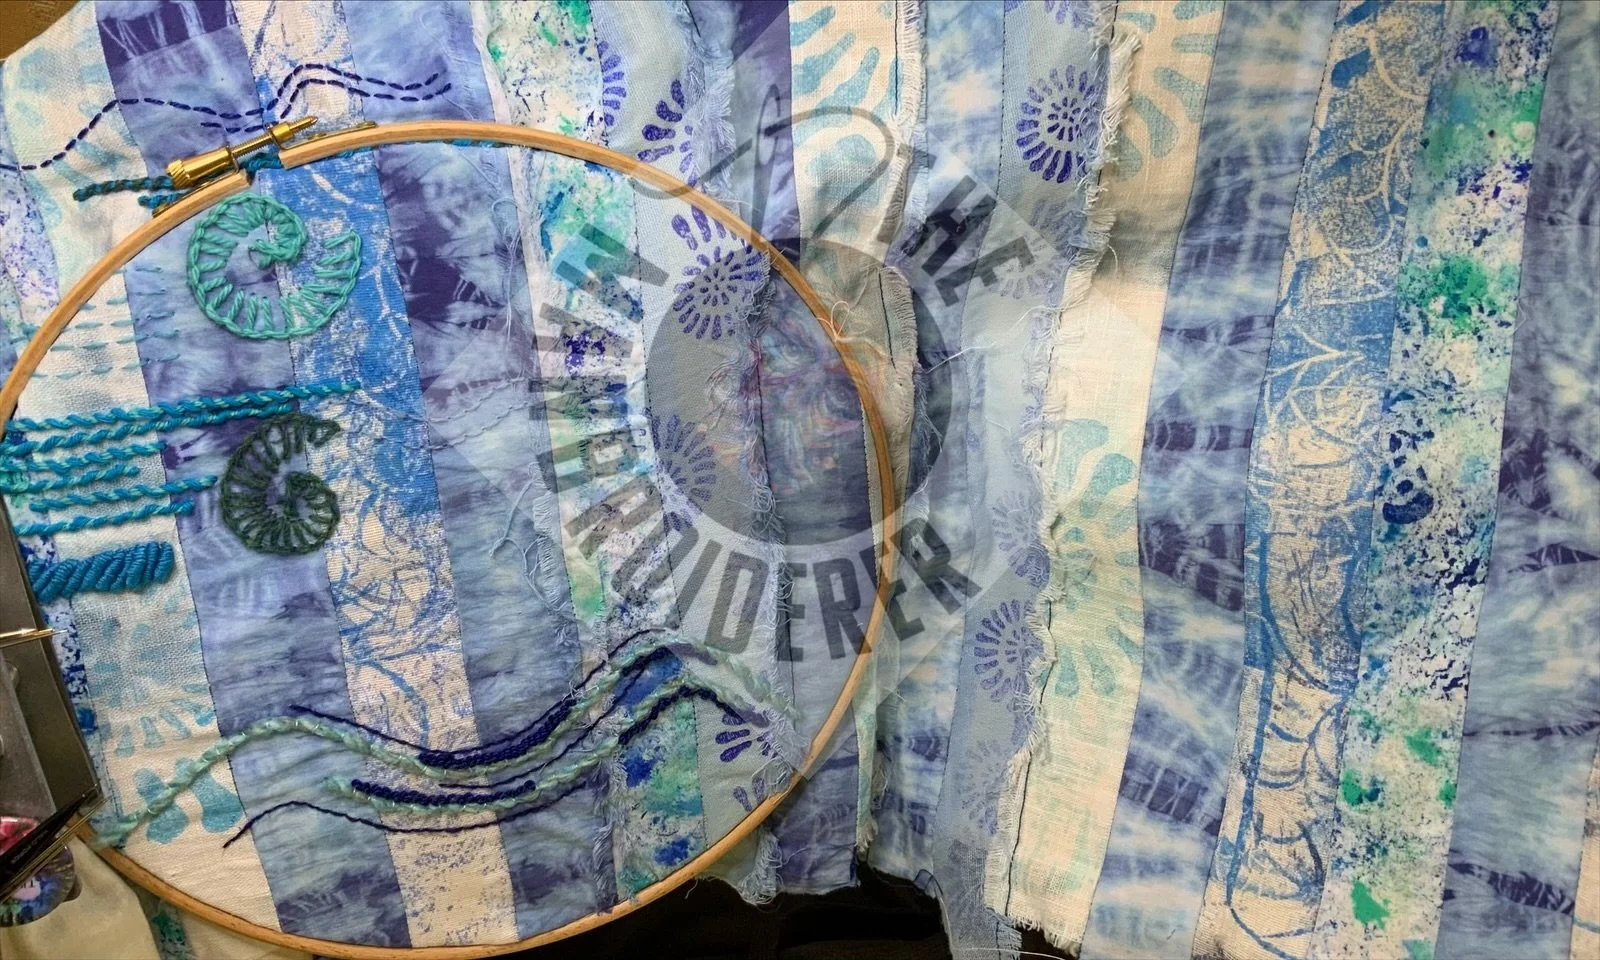

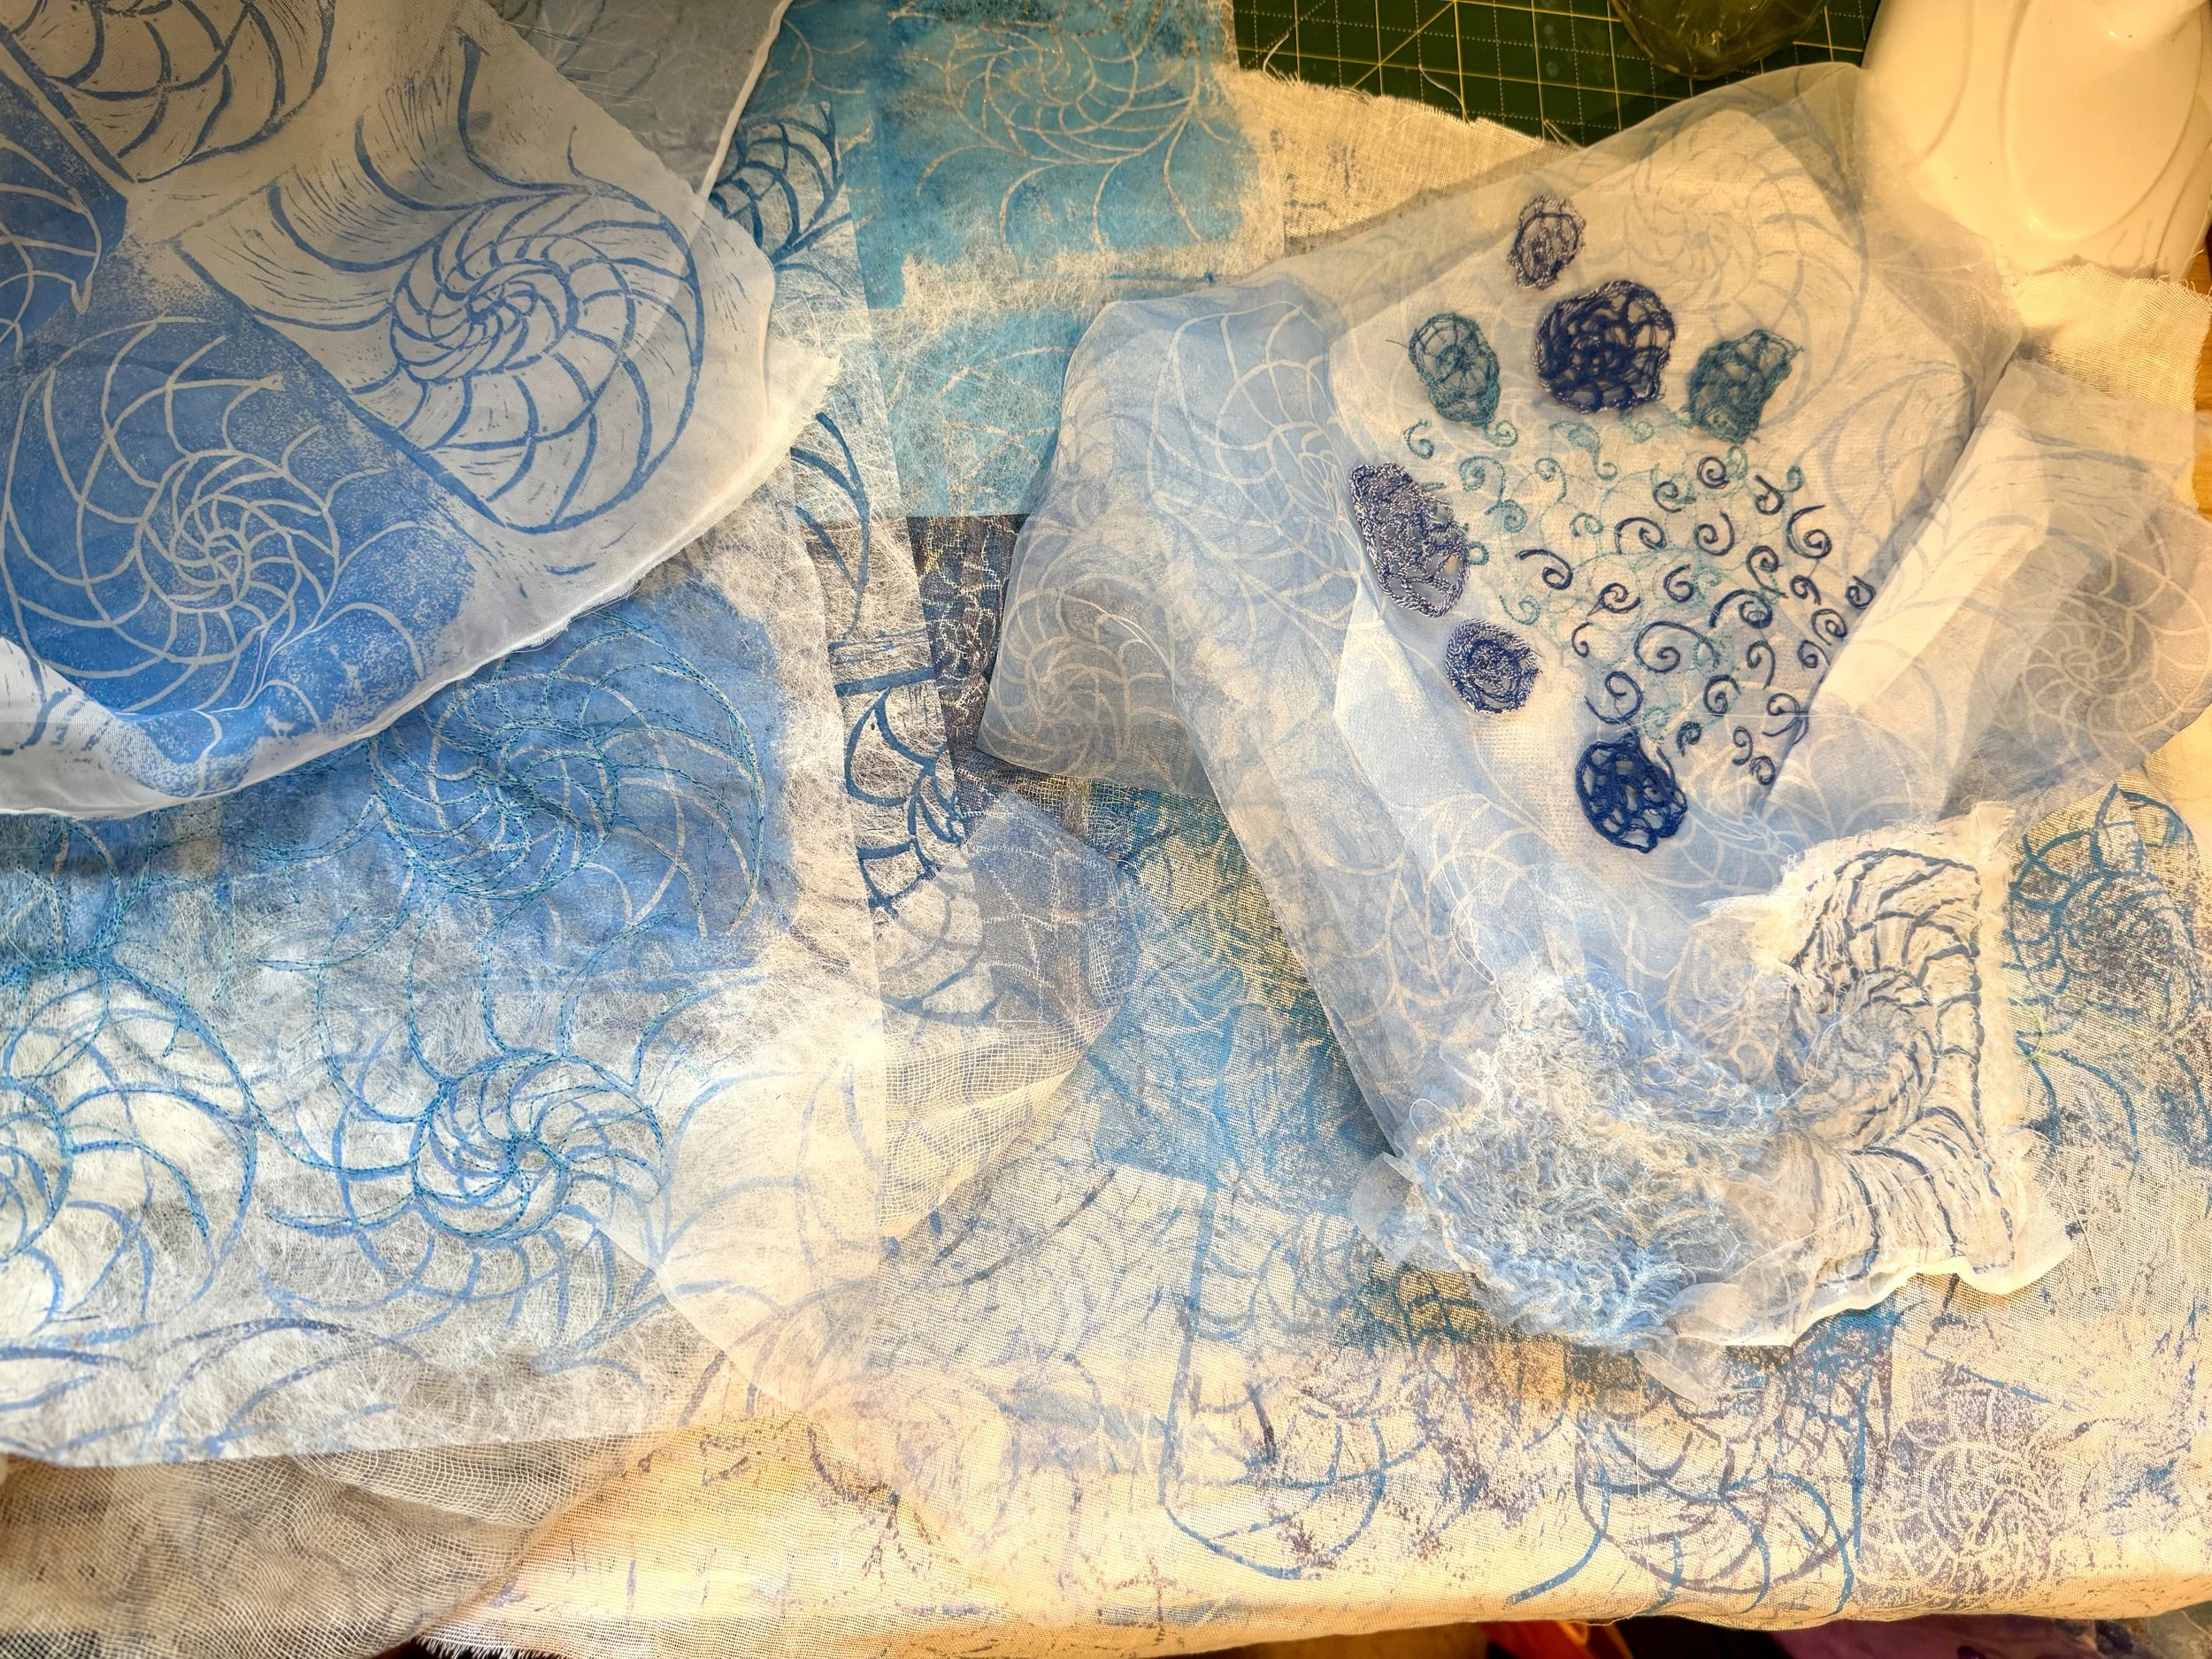


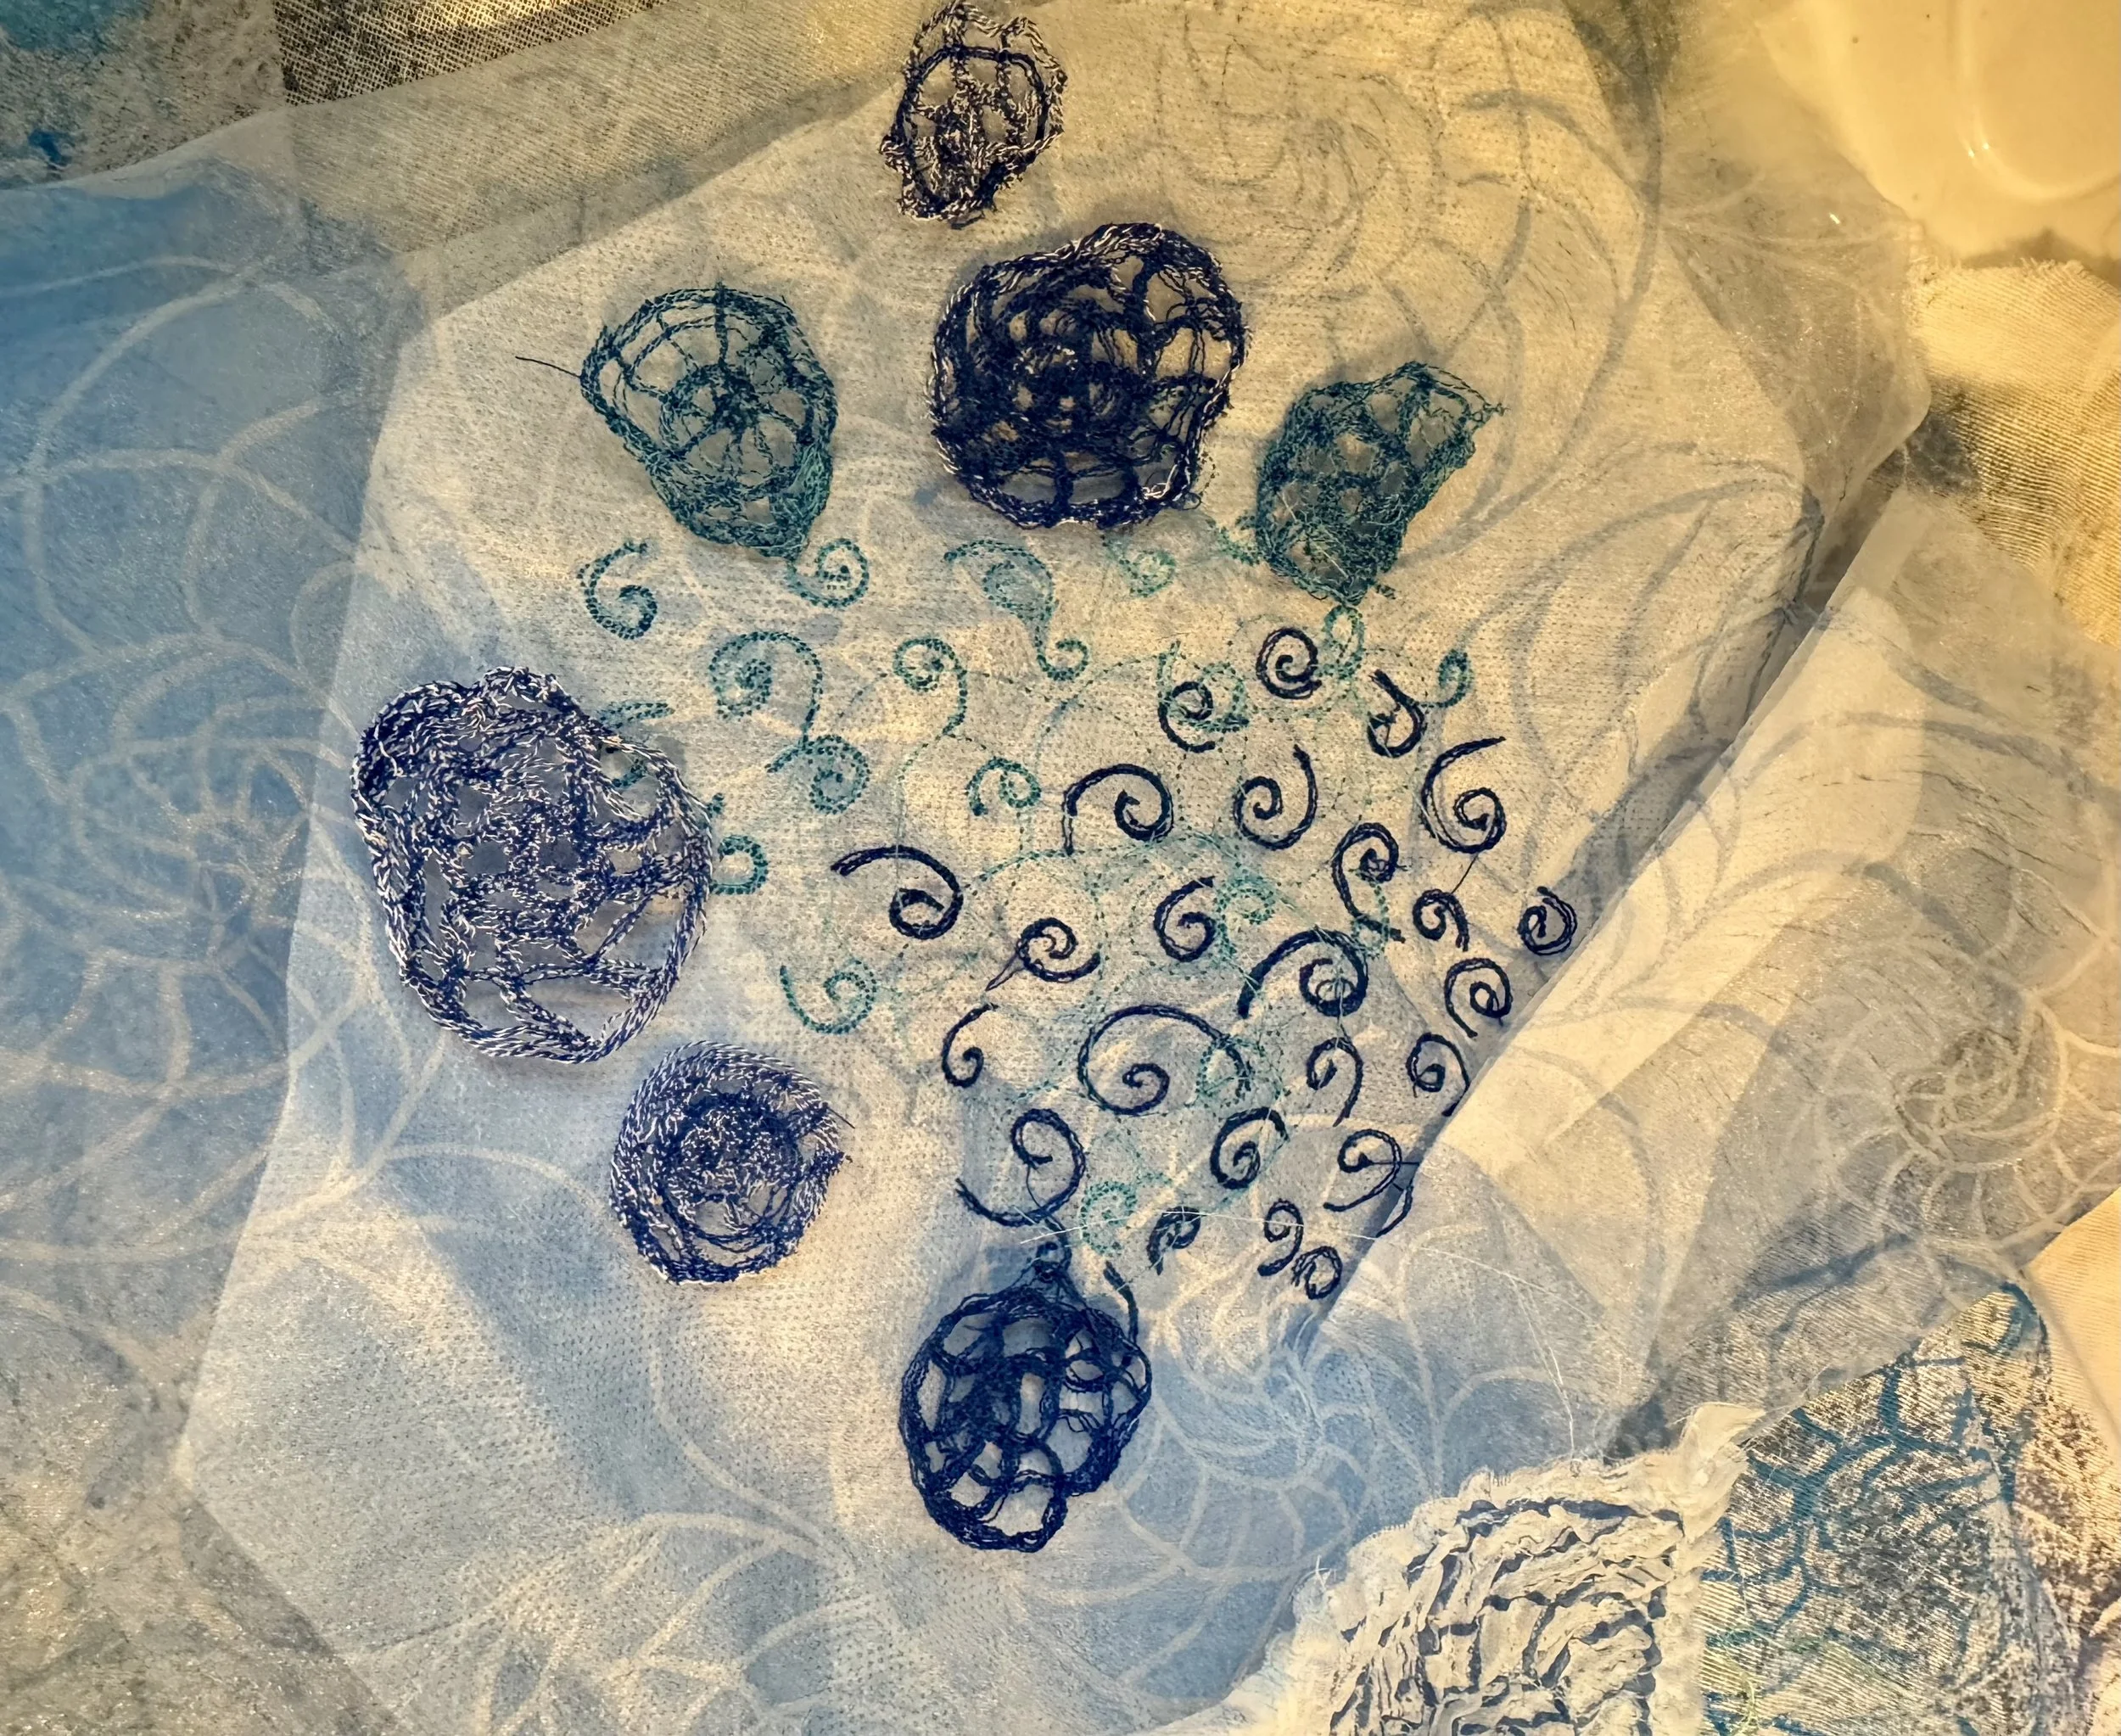
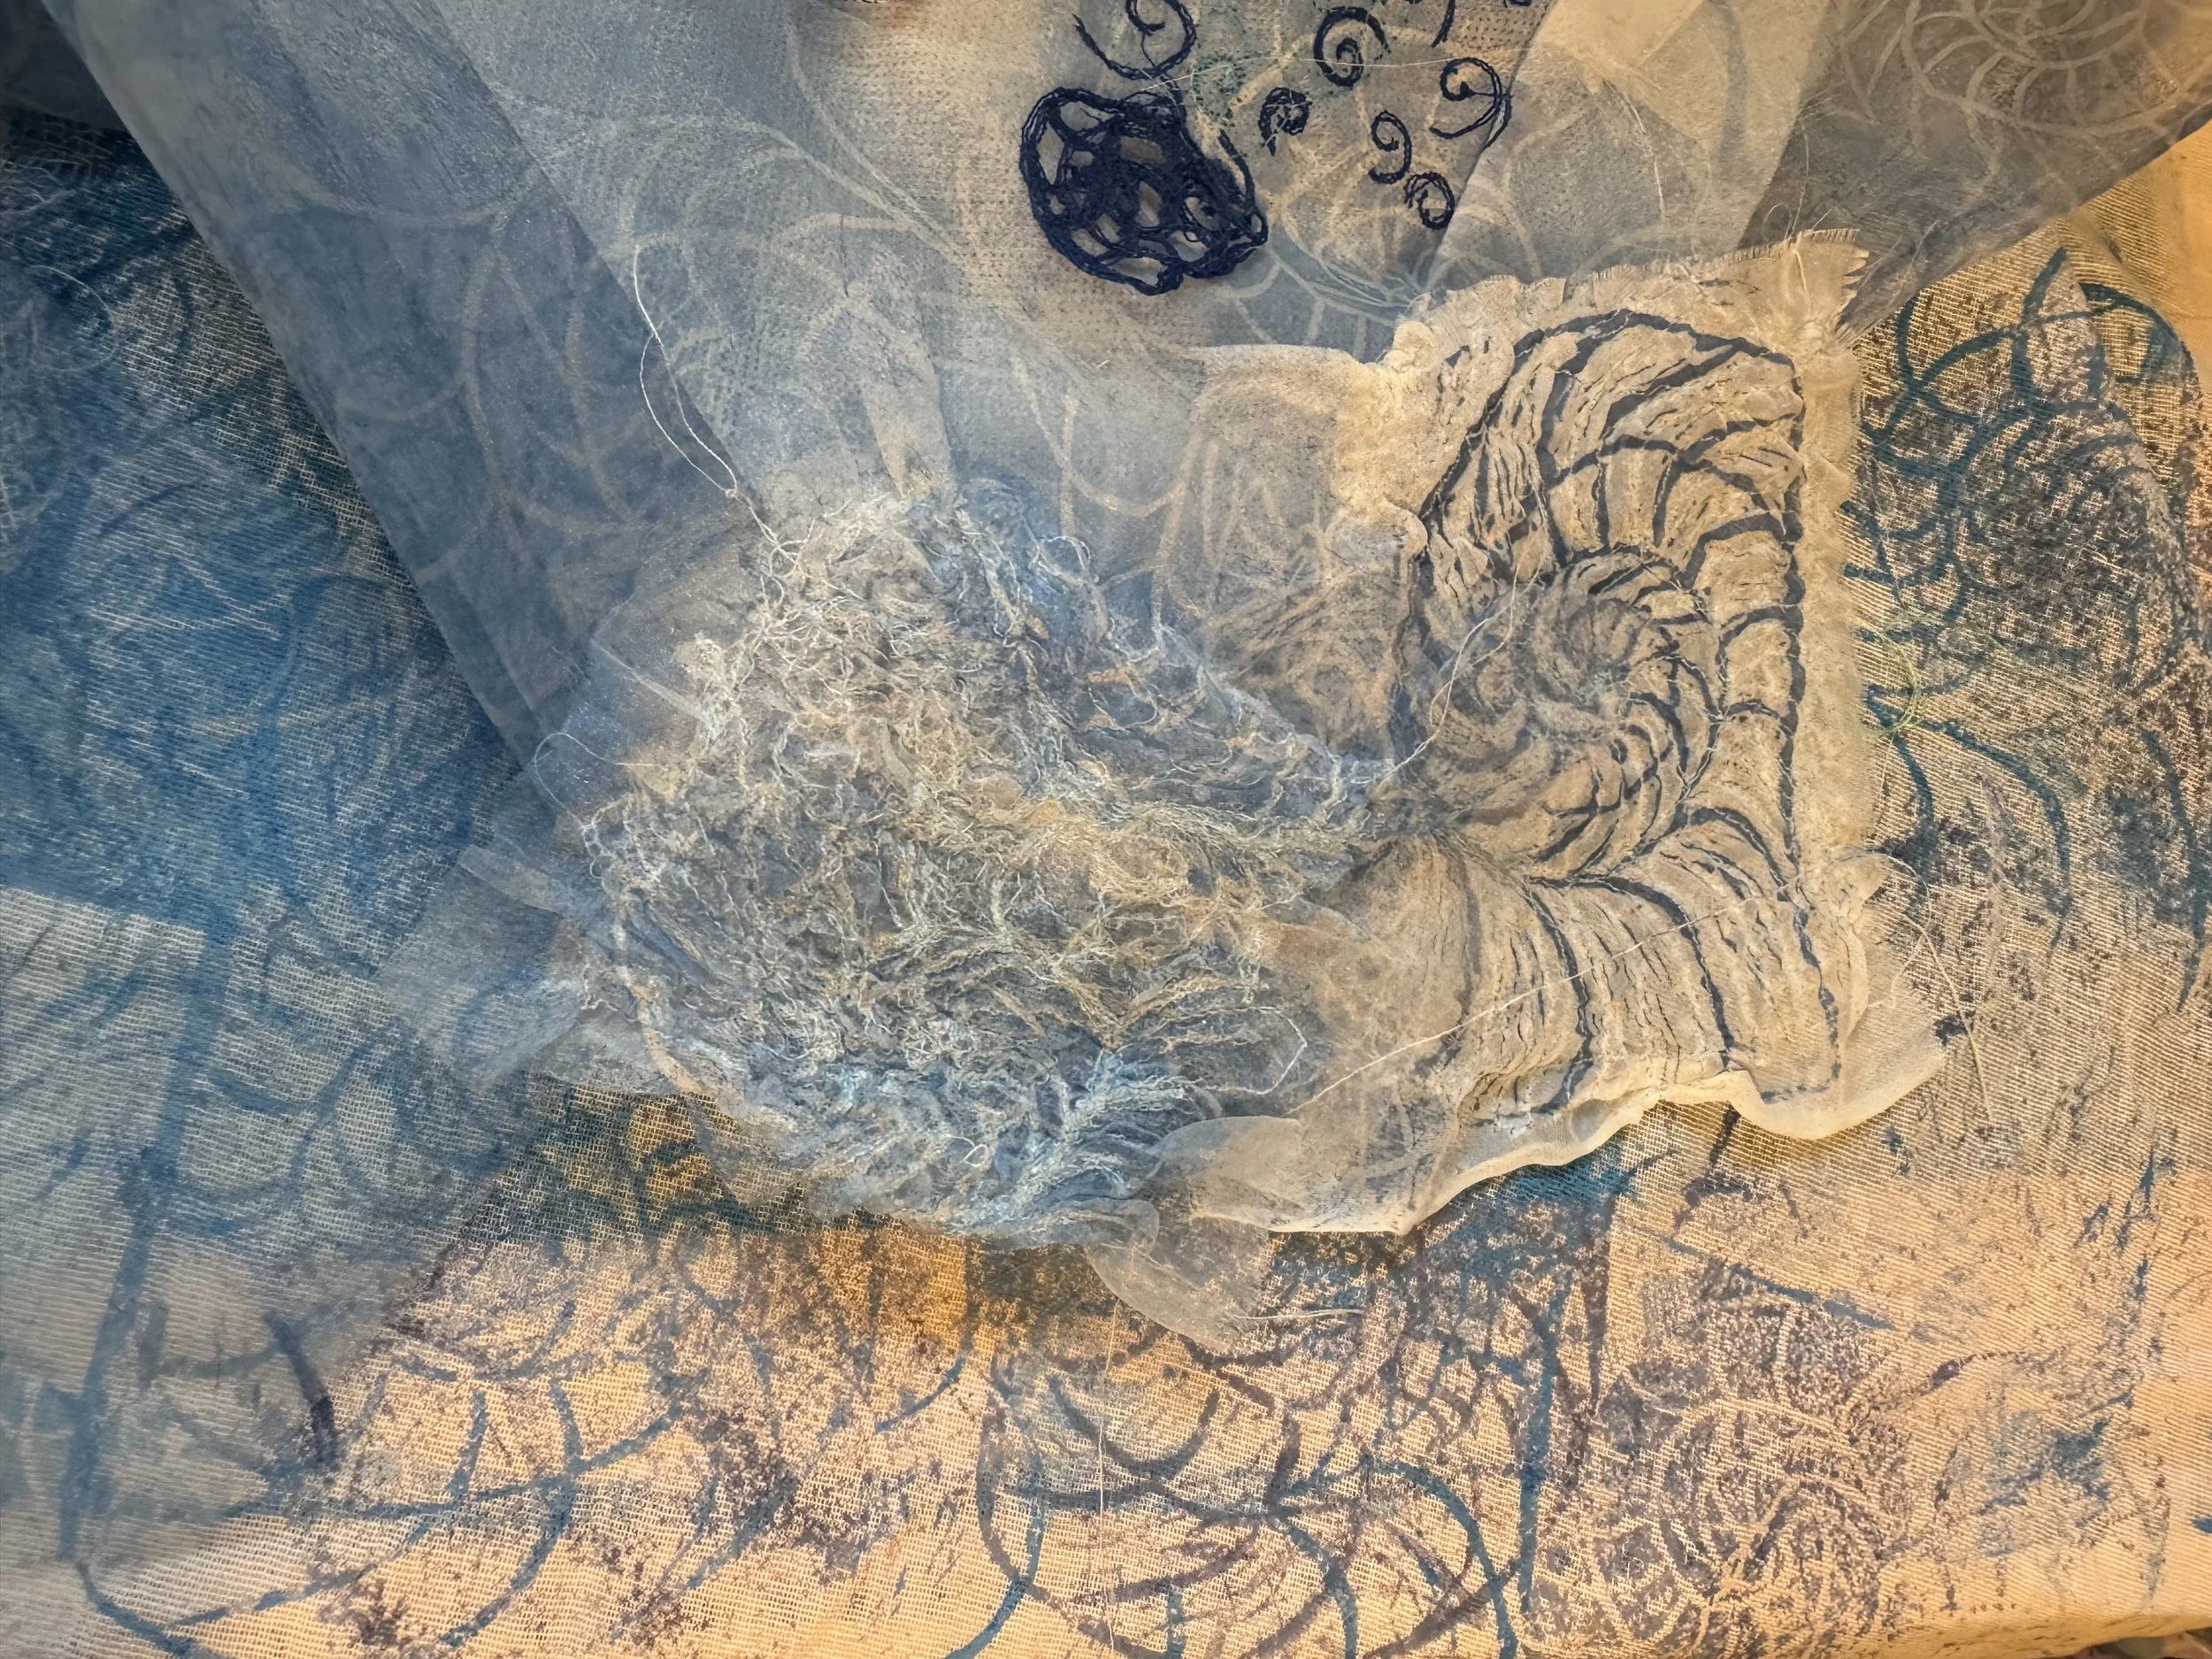

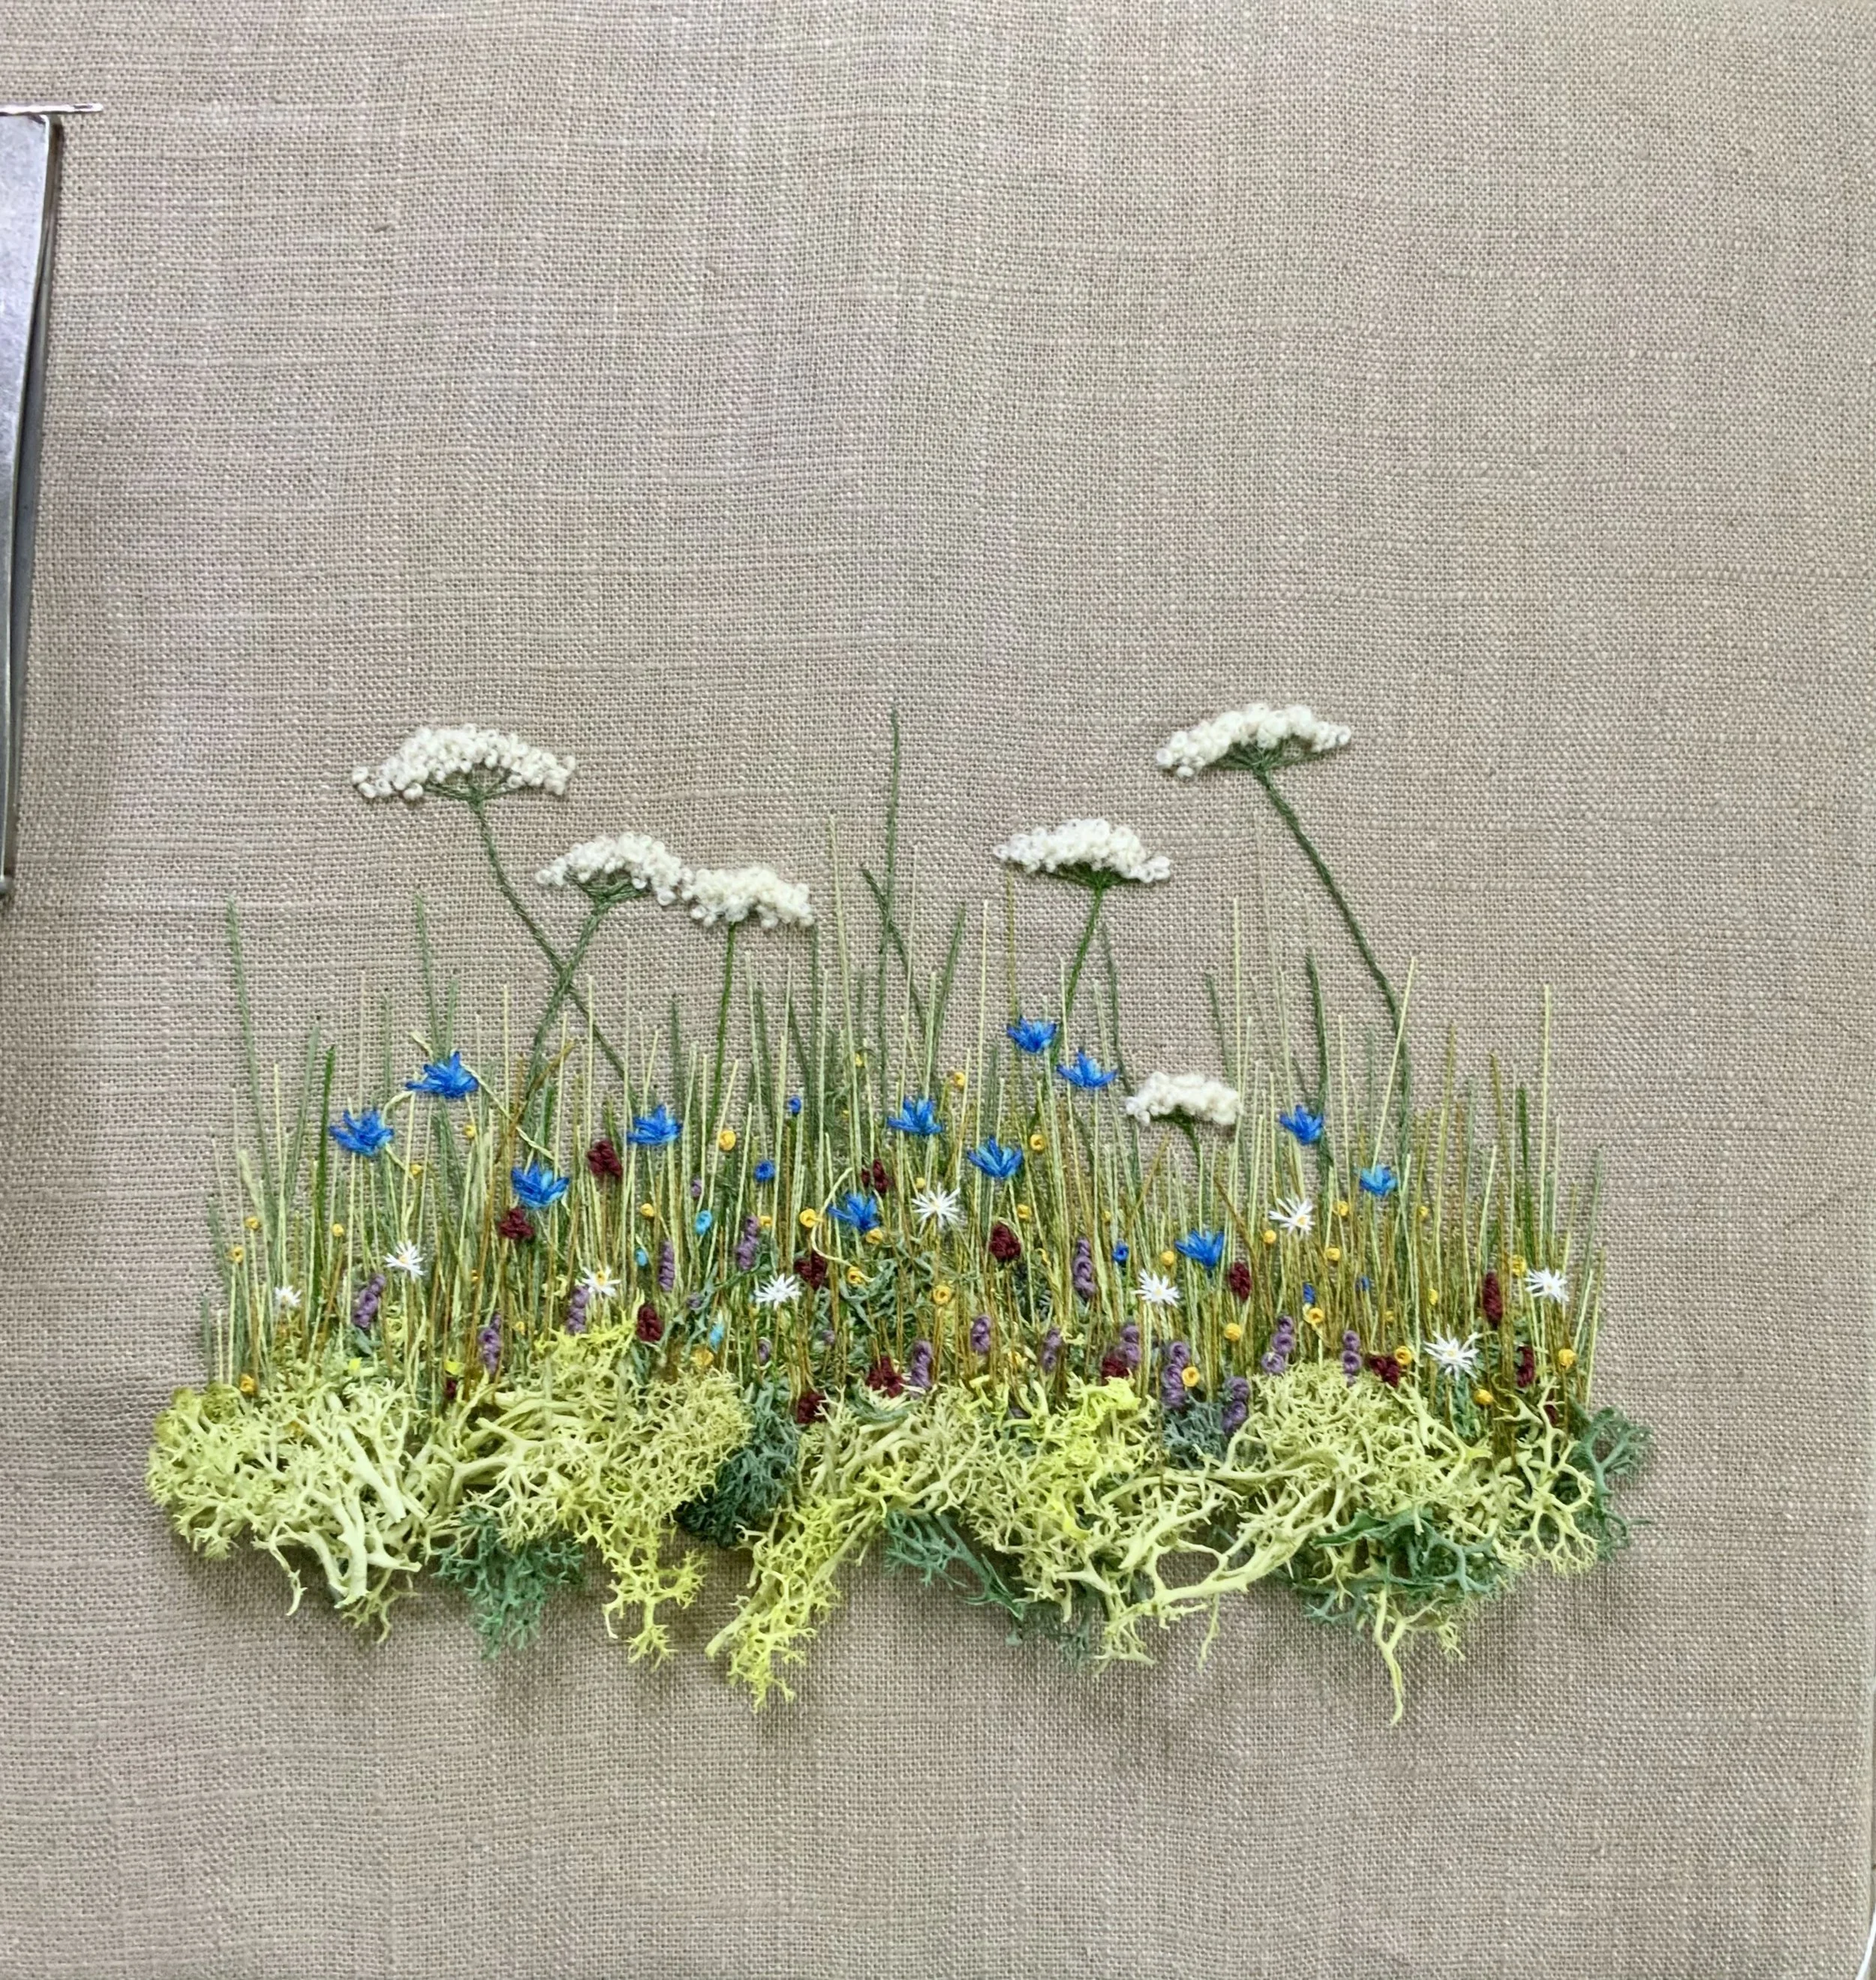
Last year, I made the decision to enrol in the Explorations in Textiles course at Littleheath Barn Studios, and I am immensely grateful for this opportunity. My primary objective was to experiment with novel techniques and explore colour in a manner that had not been previously encountered.
The course has provided me with the autonomy to employ colour with boldness and confidence. Although I am mostly self taught, I have attended numerous art workshops, primarily focused on sketching, which had not adequately addressed colour theory.
The second compelling reason for my participation in this course was to gain insights from Liske, the tutor, into various methods of colouring fabric and to consider fabrics as integral components of mixed media. Through a combination of paint, print, dyeing, fabric manipulation, and sketching, I have acquired a wealth of knowledge that has profoundly influenced my artistic endeavours.

Commission Unique Handcrafted Art with Butterflies
Commissions open for Unique handcrafted Embroidery artwork


I decided to try this piece after thinking how it could be done, after my woodland piece I wondered how I could take it a step further.
I’d bought the glass dome and for a long time I kept thinking what I could do with it, as well as how I’d put together the finished article. I purchased some natural wood coasters for the base to give an organic feel, it was then a case of creating a mossy scene using wool felt and appletons crewel wool to create several hundred French knots to keep with the organic theme. Topped this whole piece off with a real tortoishell butterfly.
my books are now open for commissions on these, please feel free to message me at tony@themanbroiderer.co.uk for more information and prices.
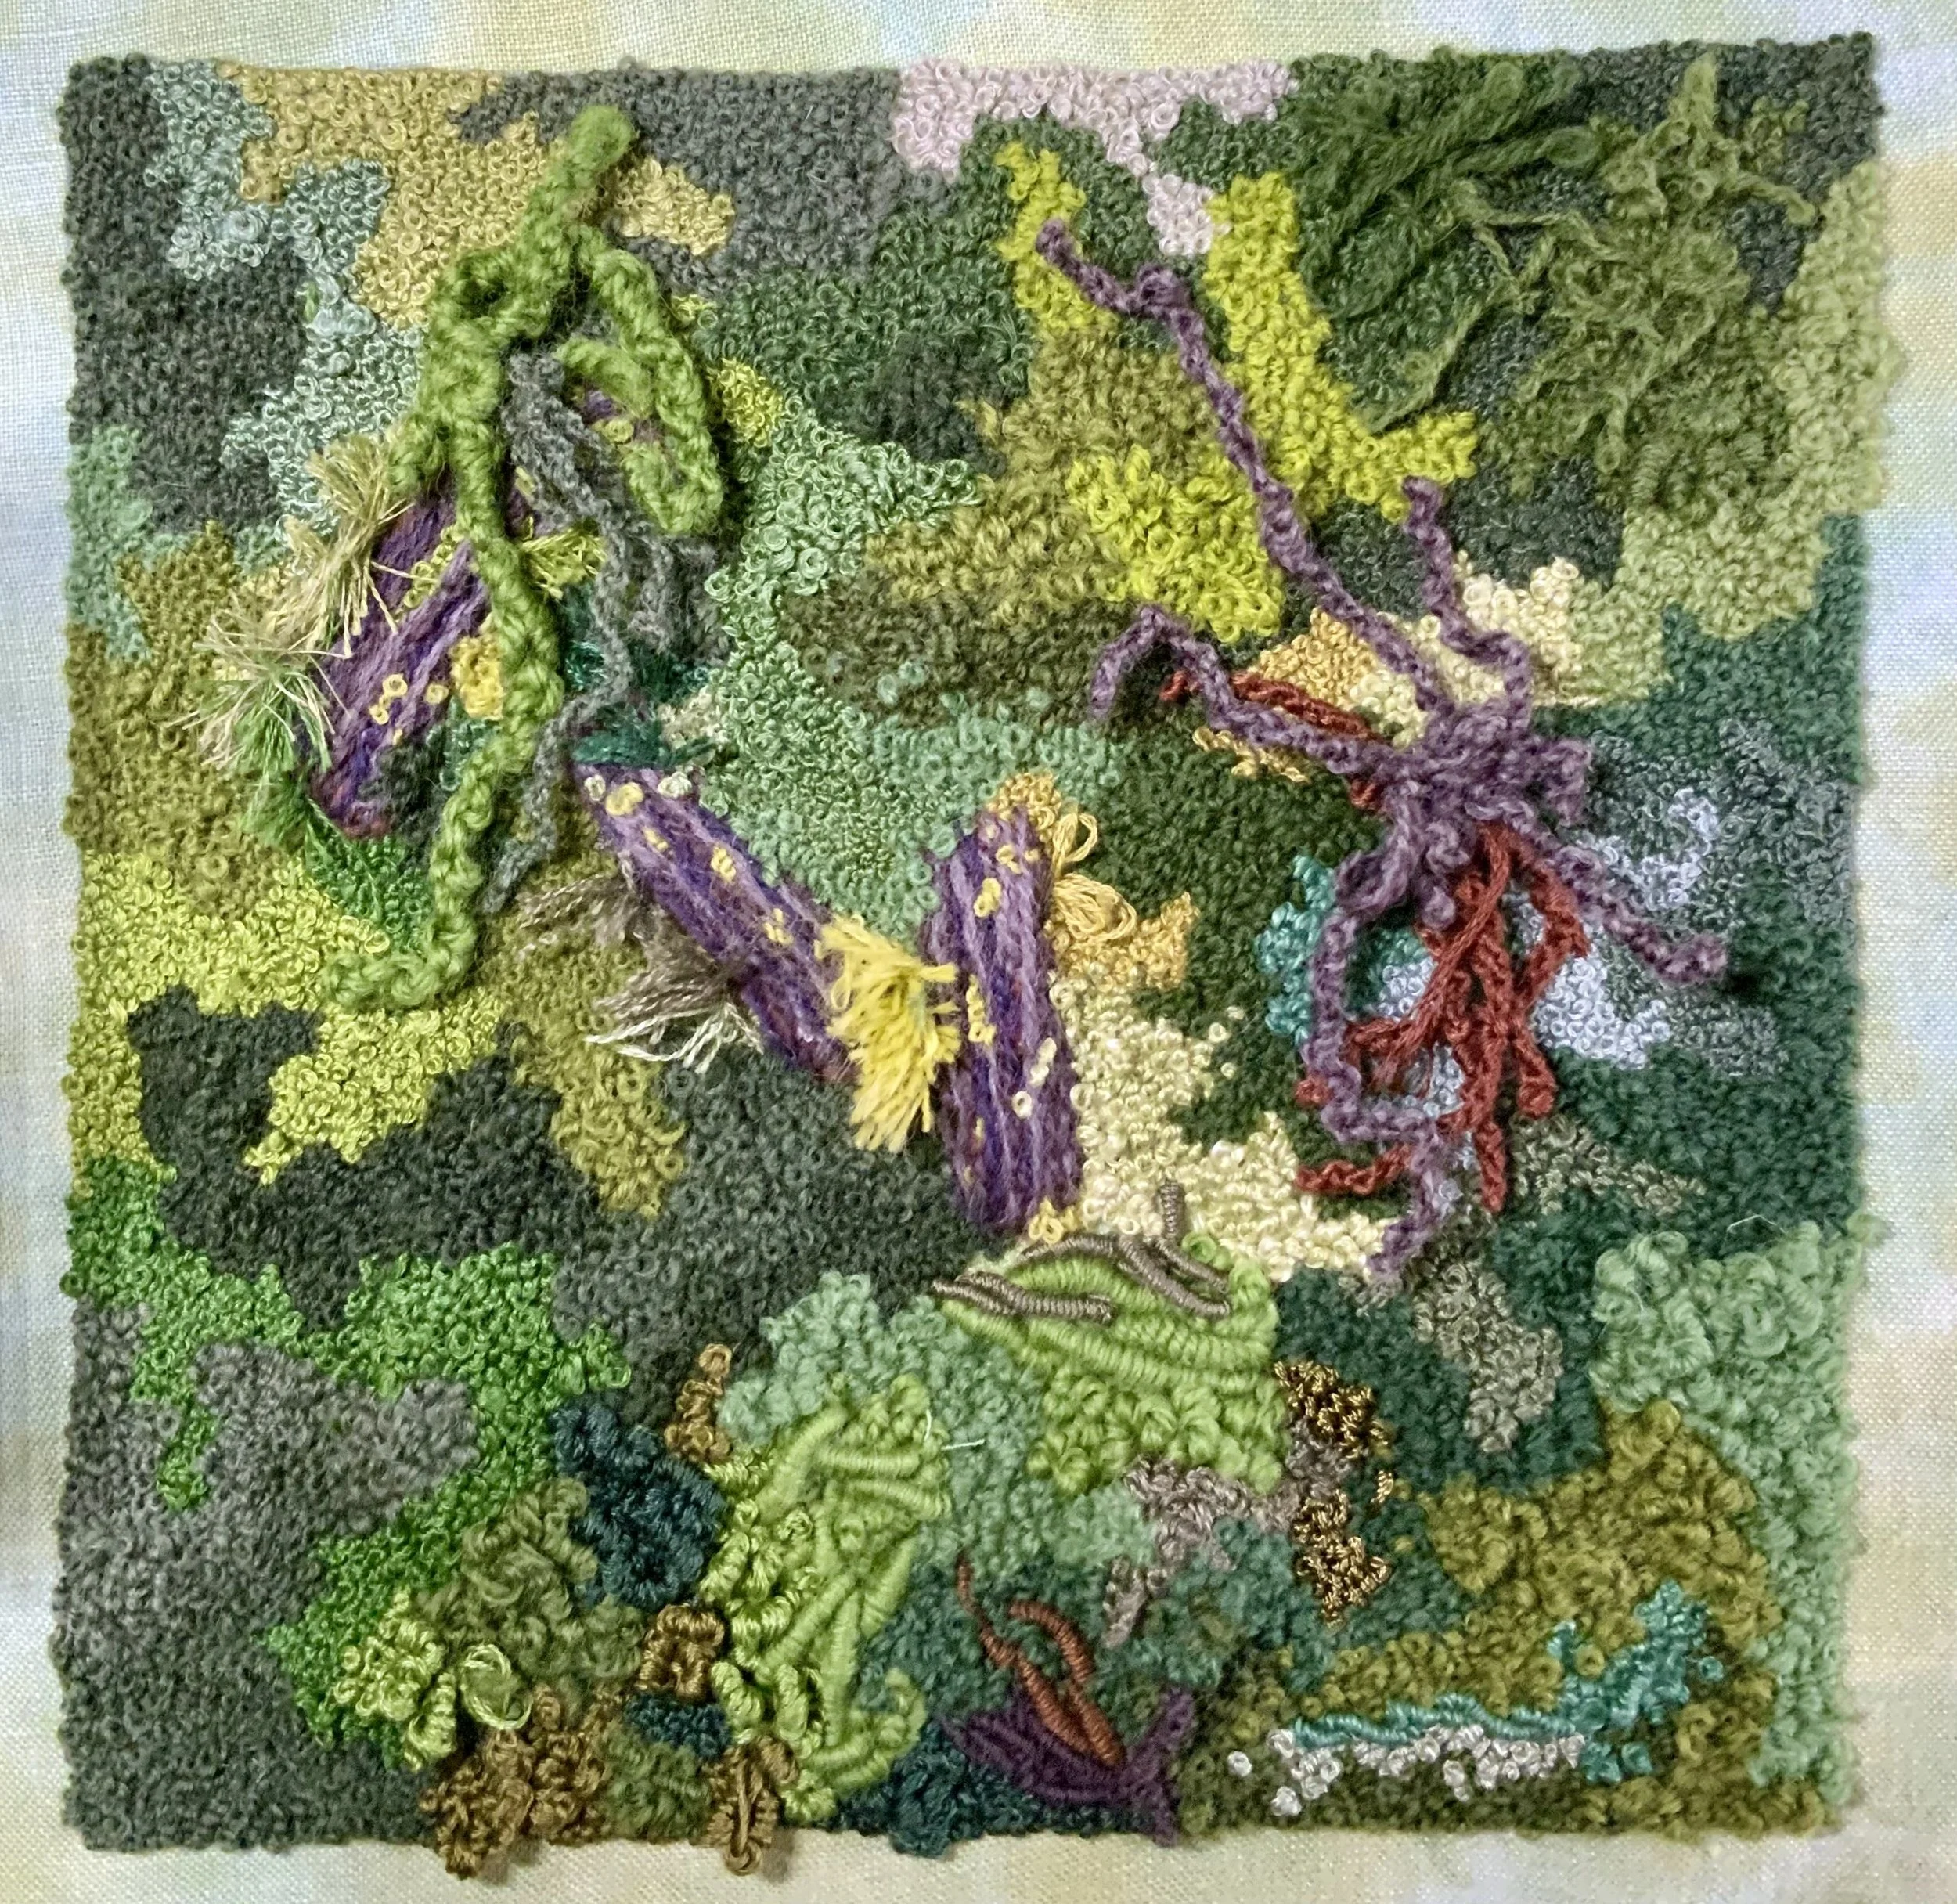
Create Stunning Woodland Embroidery with French Knots
How to create a woodland scene using French knots in hand embroidery
irst had the idea to create a woodland floor after creating my earlier piece called Earth. Along the same principle of Earth, woodland uses thousands of French knots.
With woodland, however I had decided that plant and tree roots were needed to give the impression that it wasn’t just grasses and moss, it needed to have a series of root systems showing. To create this I used bullion knots which twist and turn with each other to create tangles of roots.
As well as creating roots using bullion knots, I used a further technique based on the principle of a bullion knot, but made it detached from the fabric, this creates the illusion of vines or root systems that were then added to the design at the end, I think you’ll agree that this gives added interest and looks really cool.
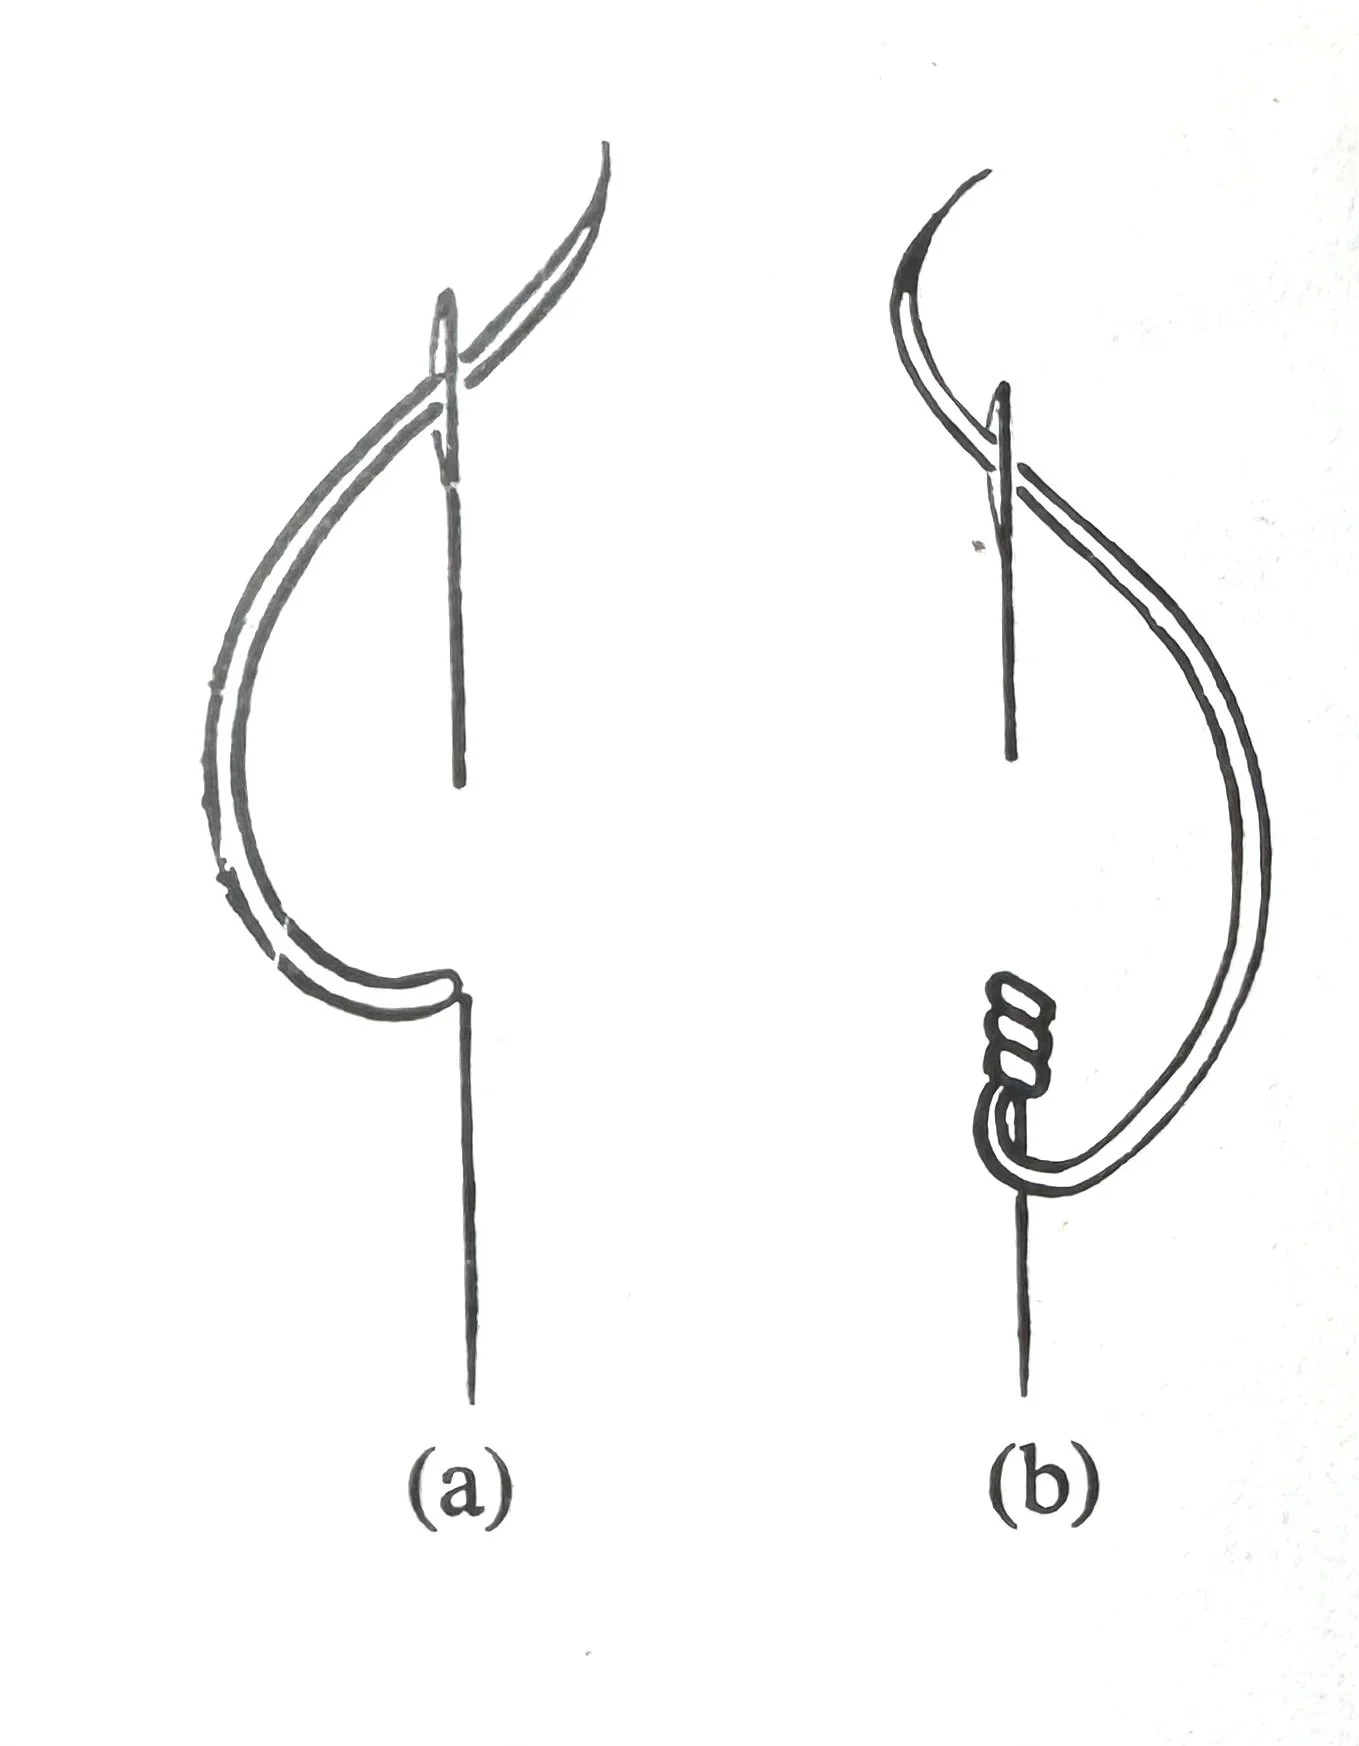
Many people shy away from French knots and find them quite intimidating, but with practice they really are simple to do and create great texture in any embroidery piece, so how are they done? Here’s a quick tutorial on how to create the perfect French knot.
Firstly, come up through the fabric at point one (see fig a) hold the thread between the thumb and index finger and wrap the thread around the needle twice. Still holding the thread, turn the point of the needle round and insert it at point 2. Pull the thread through to the back, whilst holding the thread firmly but not too tightly or it will be too tight for the thread to pass through.

Diagram of French Knots
Practice these on a scrap piece of fabric and I promise you that French knots will be part of your repertoire in no time. I would advise that you use a hoop and a stand, either a lamp stand or clamp stand so you have both hands free to work the stitches.
Bullion knots are a little trickier to do, but again with patience, practice and knowledge you can master them, I would suggest that you look at some YouTube videos for assistance, but I’ll try to explain here as best I can.
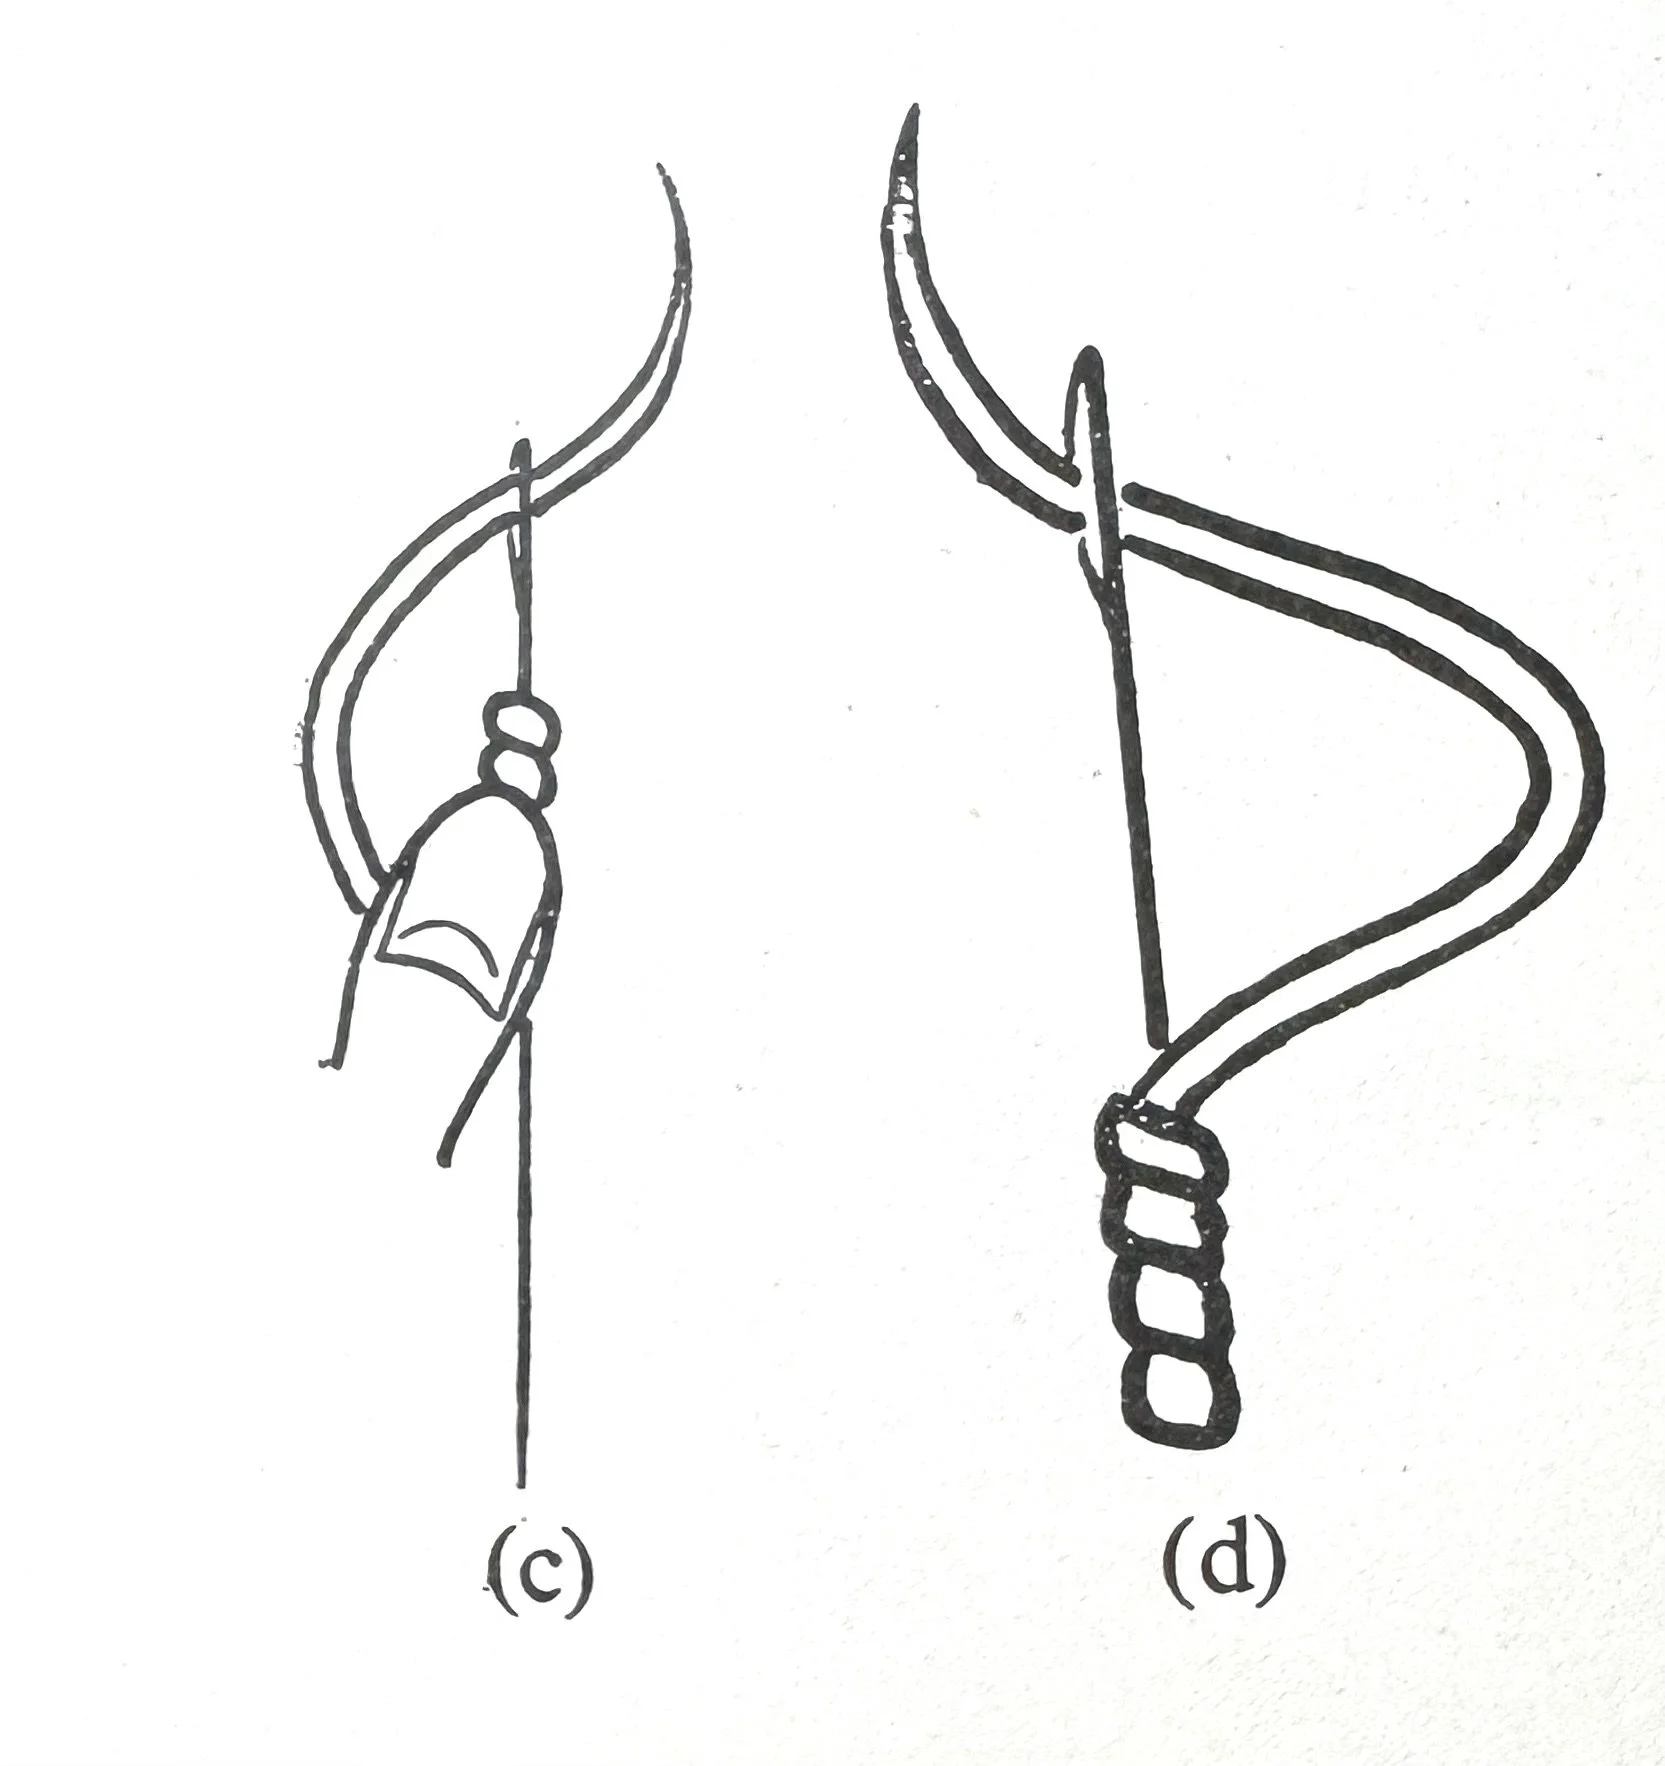
Using a needle with as small an eye that is possible for the thread being used, for DMC stranded cotton I use an embroidery needle size 7, you need the thread to pass easily through the twists. Pull the thread through to the right side of the fabric and take a back stitch emerging at point (a). Twist the thread over the needle as many times as you need to cover the space of the back stitch you’ve made (b).
Put your thumb on the twisted thread and pull the needle right through the twists (c). Insert the needle at the other end of the back stitch (d) to tie down the twists and make one bullion stitch.
Sarah Homfray has some brilliant videos demonstrating embroidery stitches, here’s a link to her video showing bullion knots https://www.youtube.com/watch?v=0veAN4O0tcI&t=3s

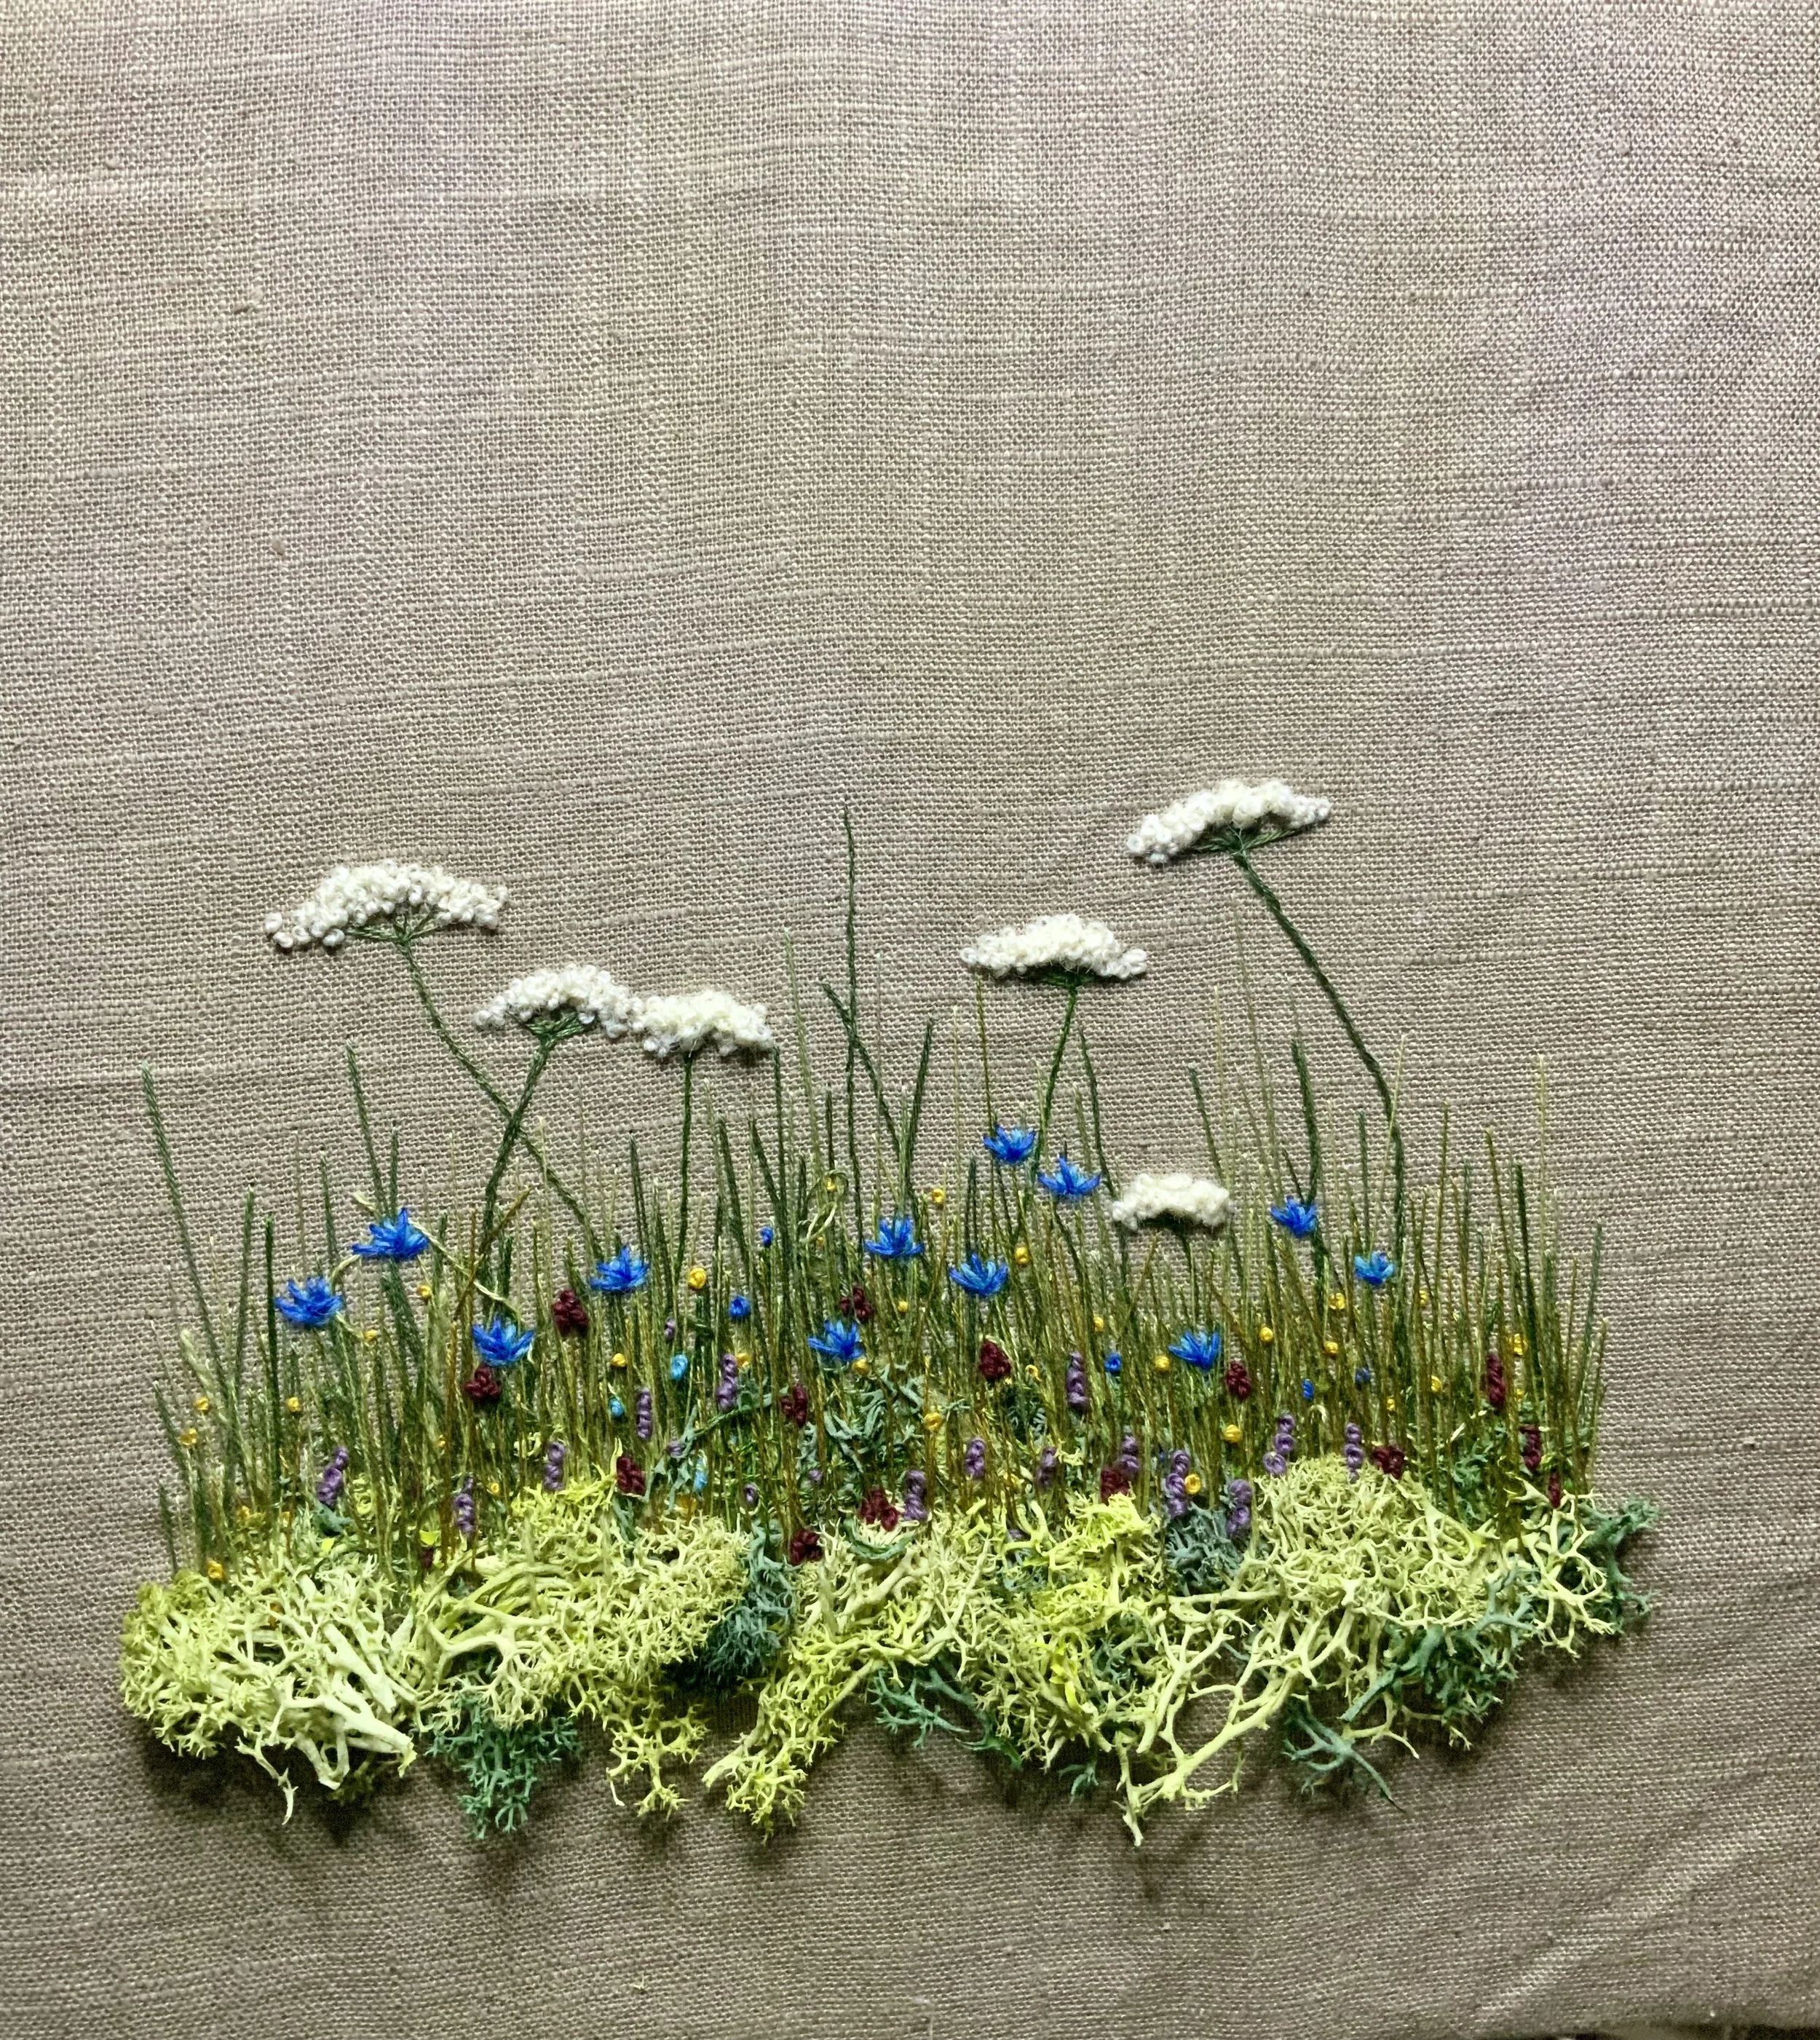
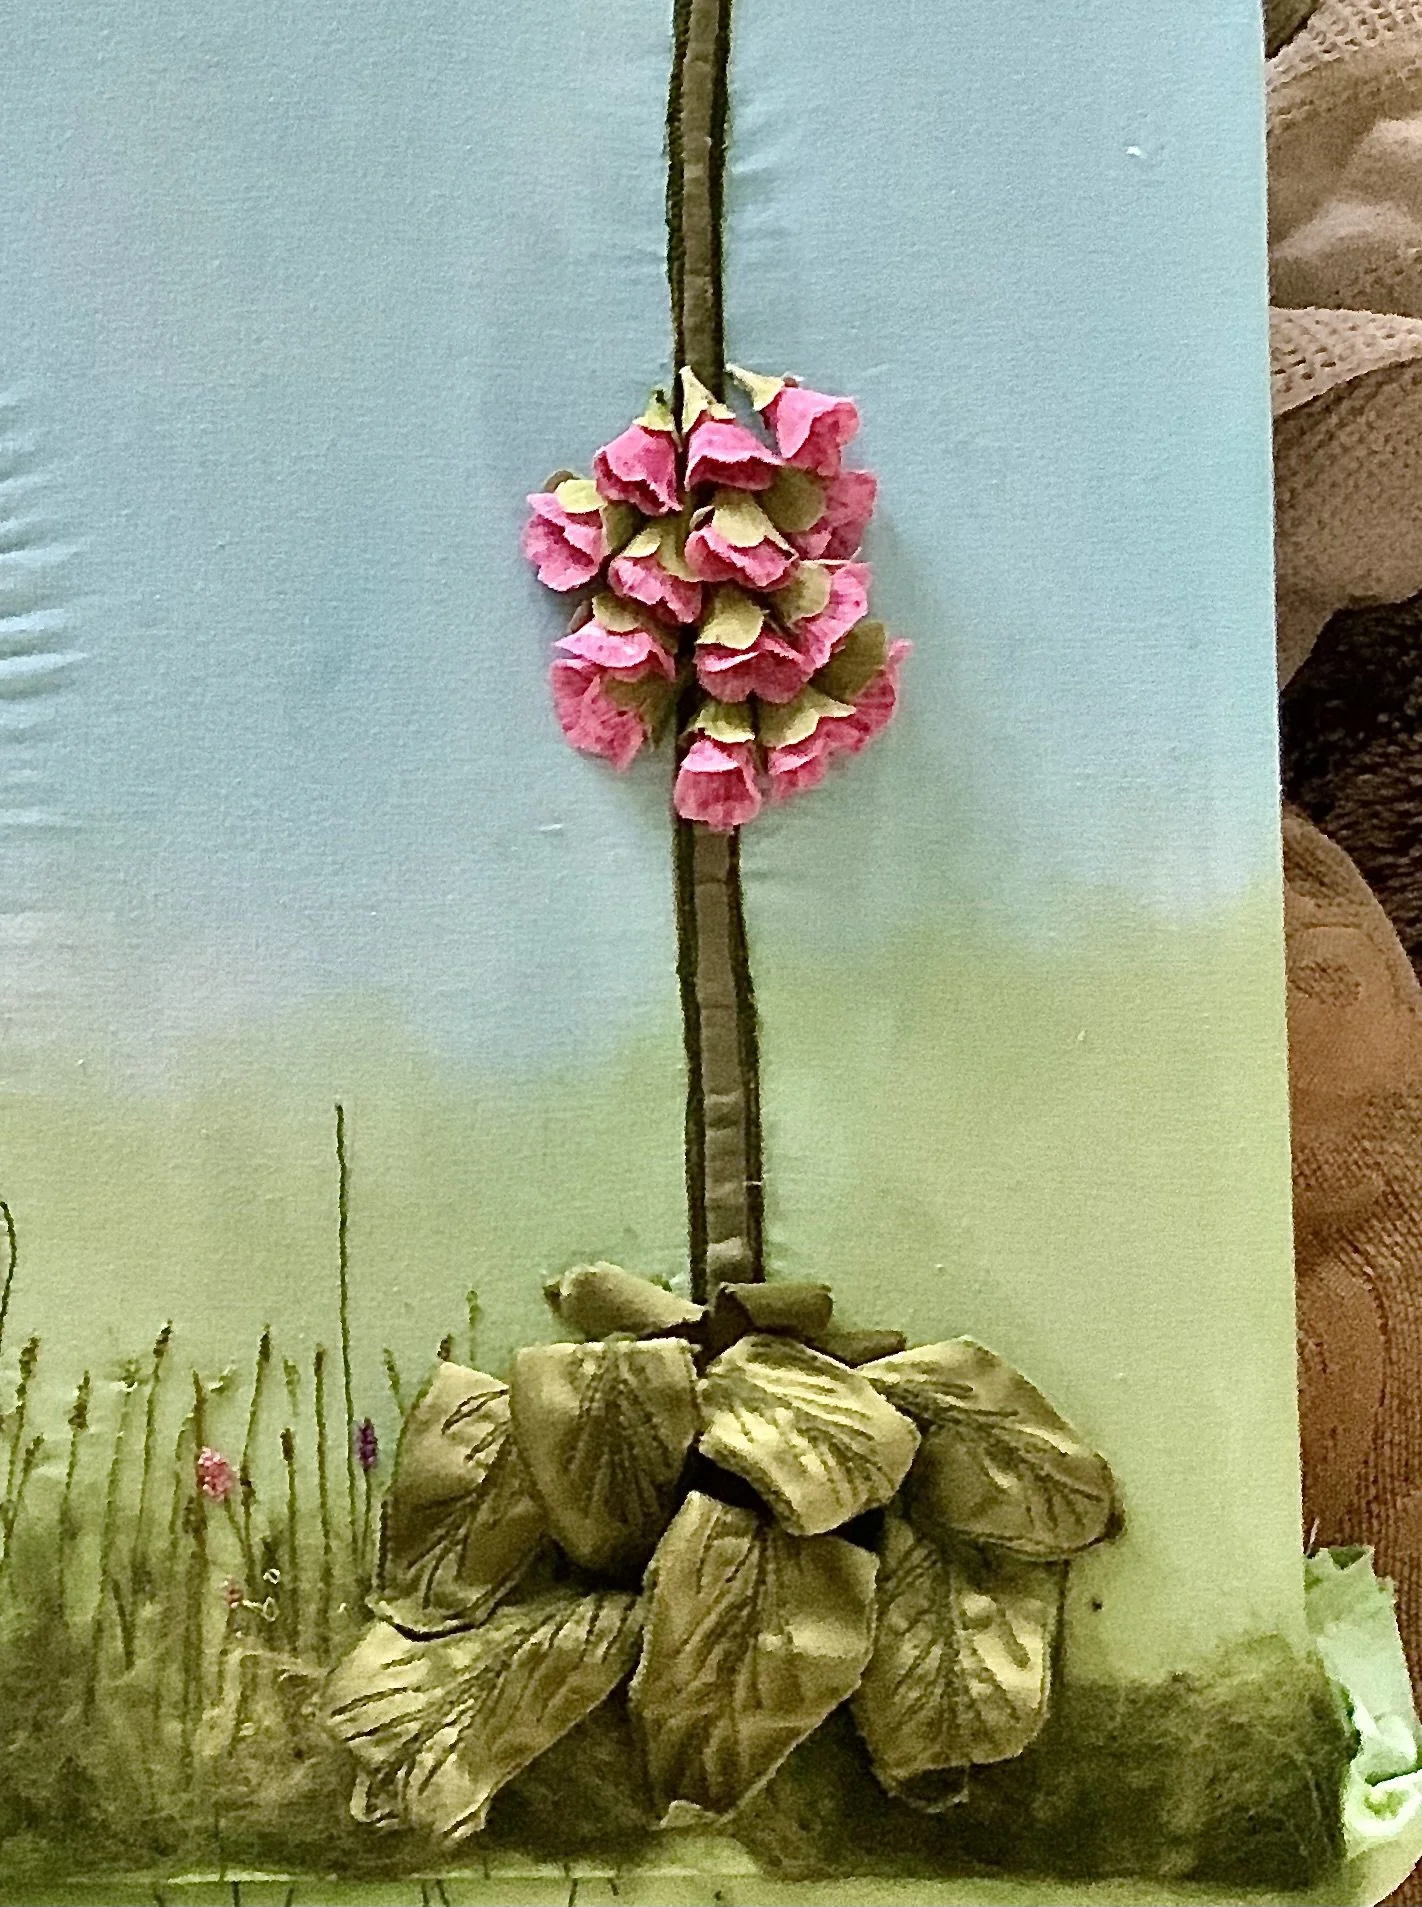
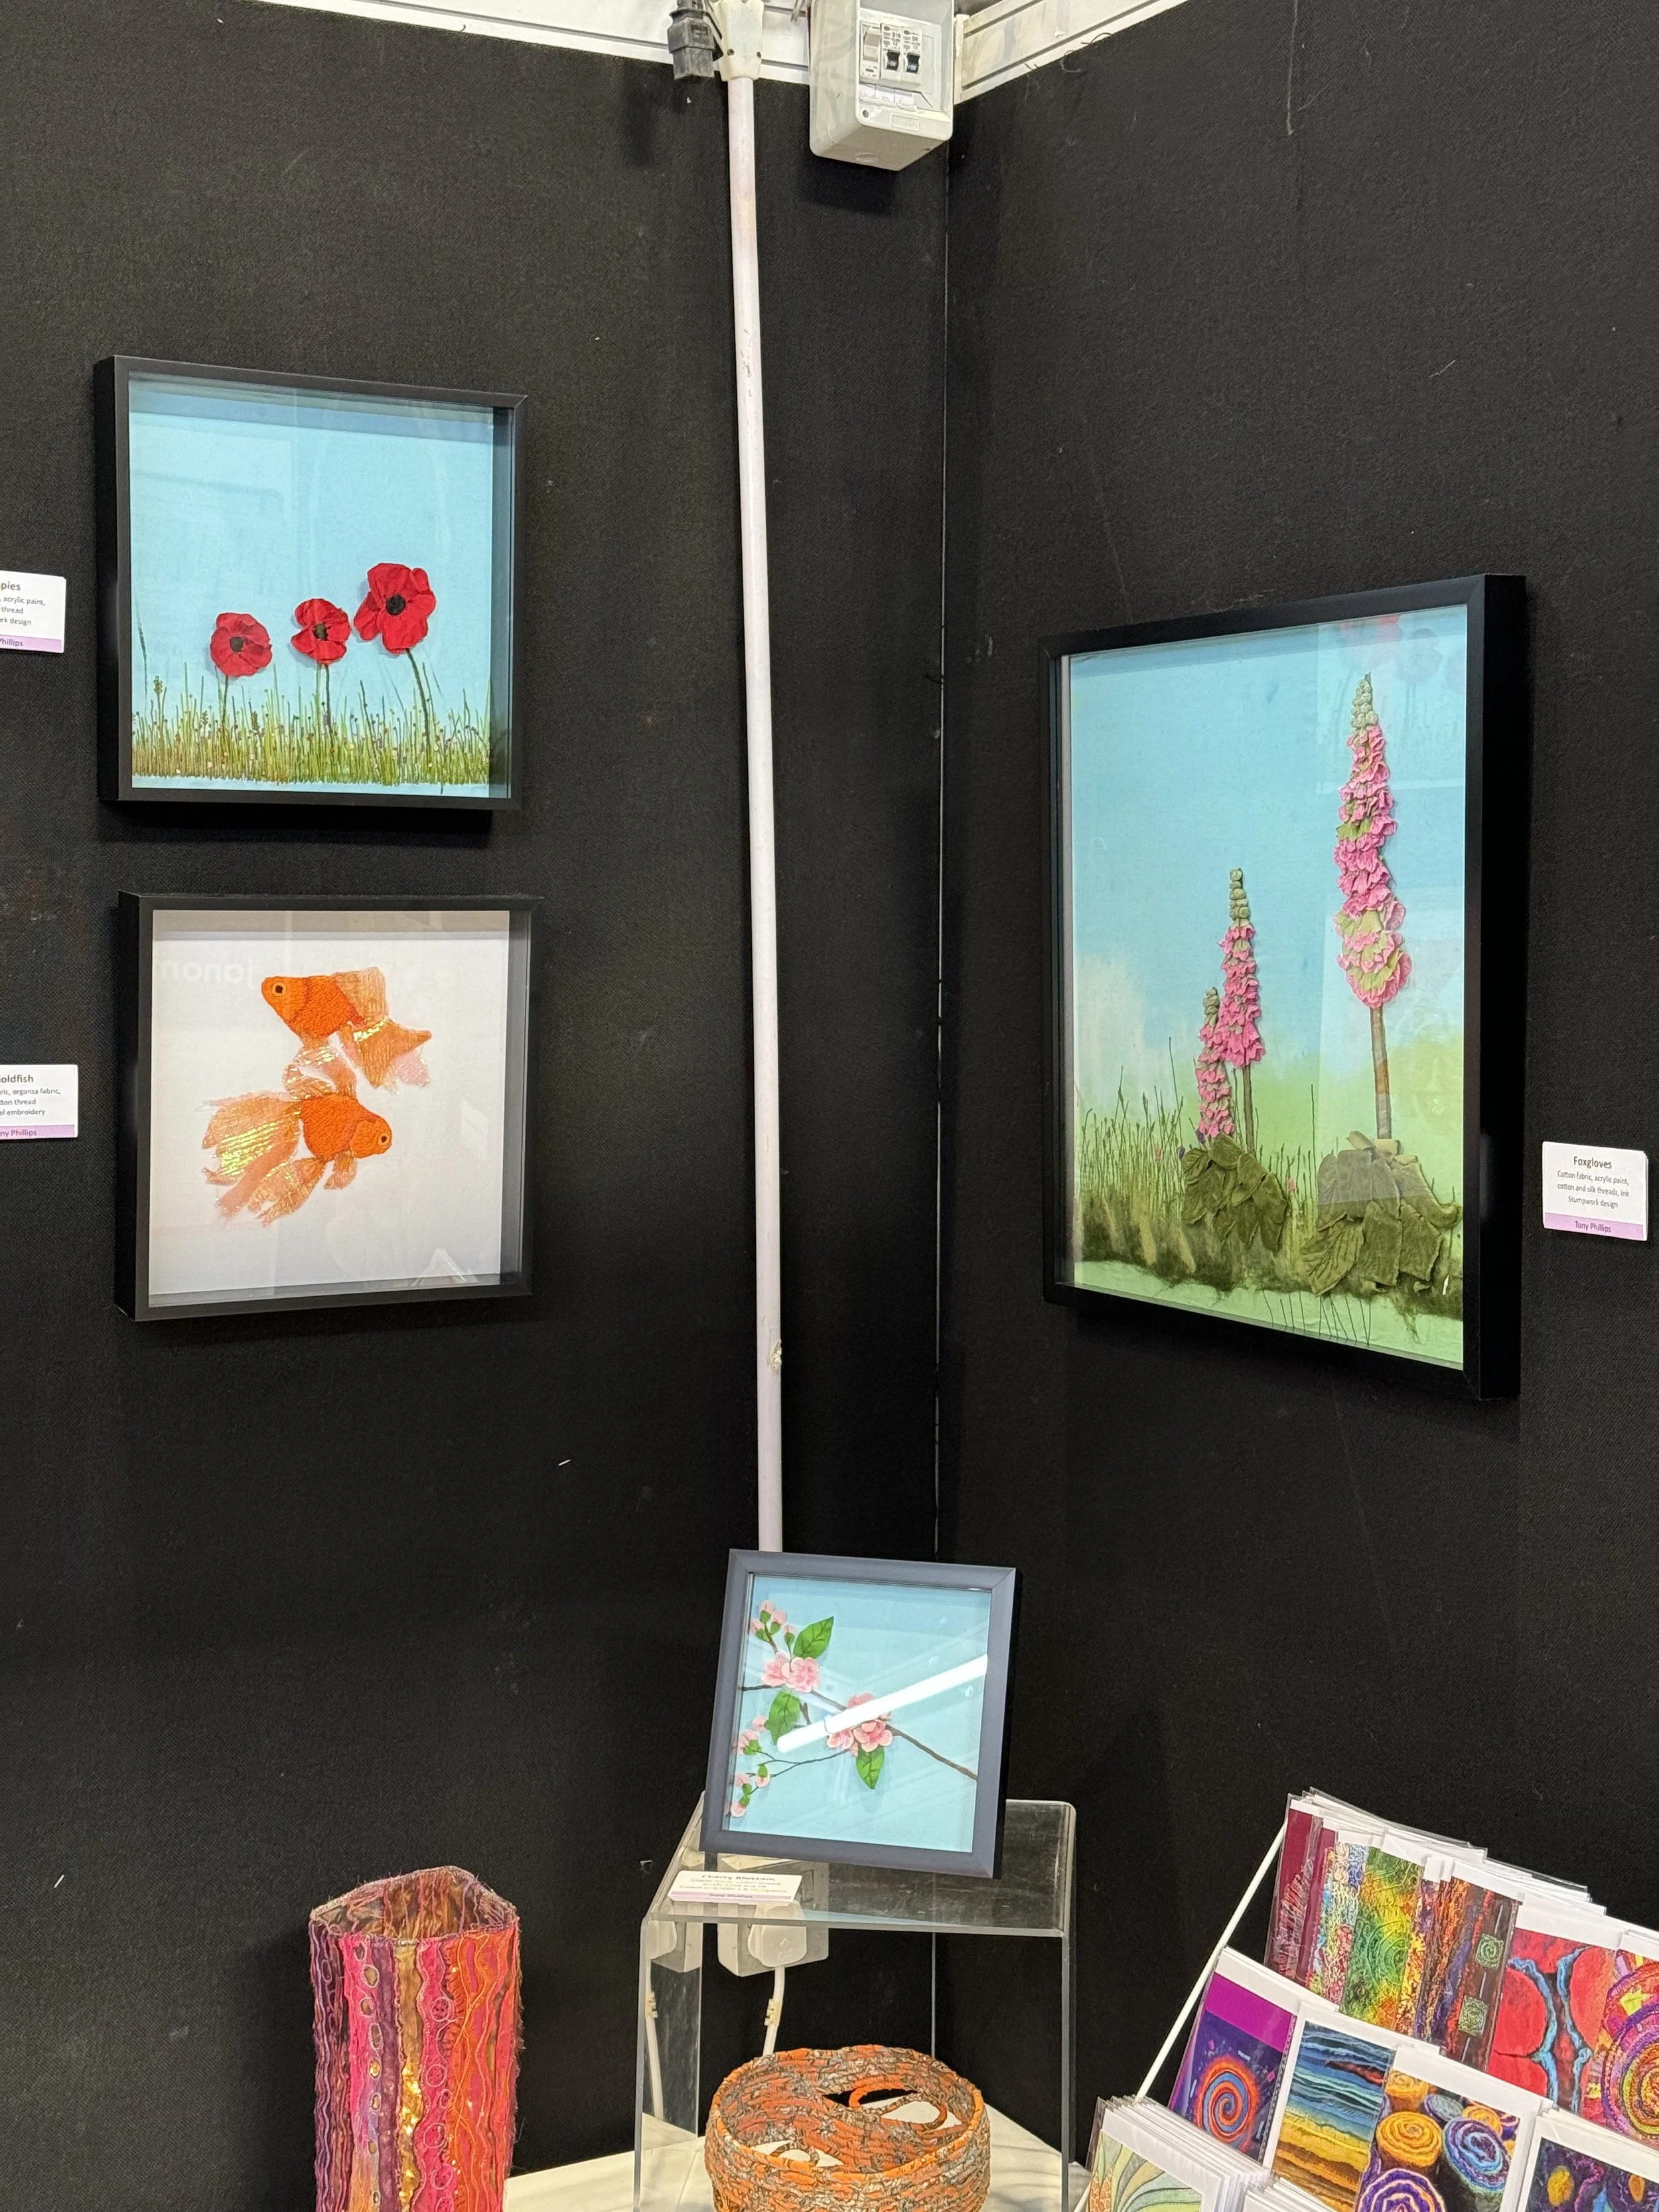
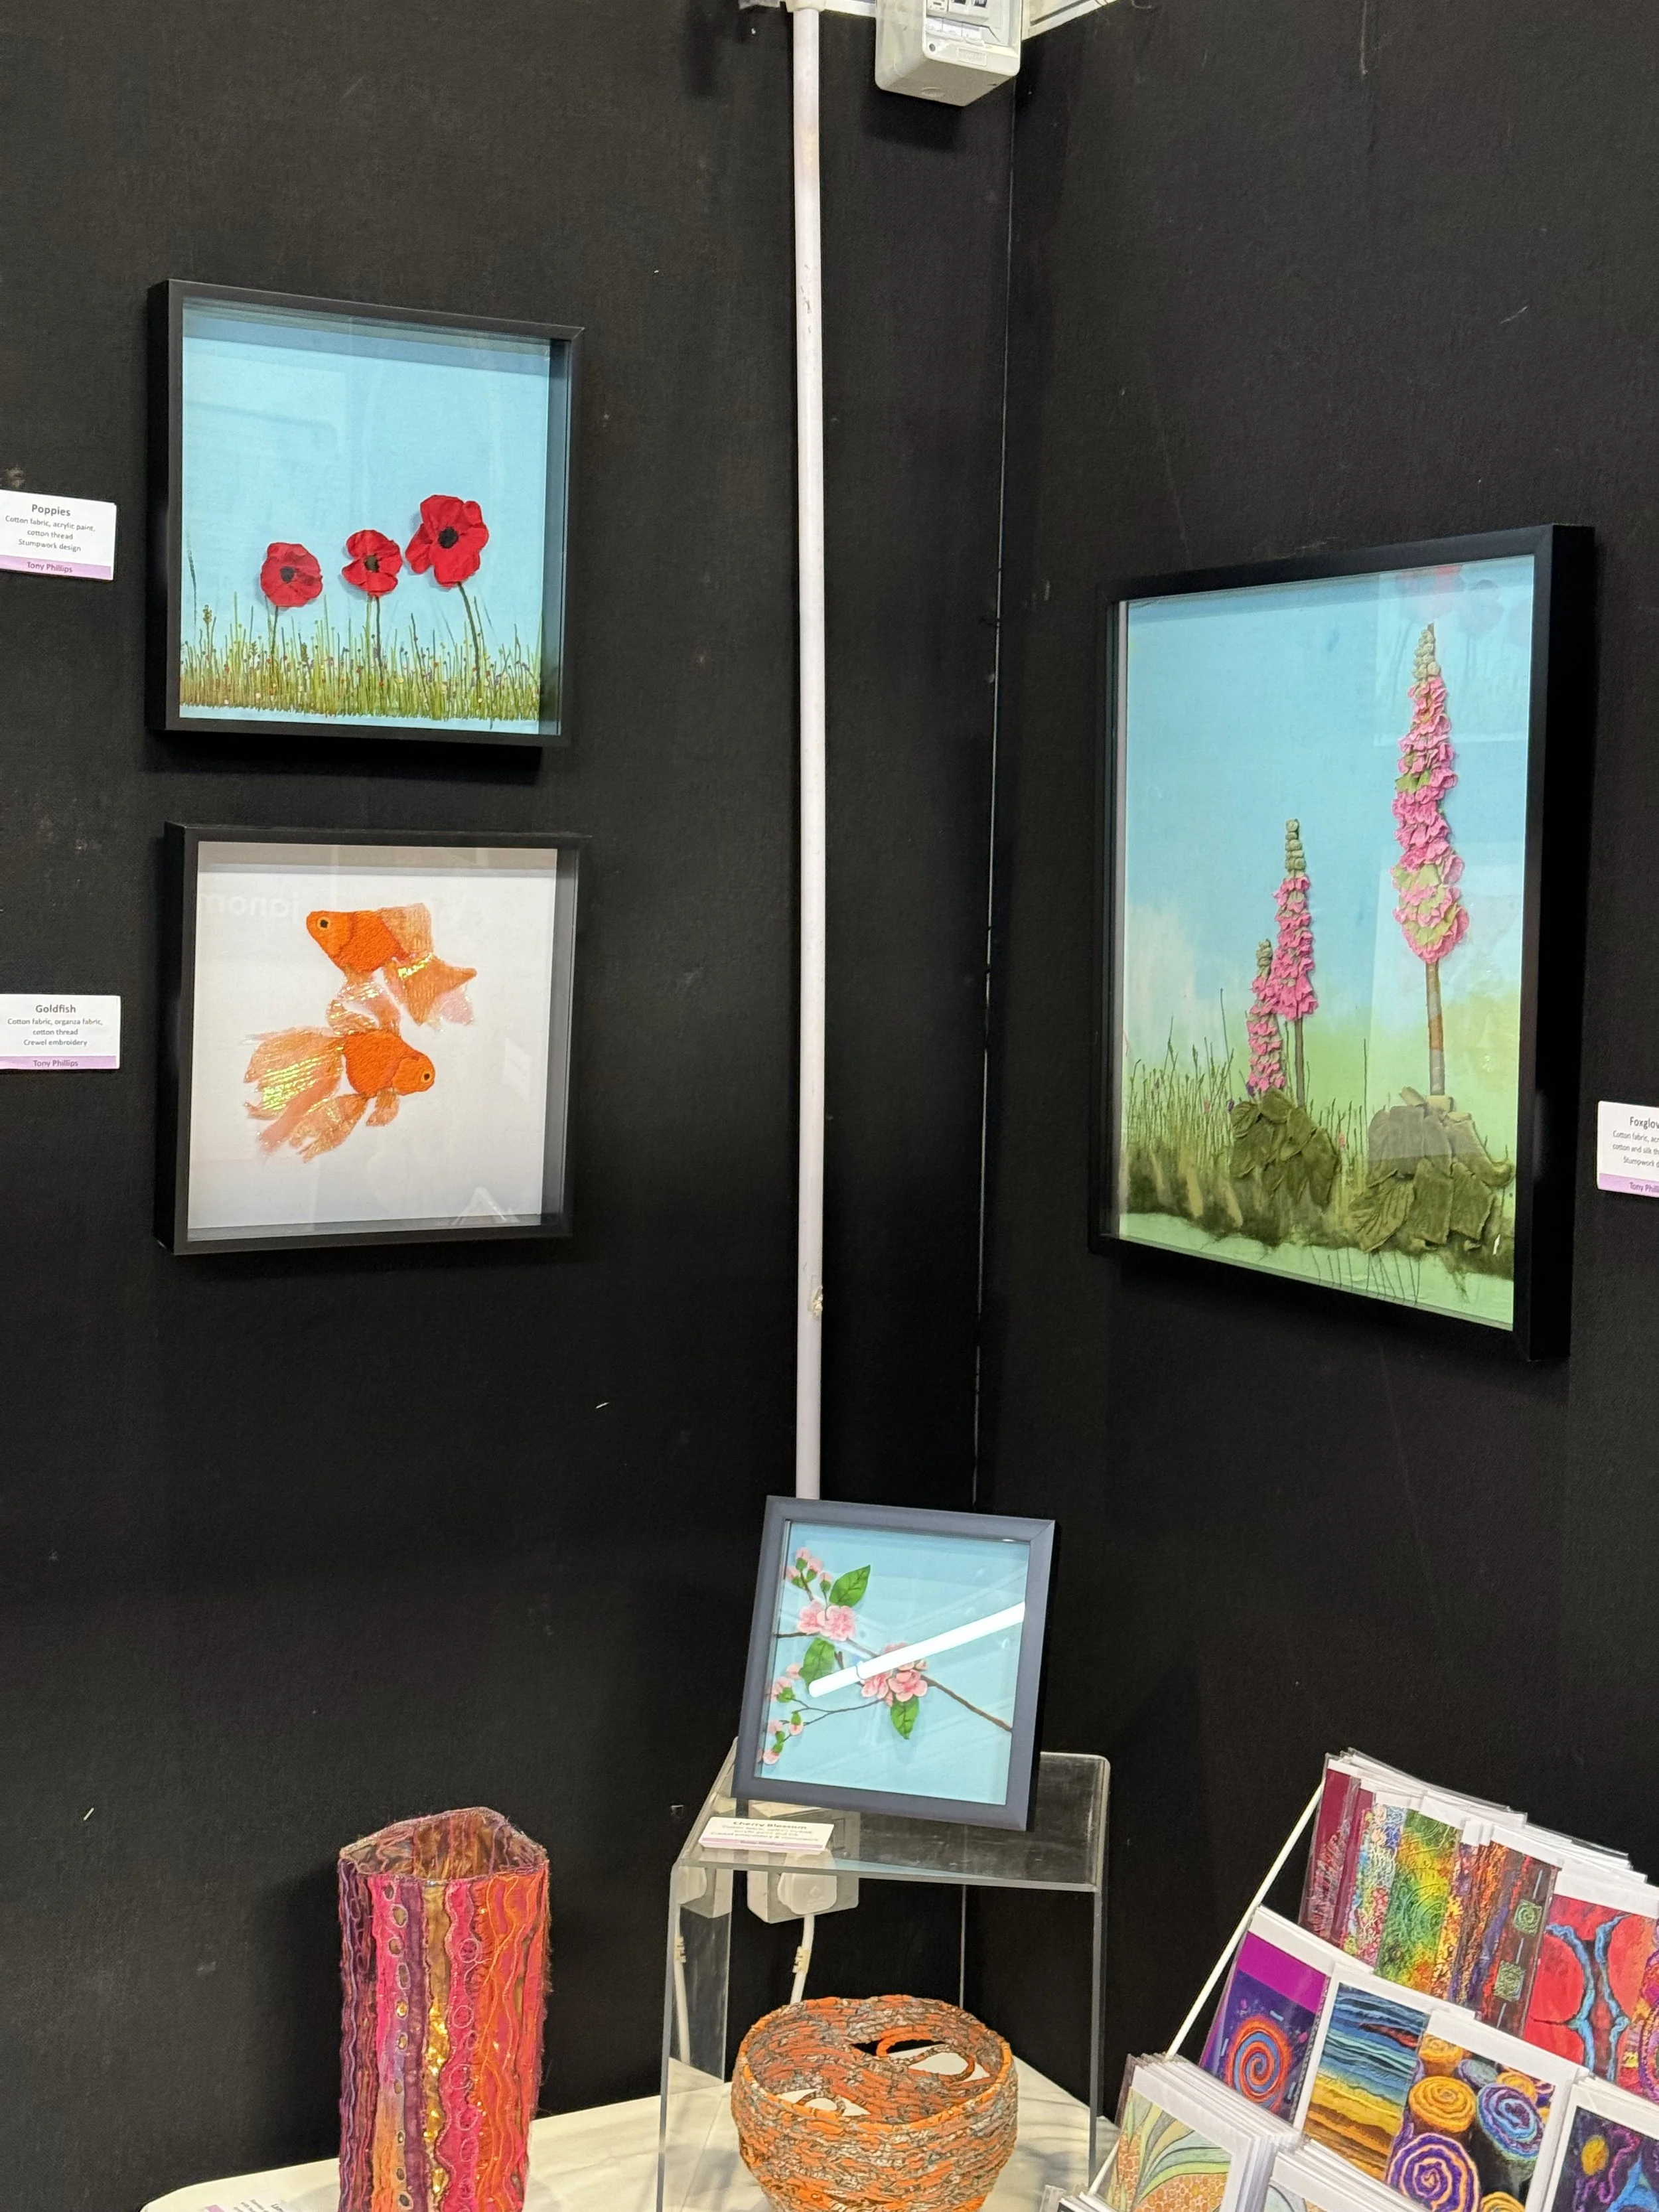
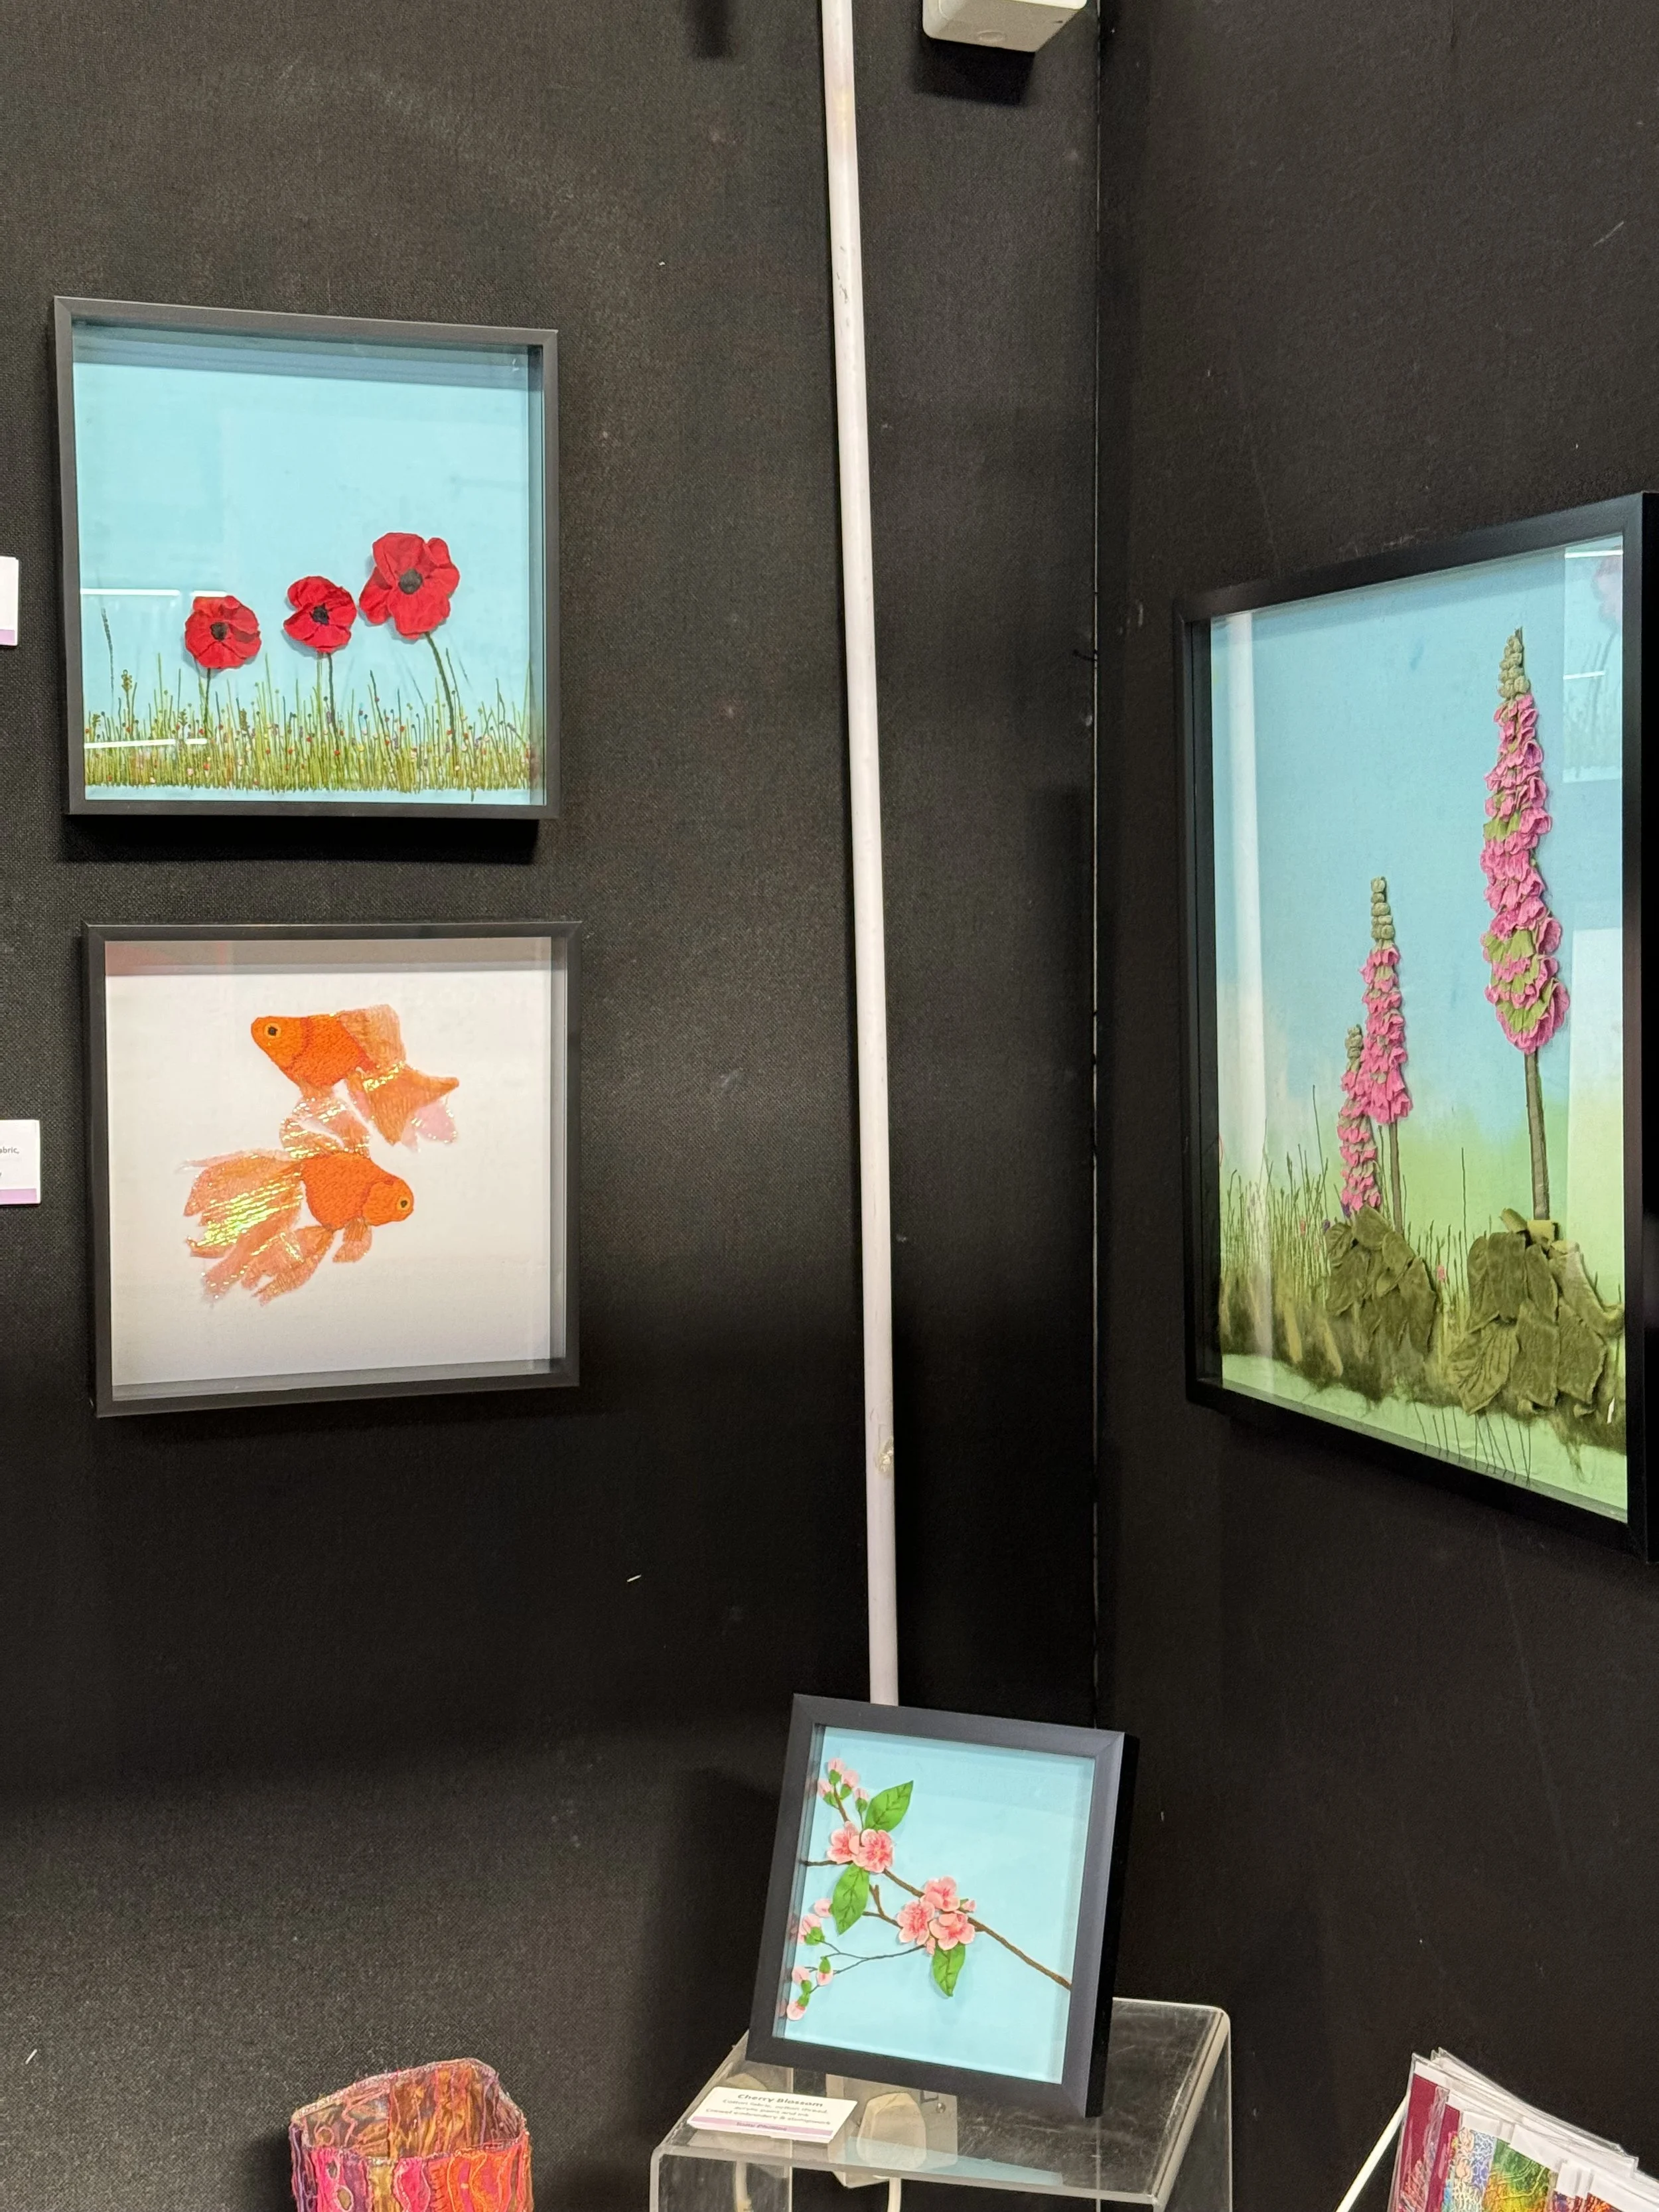
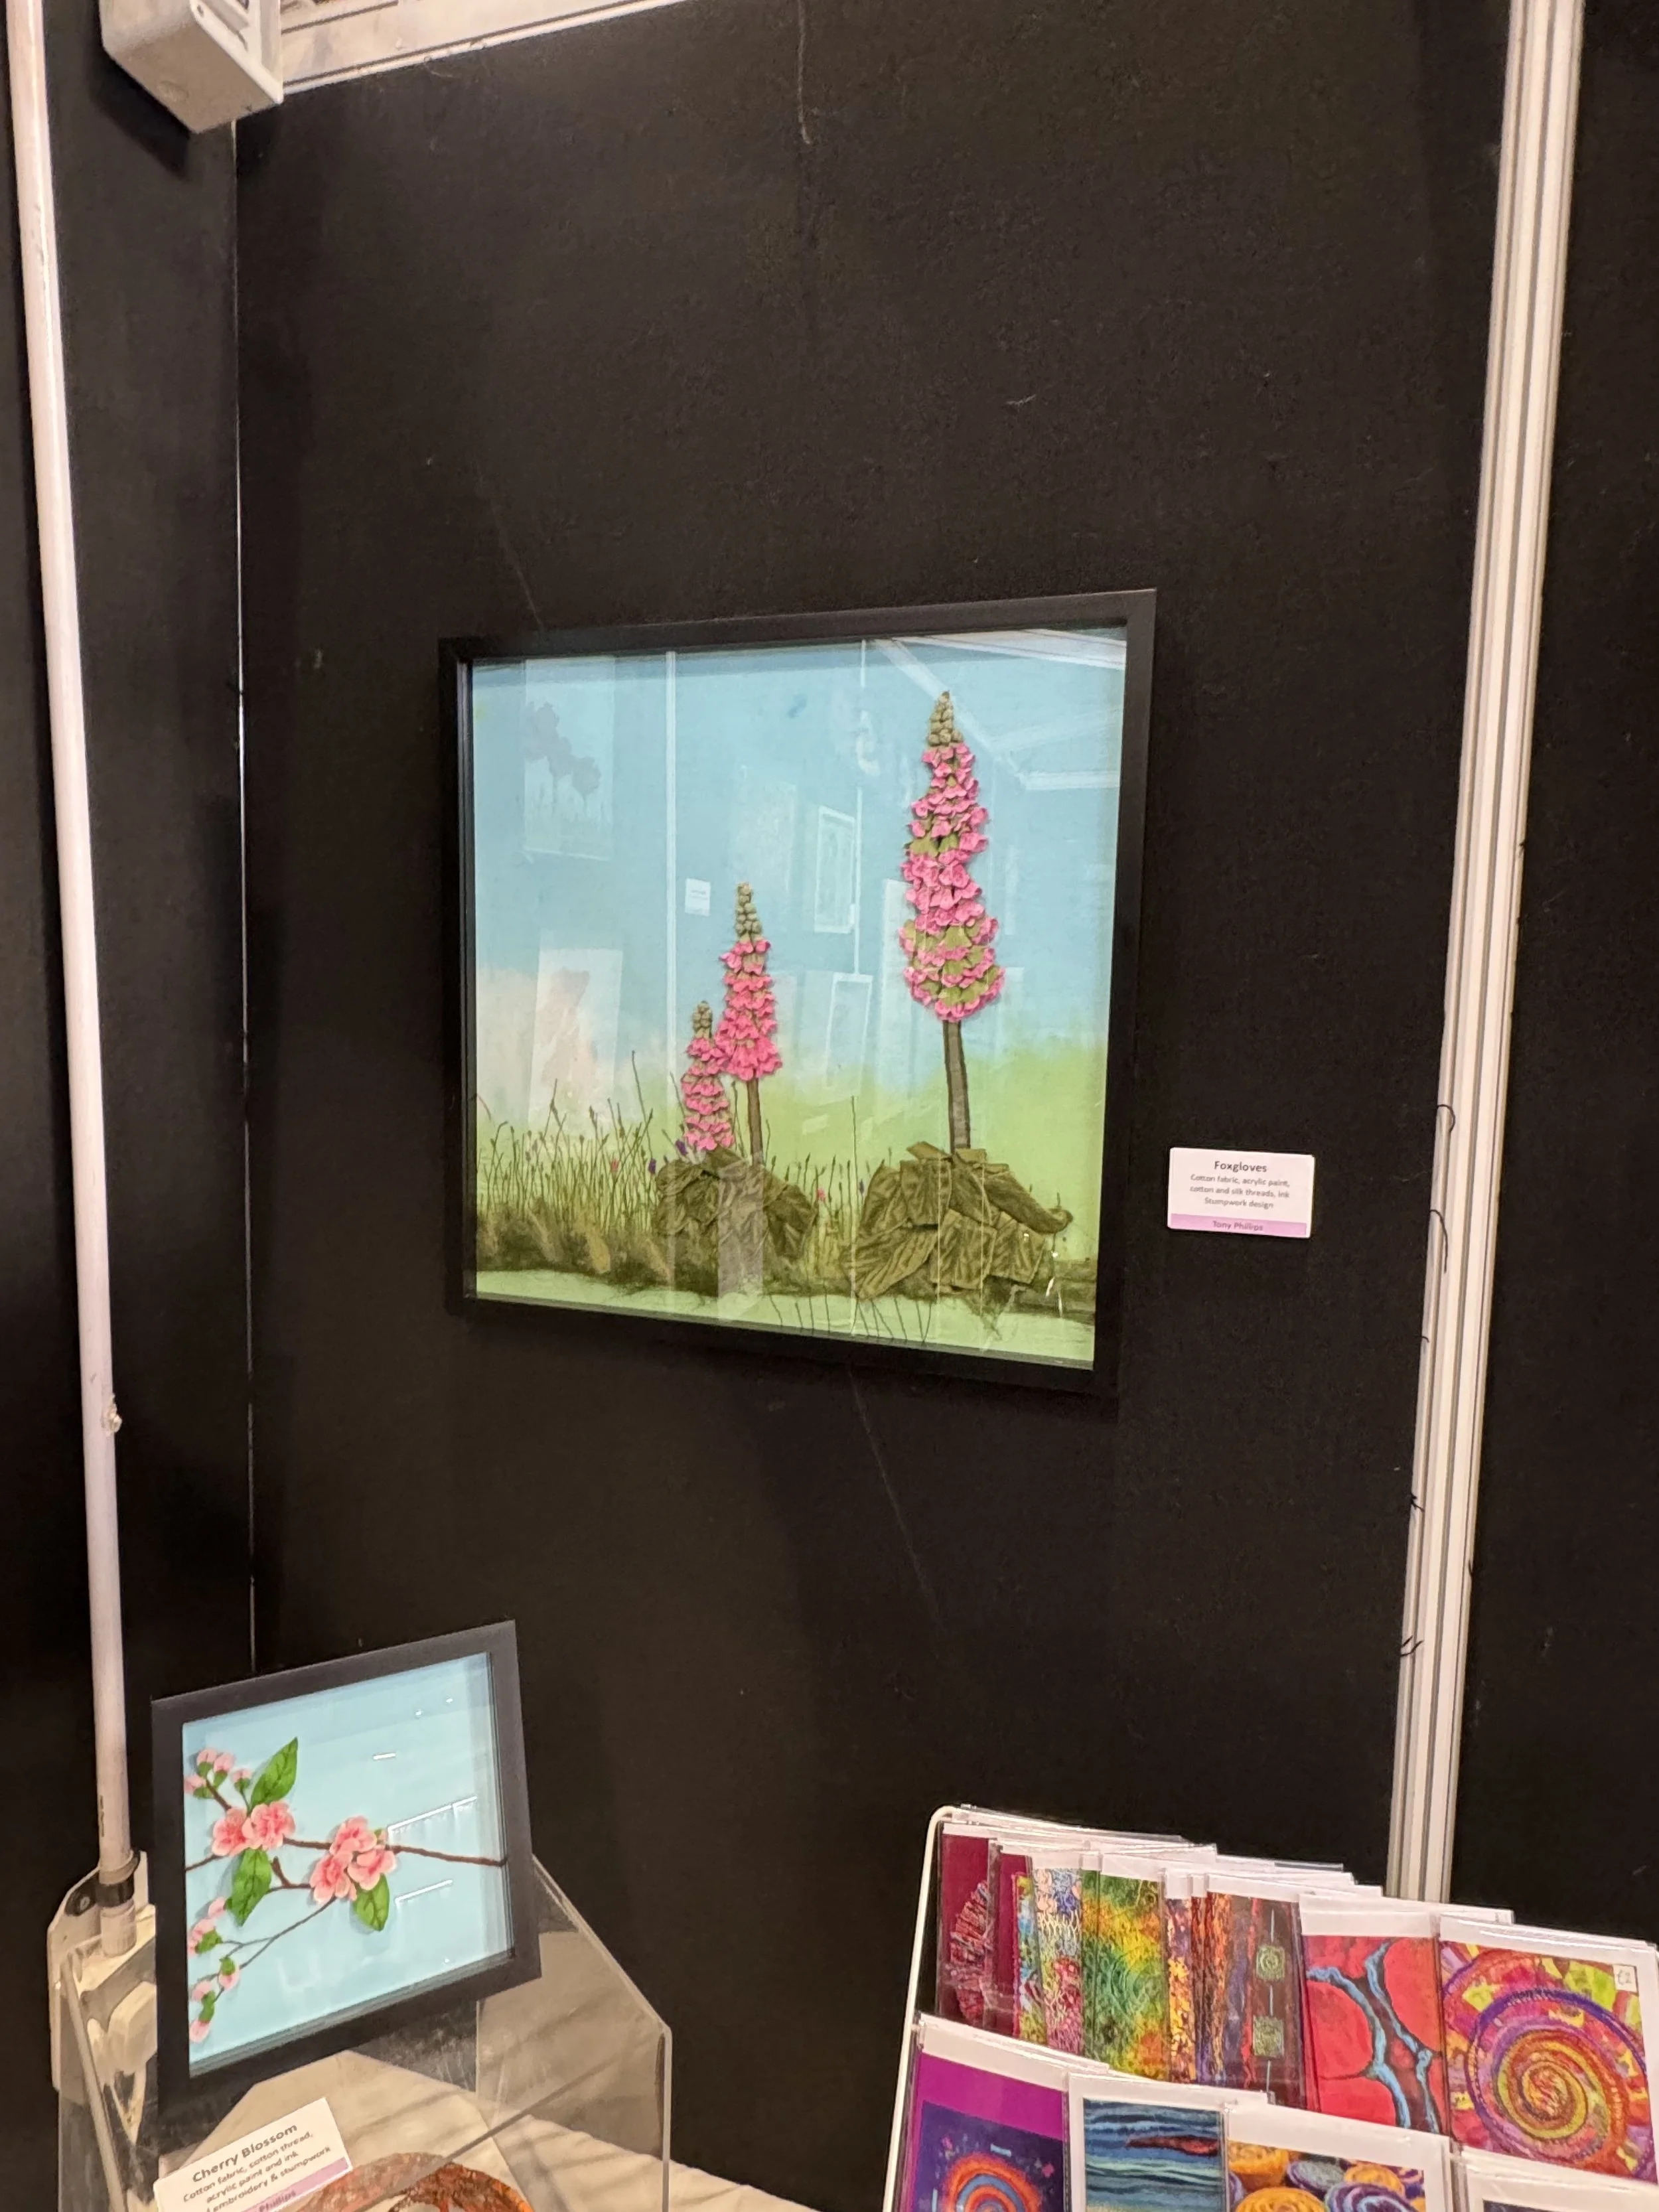
Beautiful Foxgloves
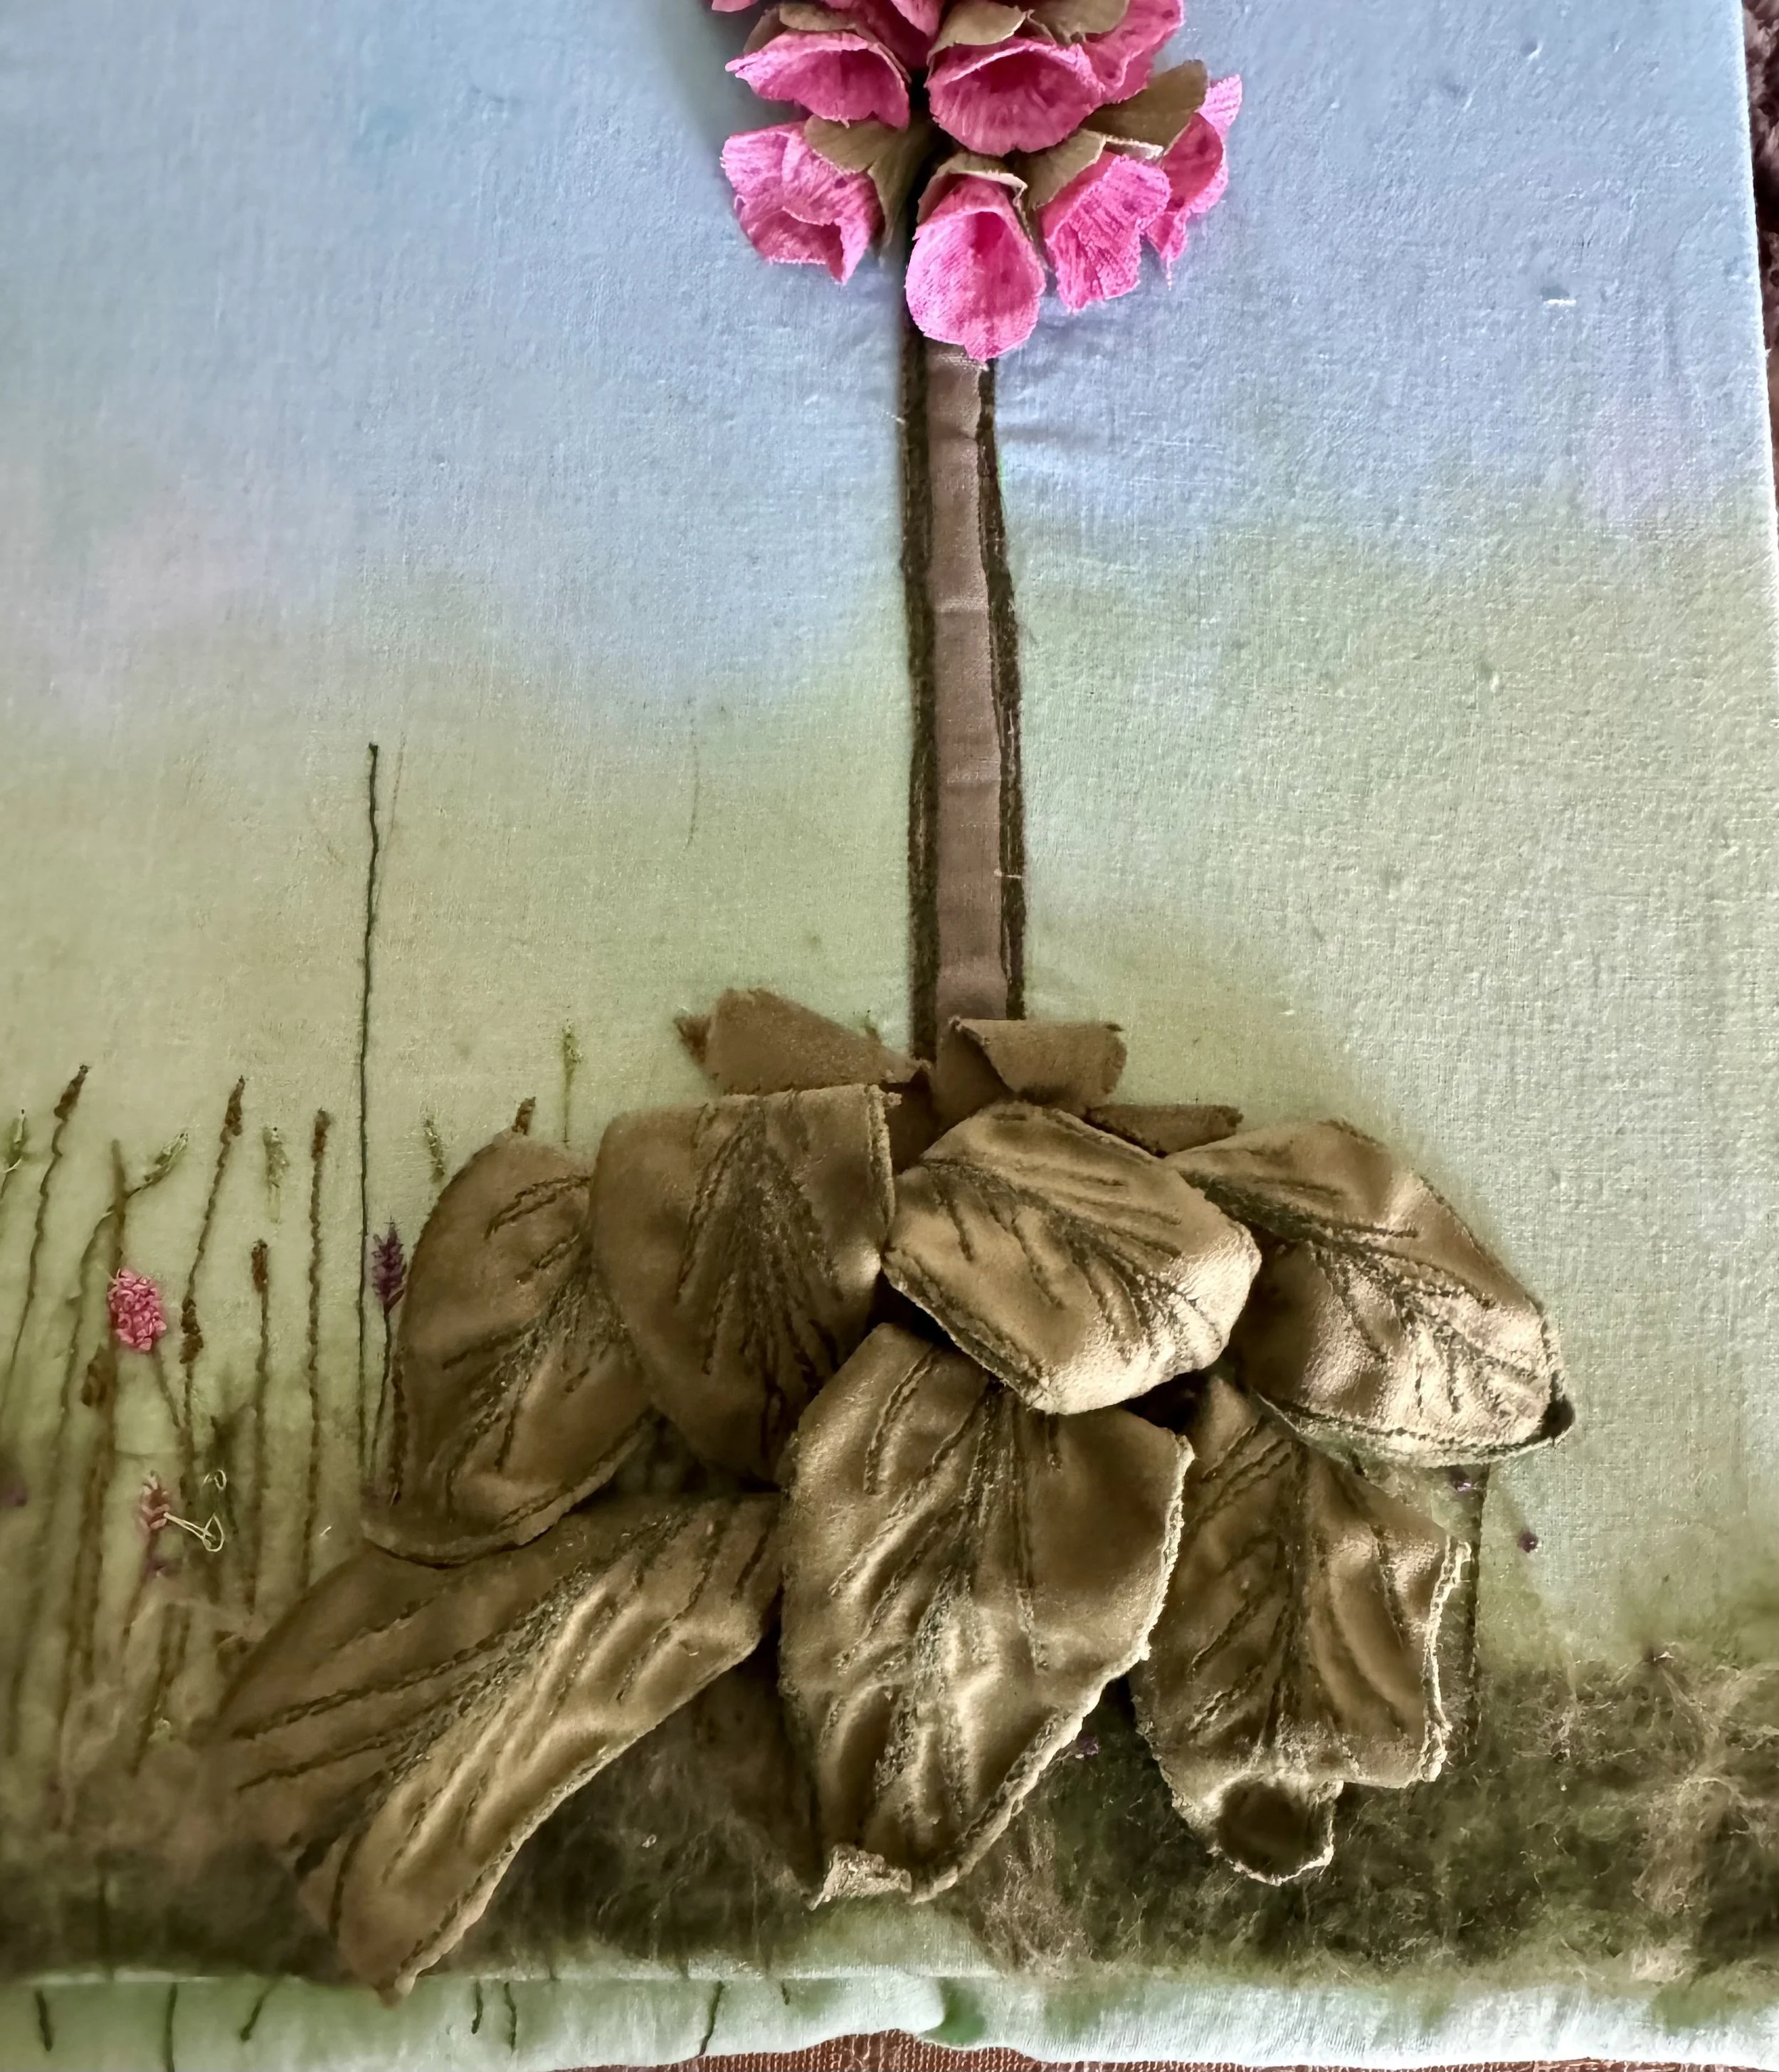
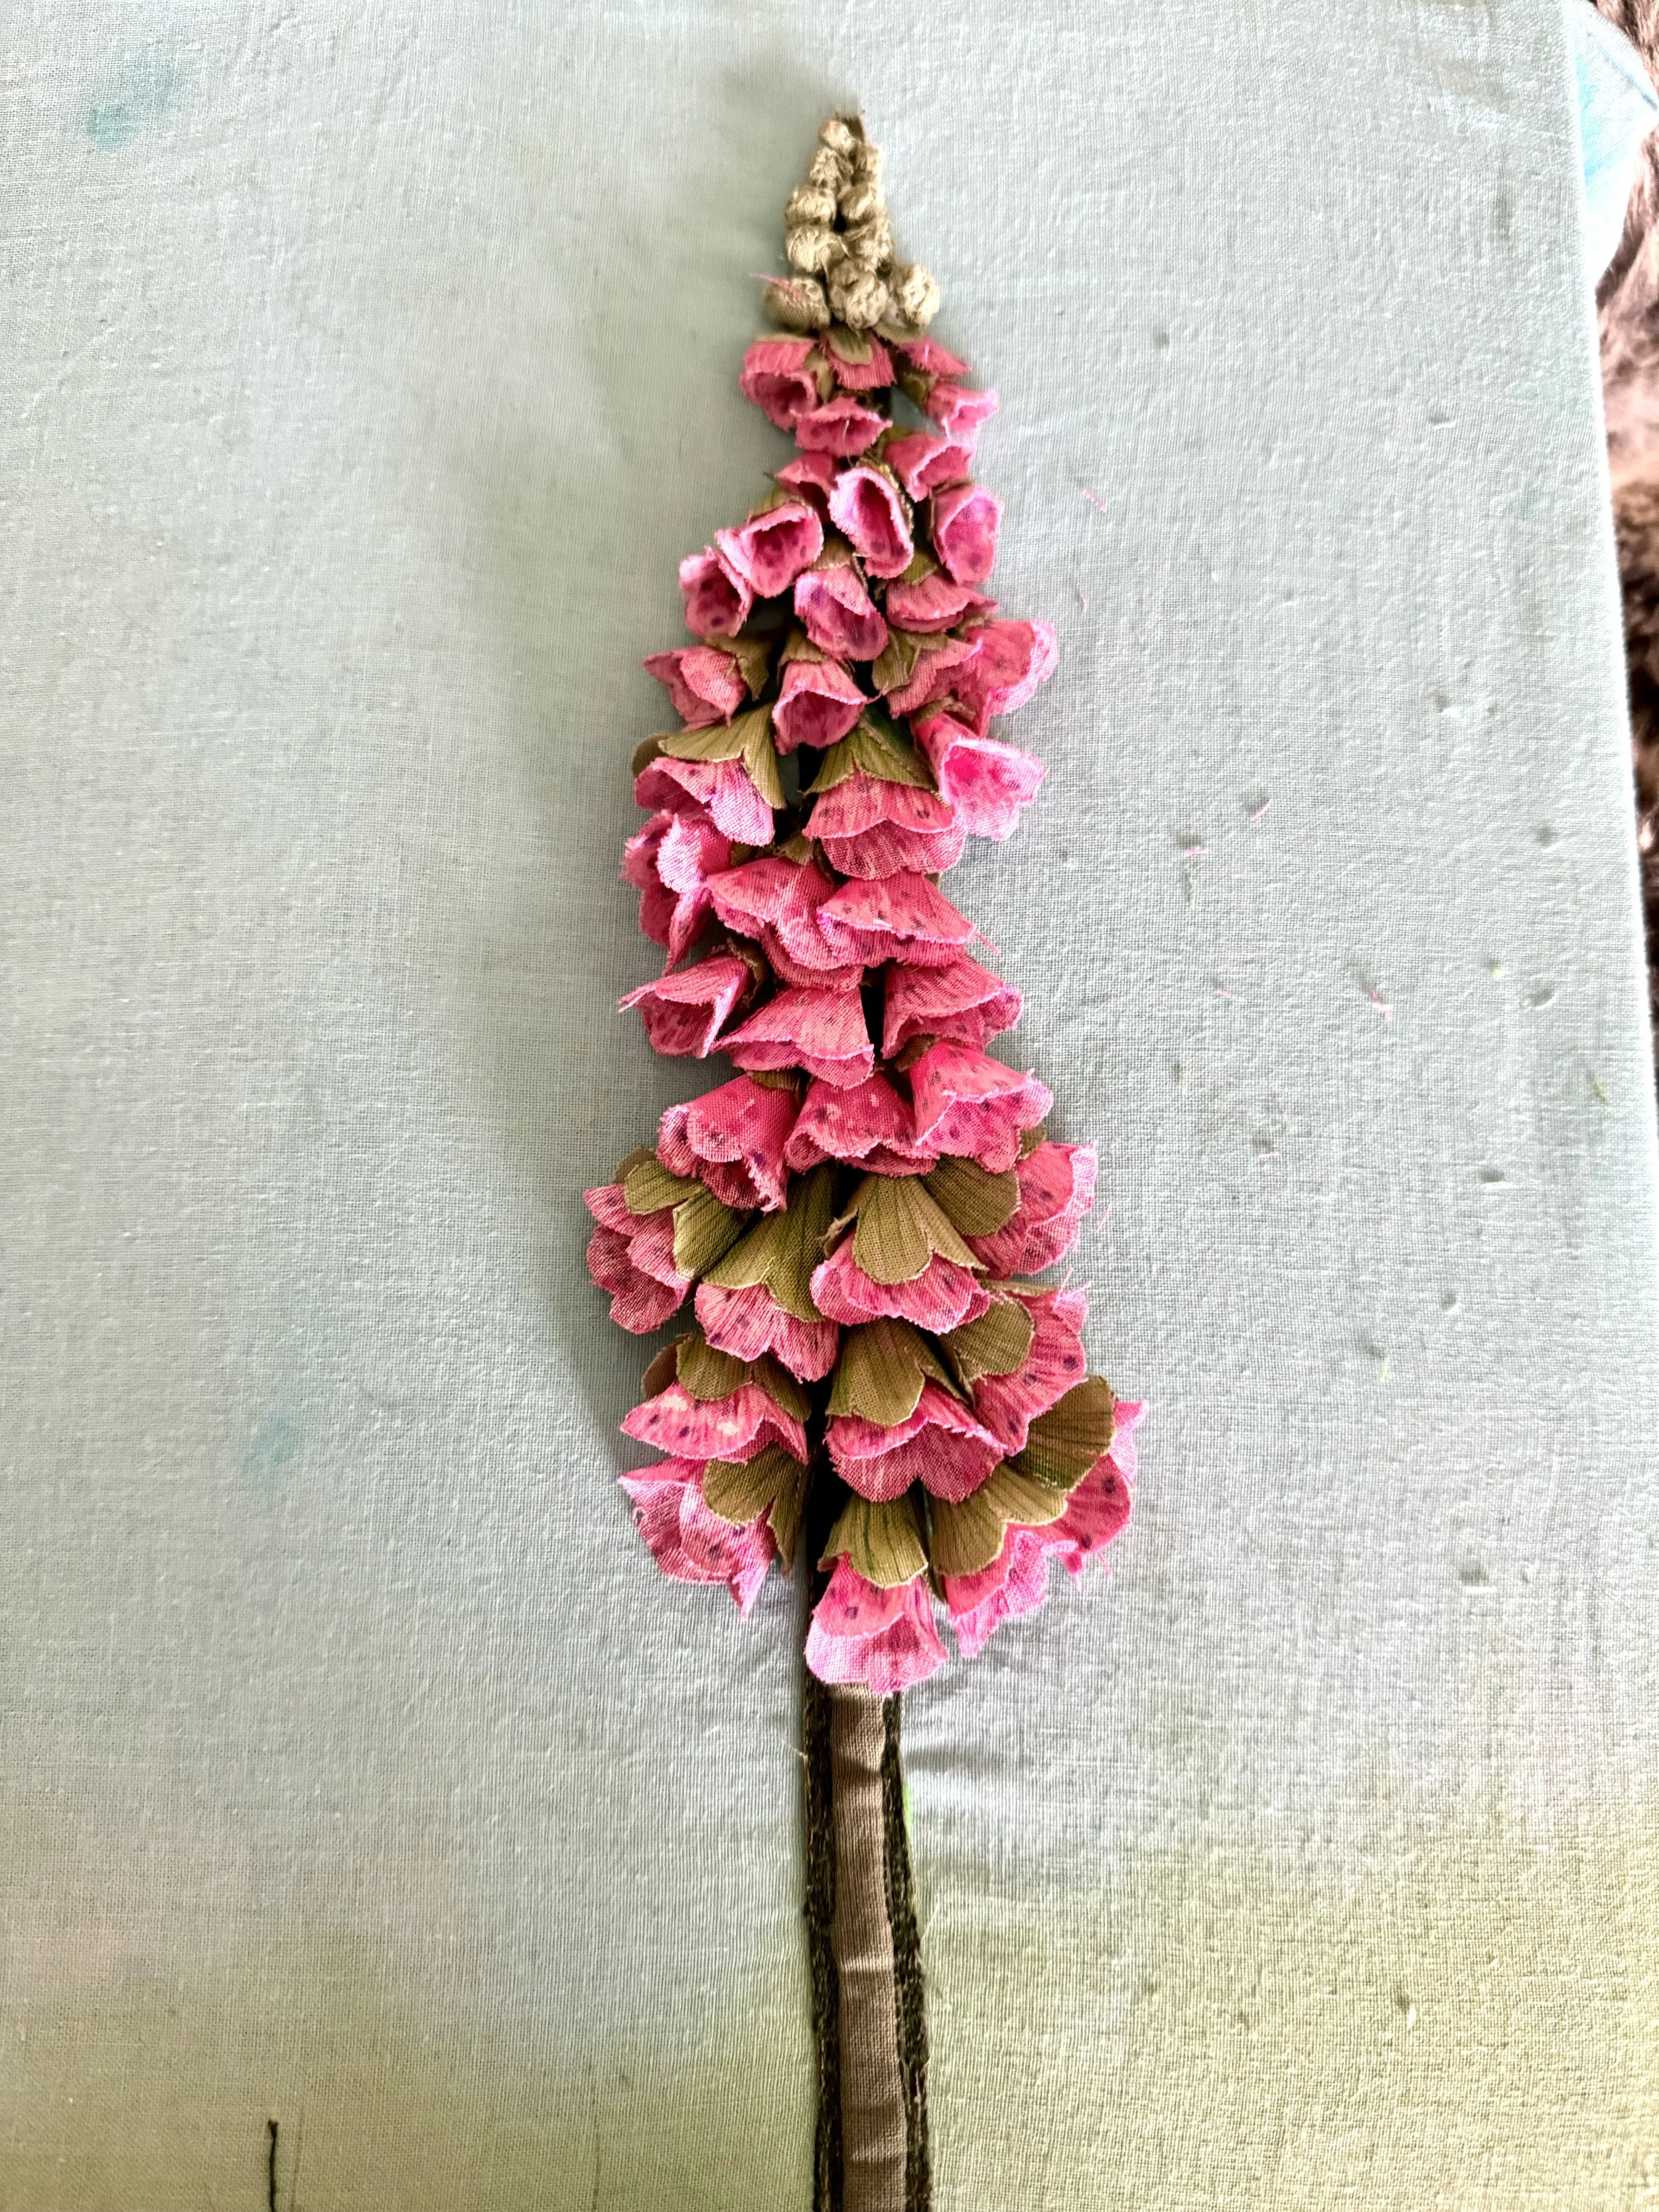
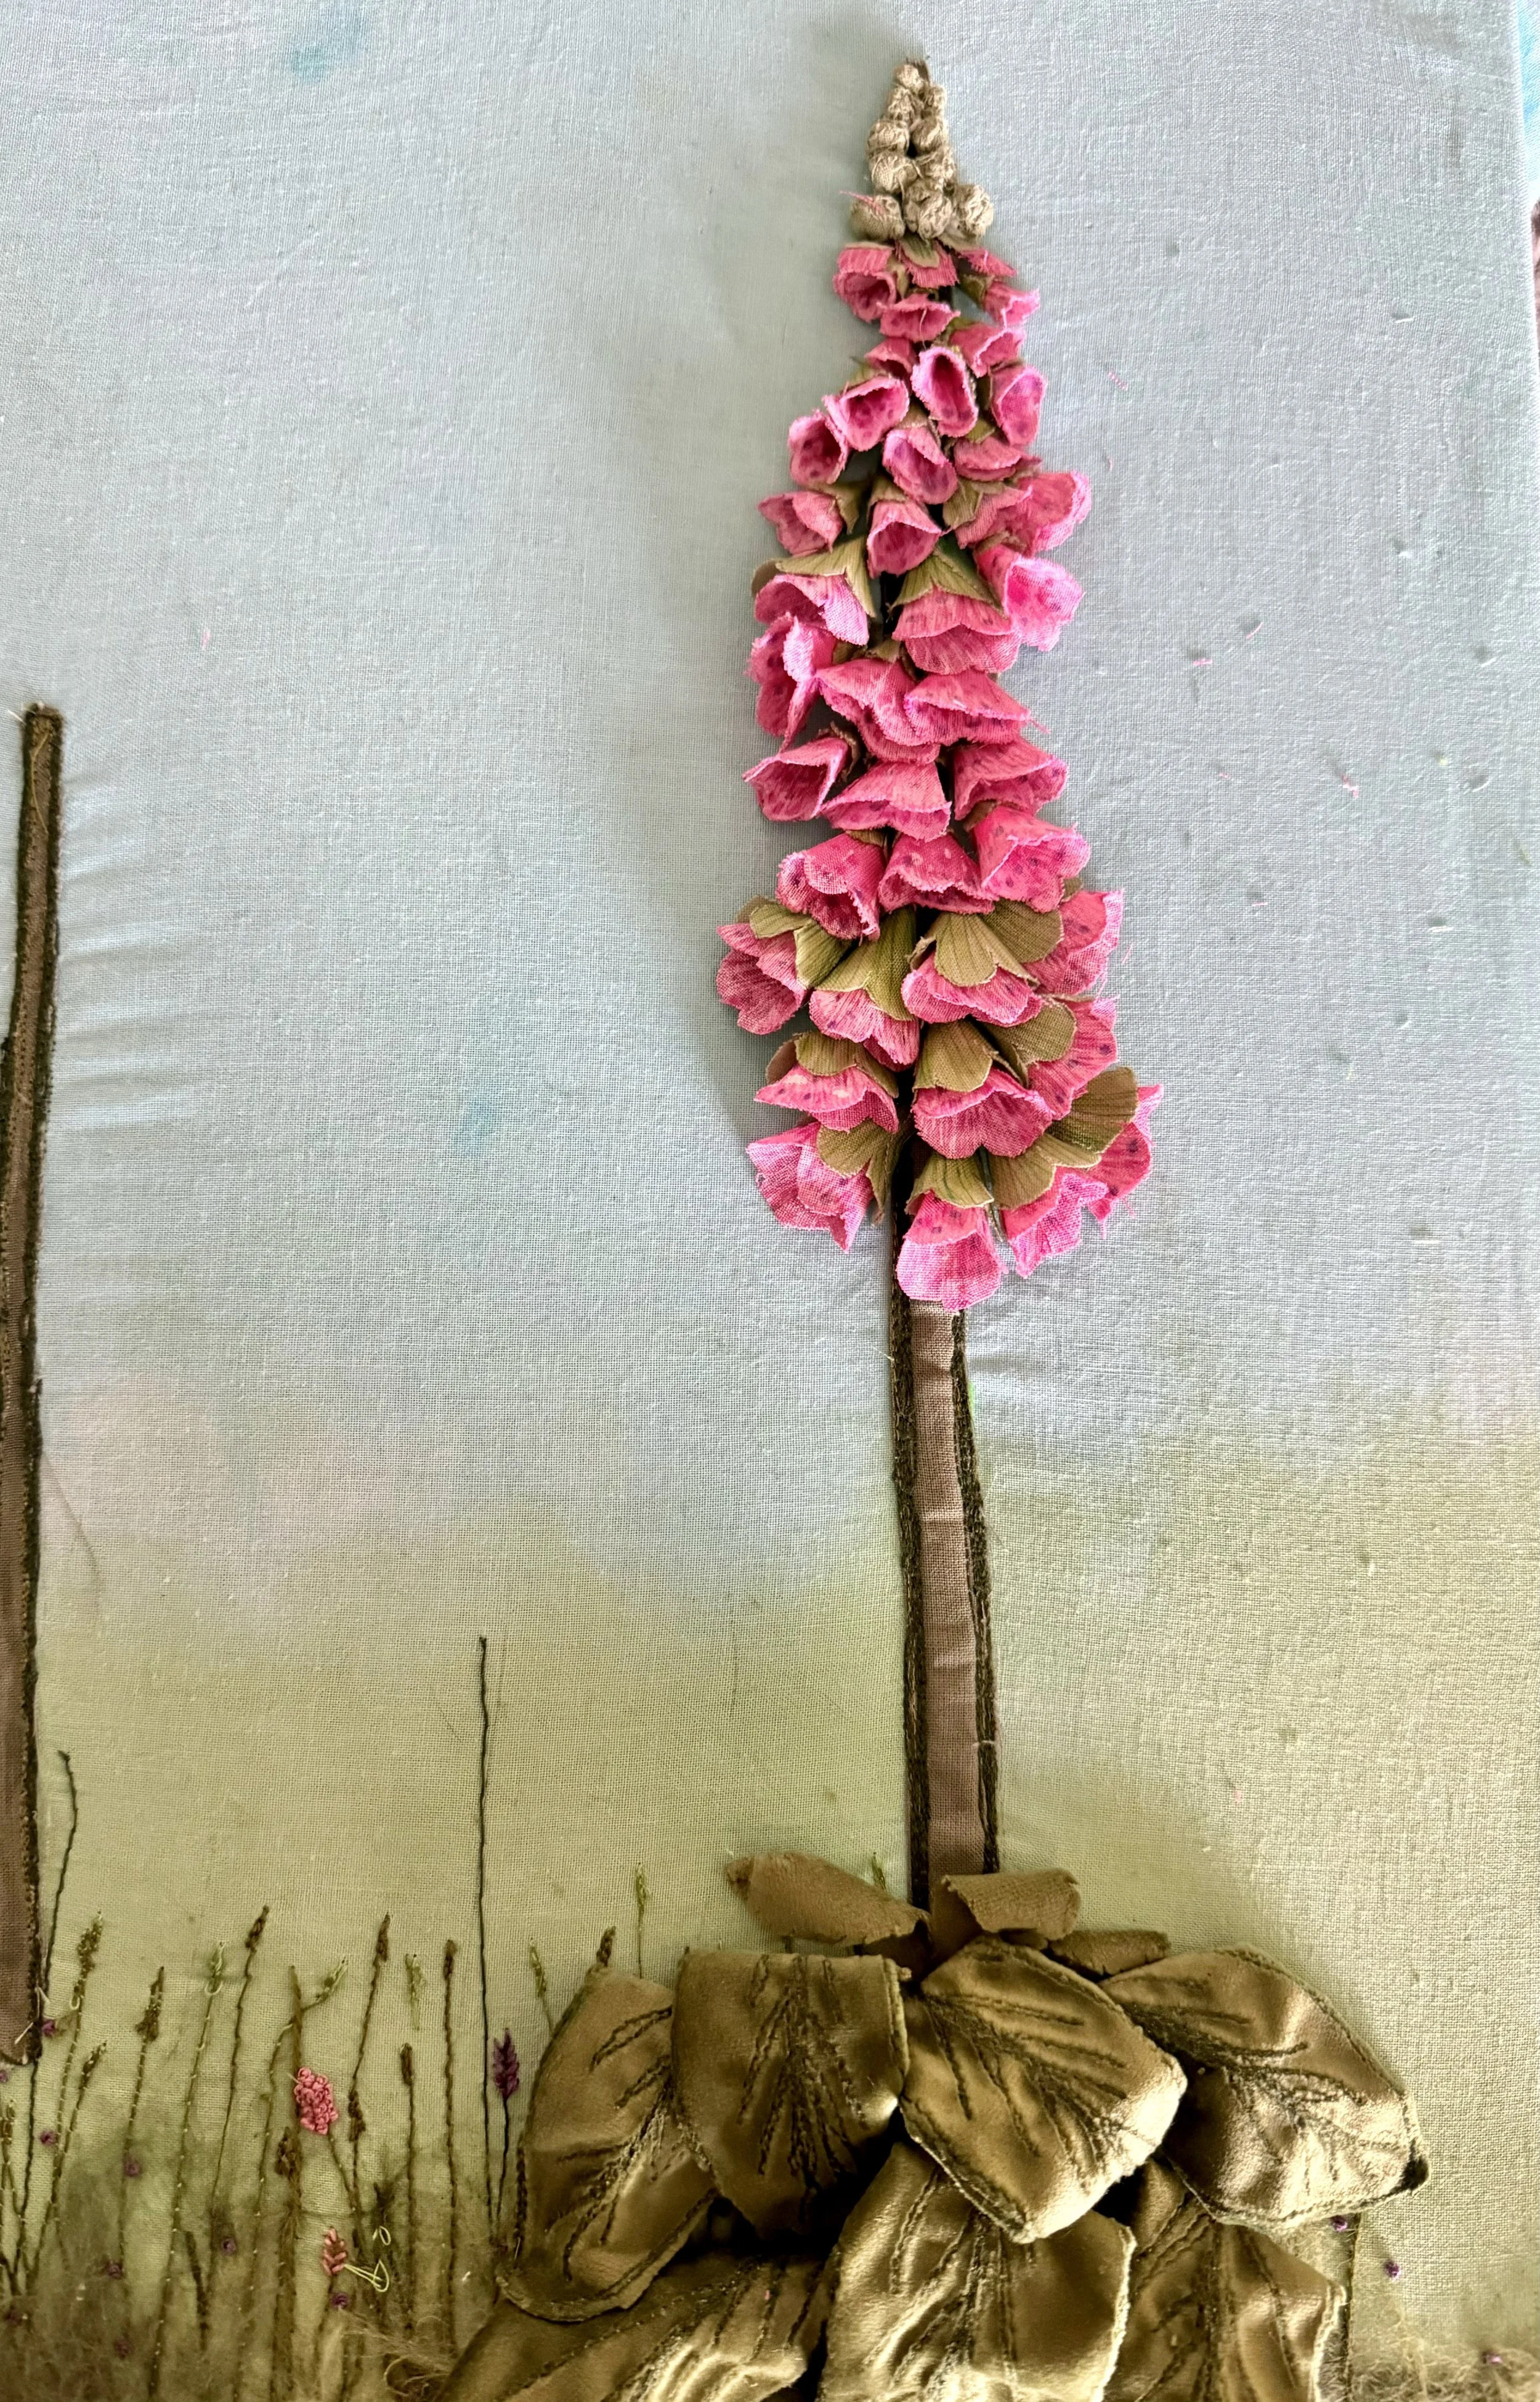
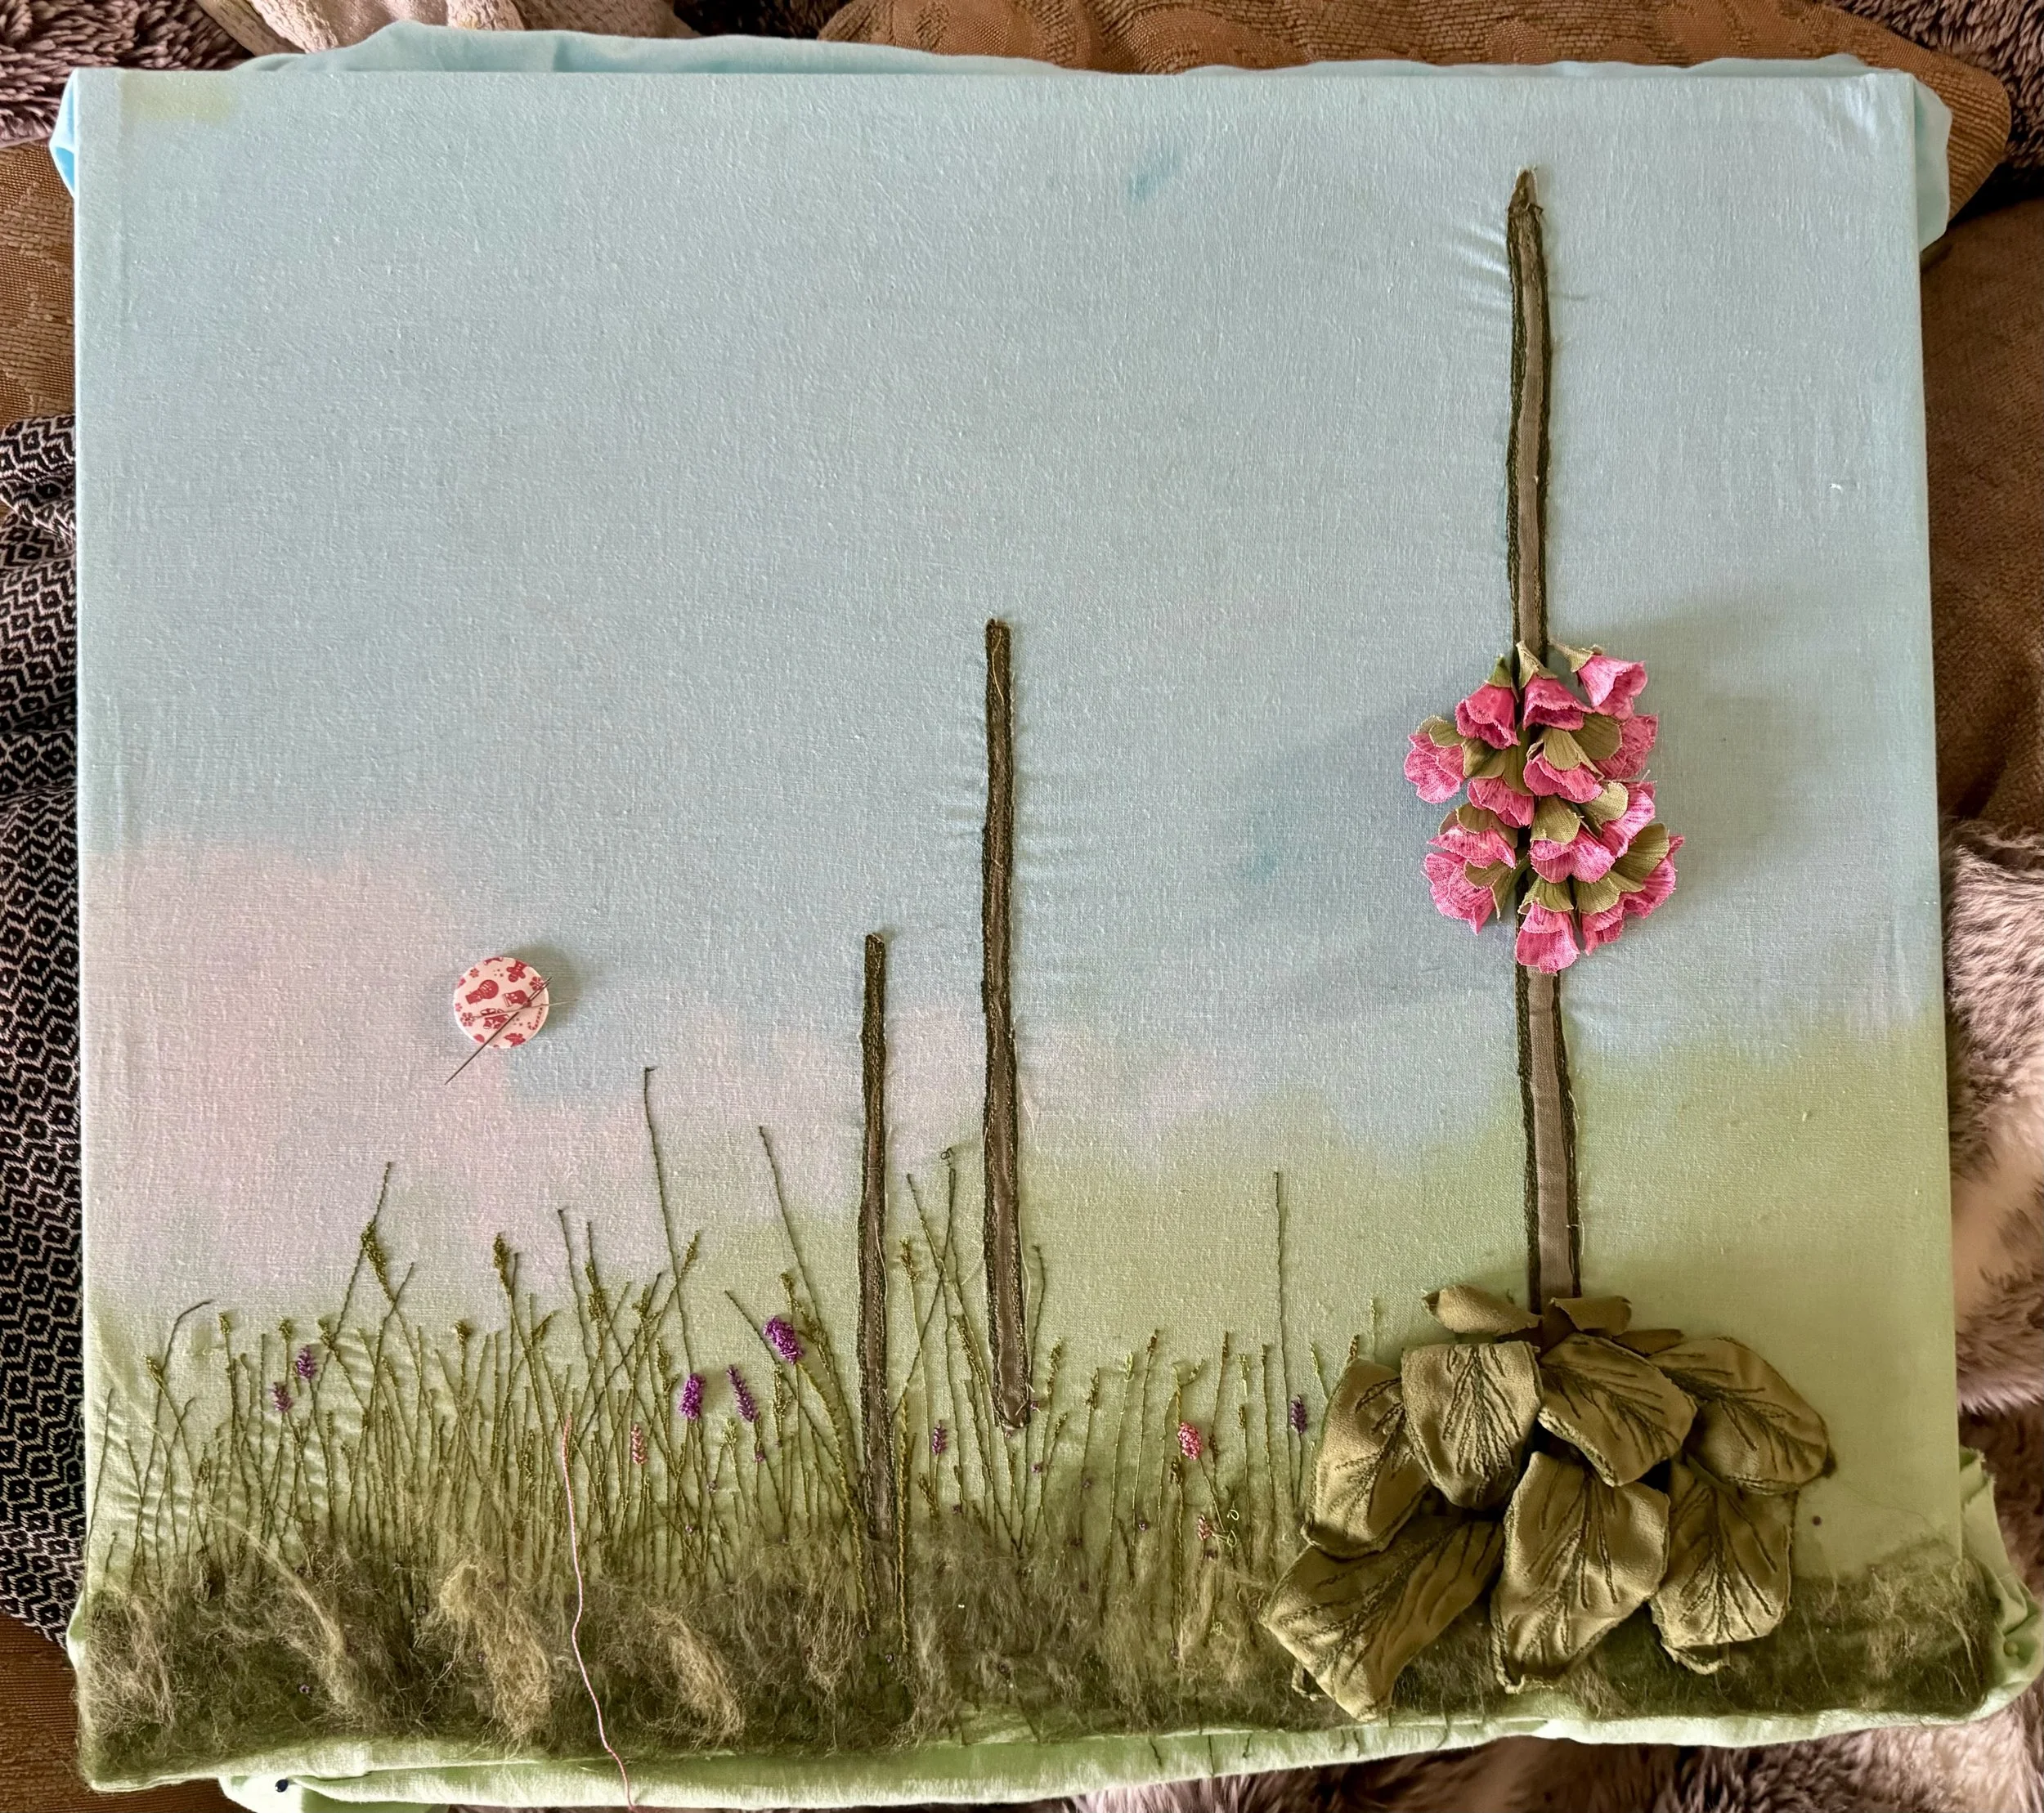
I've recently finished this foxglove piece, I admit it's taken me longer than it really should have. I was trying to work out how to get the right perspective. Ensuring that the foxglove flowers and leaves were the correct size, took more working out than I'd realised.


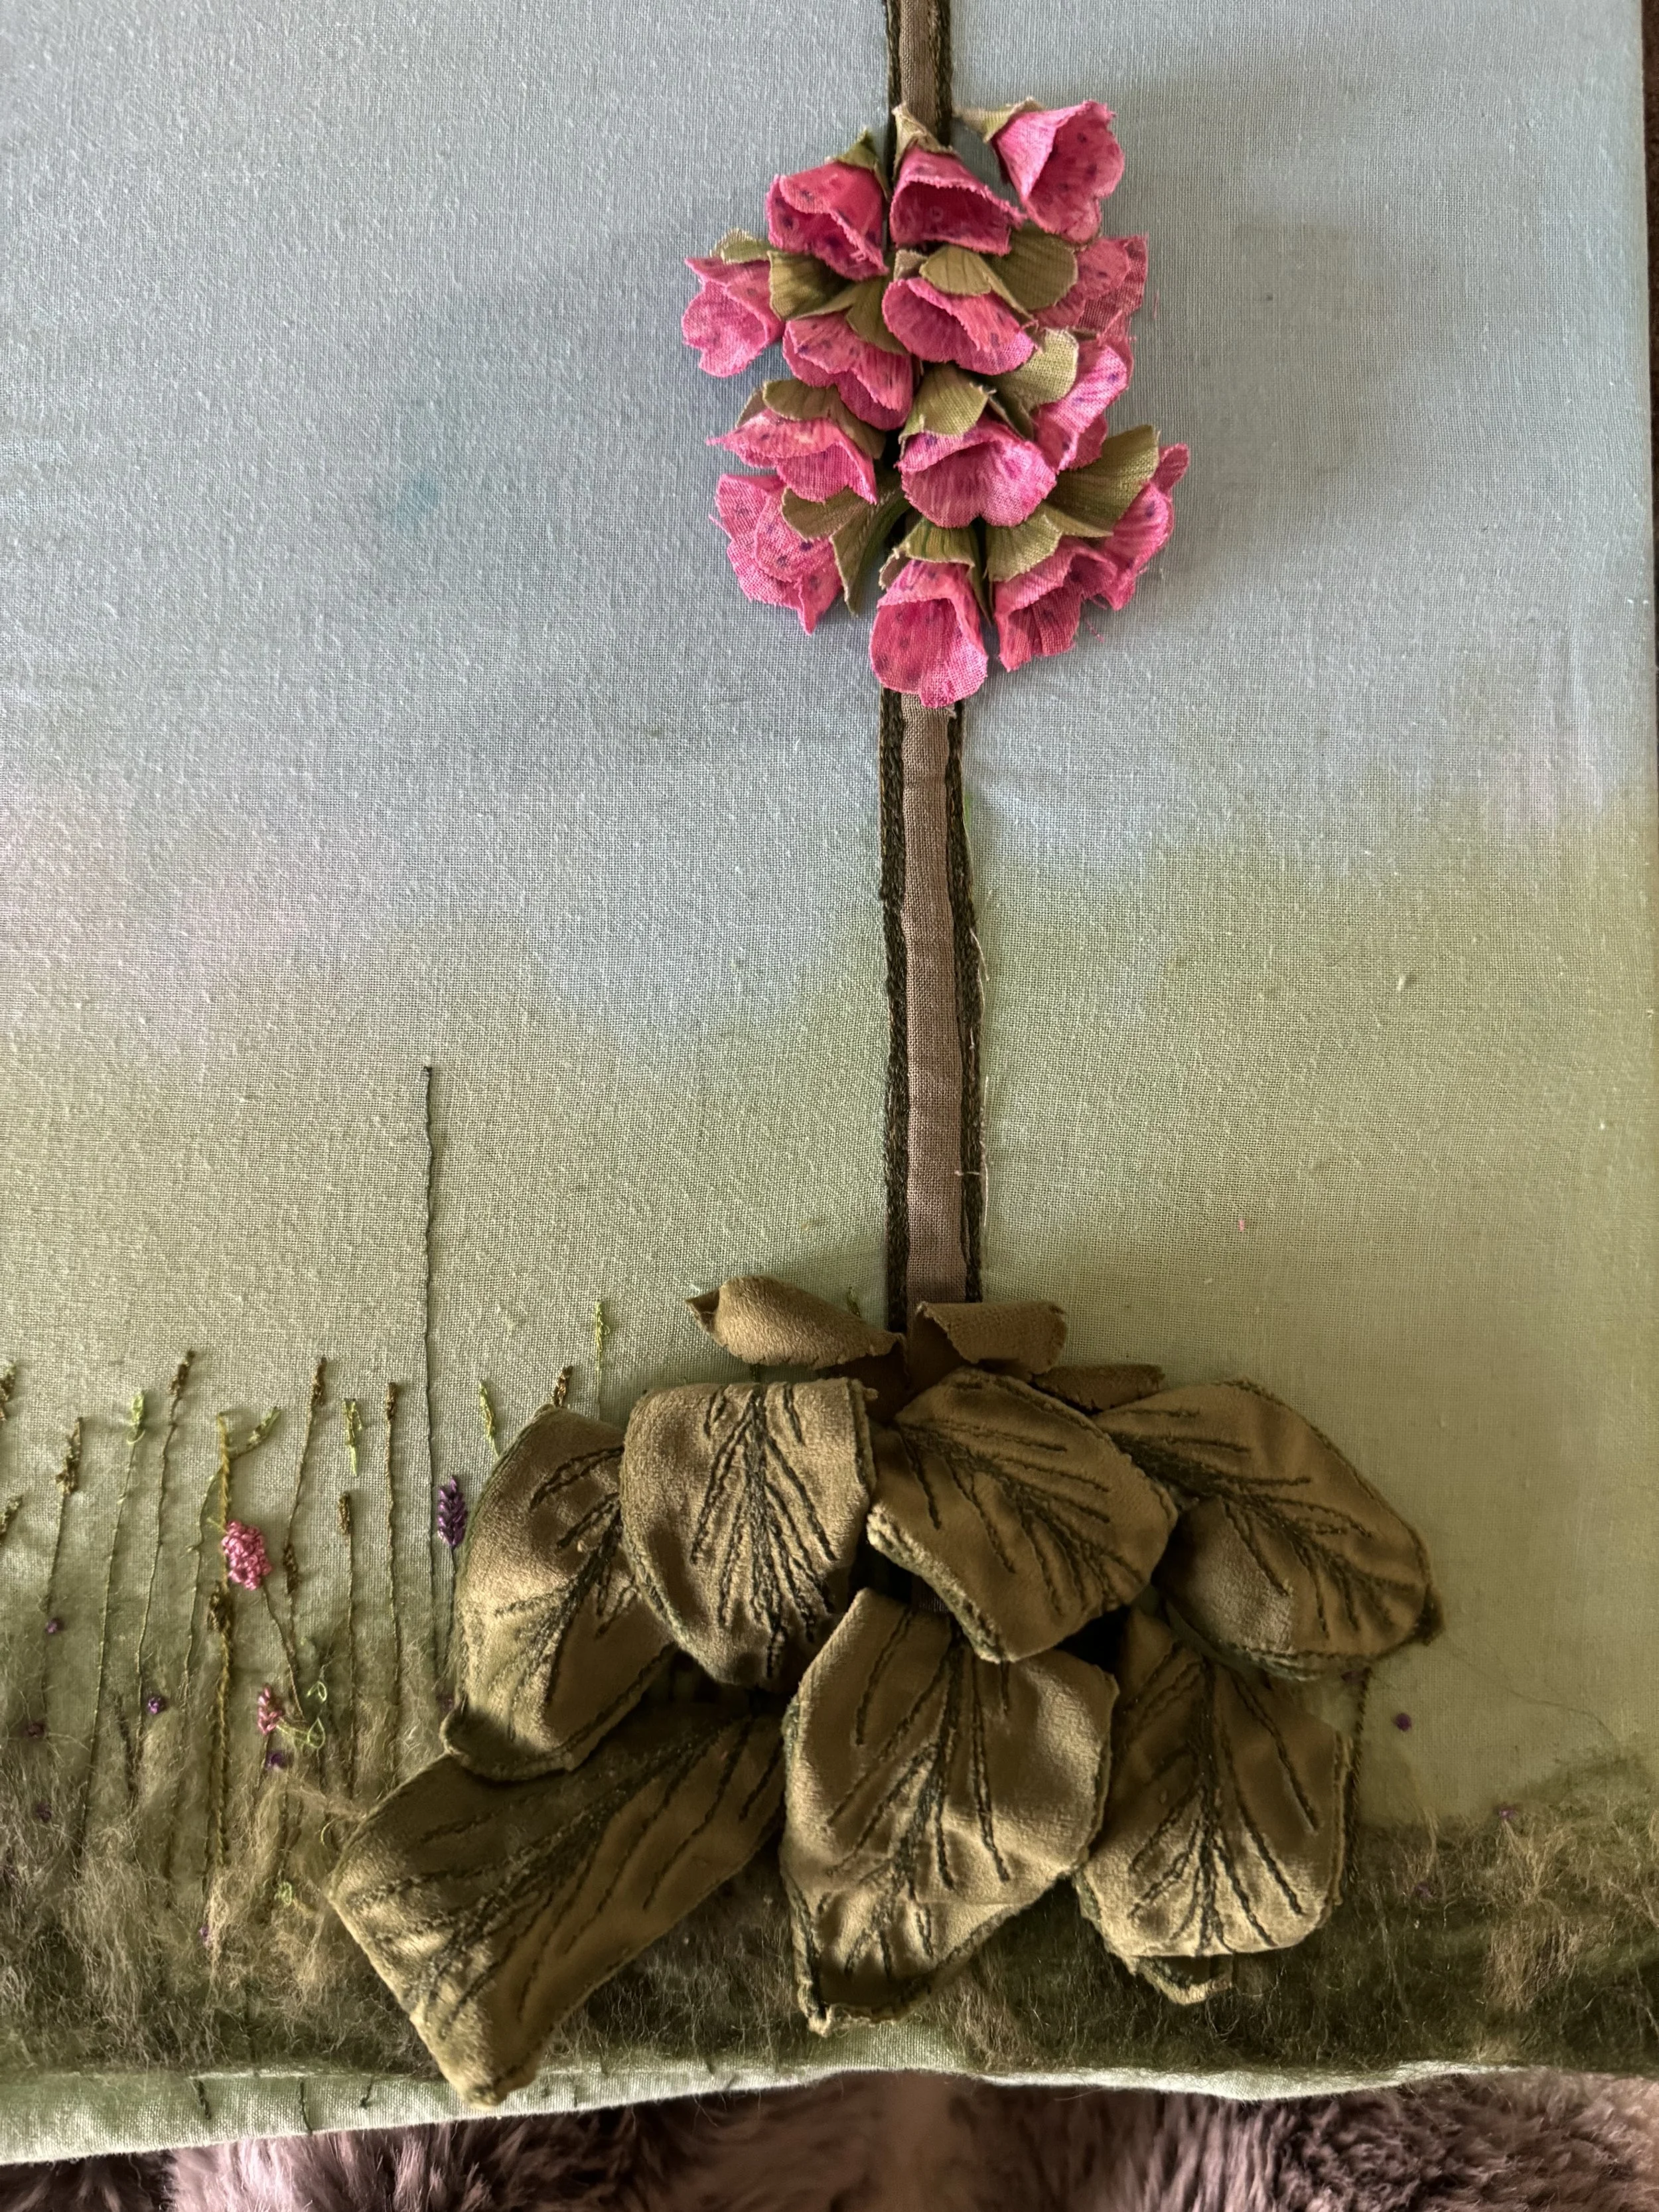
I've recently finished this foxglove piece, I admit it's taken me longer than it really should have. I was trying to work out how to get the right perspective. Ensuring that the foxglove flowers and leaves were the correct size, took more working out than I'd realised.
After dyeing the fabric background using sponges to create more of a depth rather than a flat colour I then went on to create a template for the flowers. I imagined the flower trumpets as if they were opened out and flattened and created a cardboard template.
I created four different sizes of template, some of which would be used for the base of the flower trumpets. I think I made in the region of 50 flowers of varying sizes. I created templates foe the leaves too, the leaves were created using velvet which I then free motion embroidered the details on each leaf.
I free motion embroidered the grass on the background, then felted green merino wool fibres to give the base some depth, I finished it off by hand embroidering some flower details.
I hand sewed the flower trumpets on by hand from the bottom up as I needed the trumpets to lay on top of each other.
I hope you enjoyed a little insight into this piece, let me know what you are all doing, I'd love to see your projects. You are welcome to email me Tony@themanbroiderer.co.uk

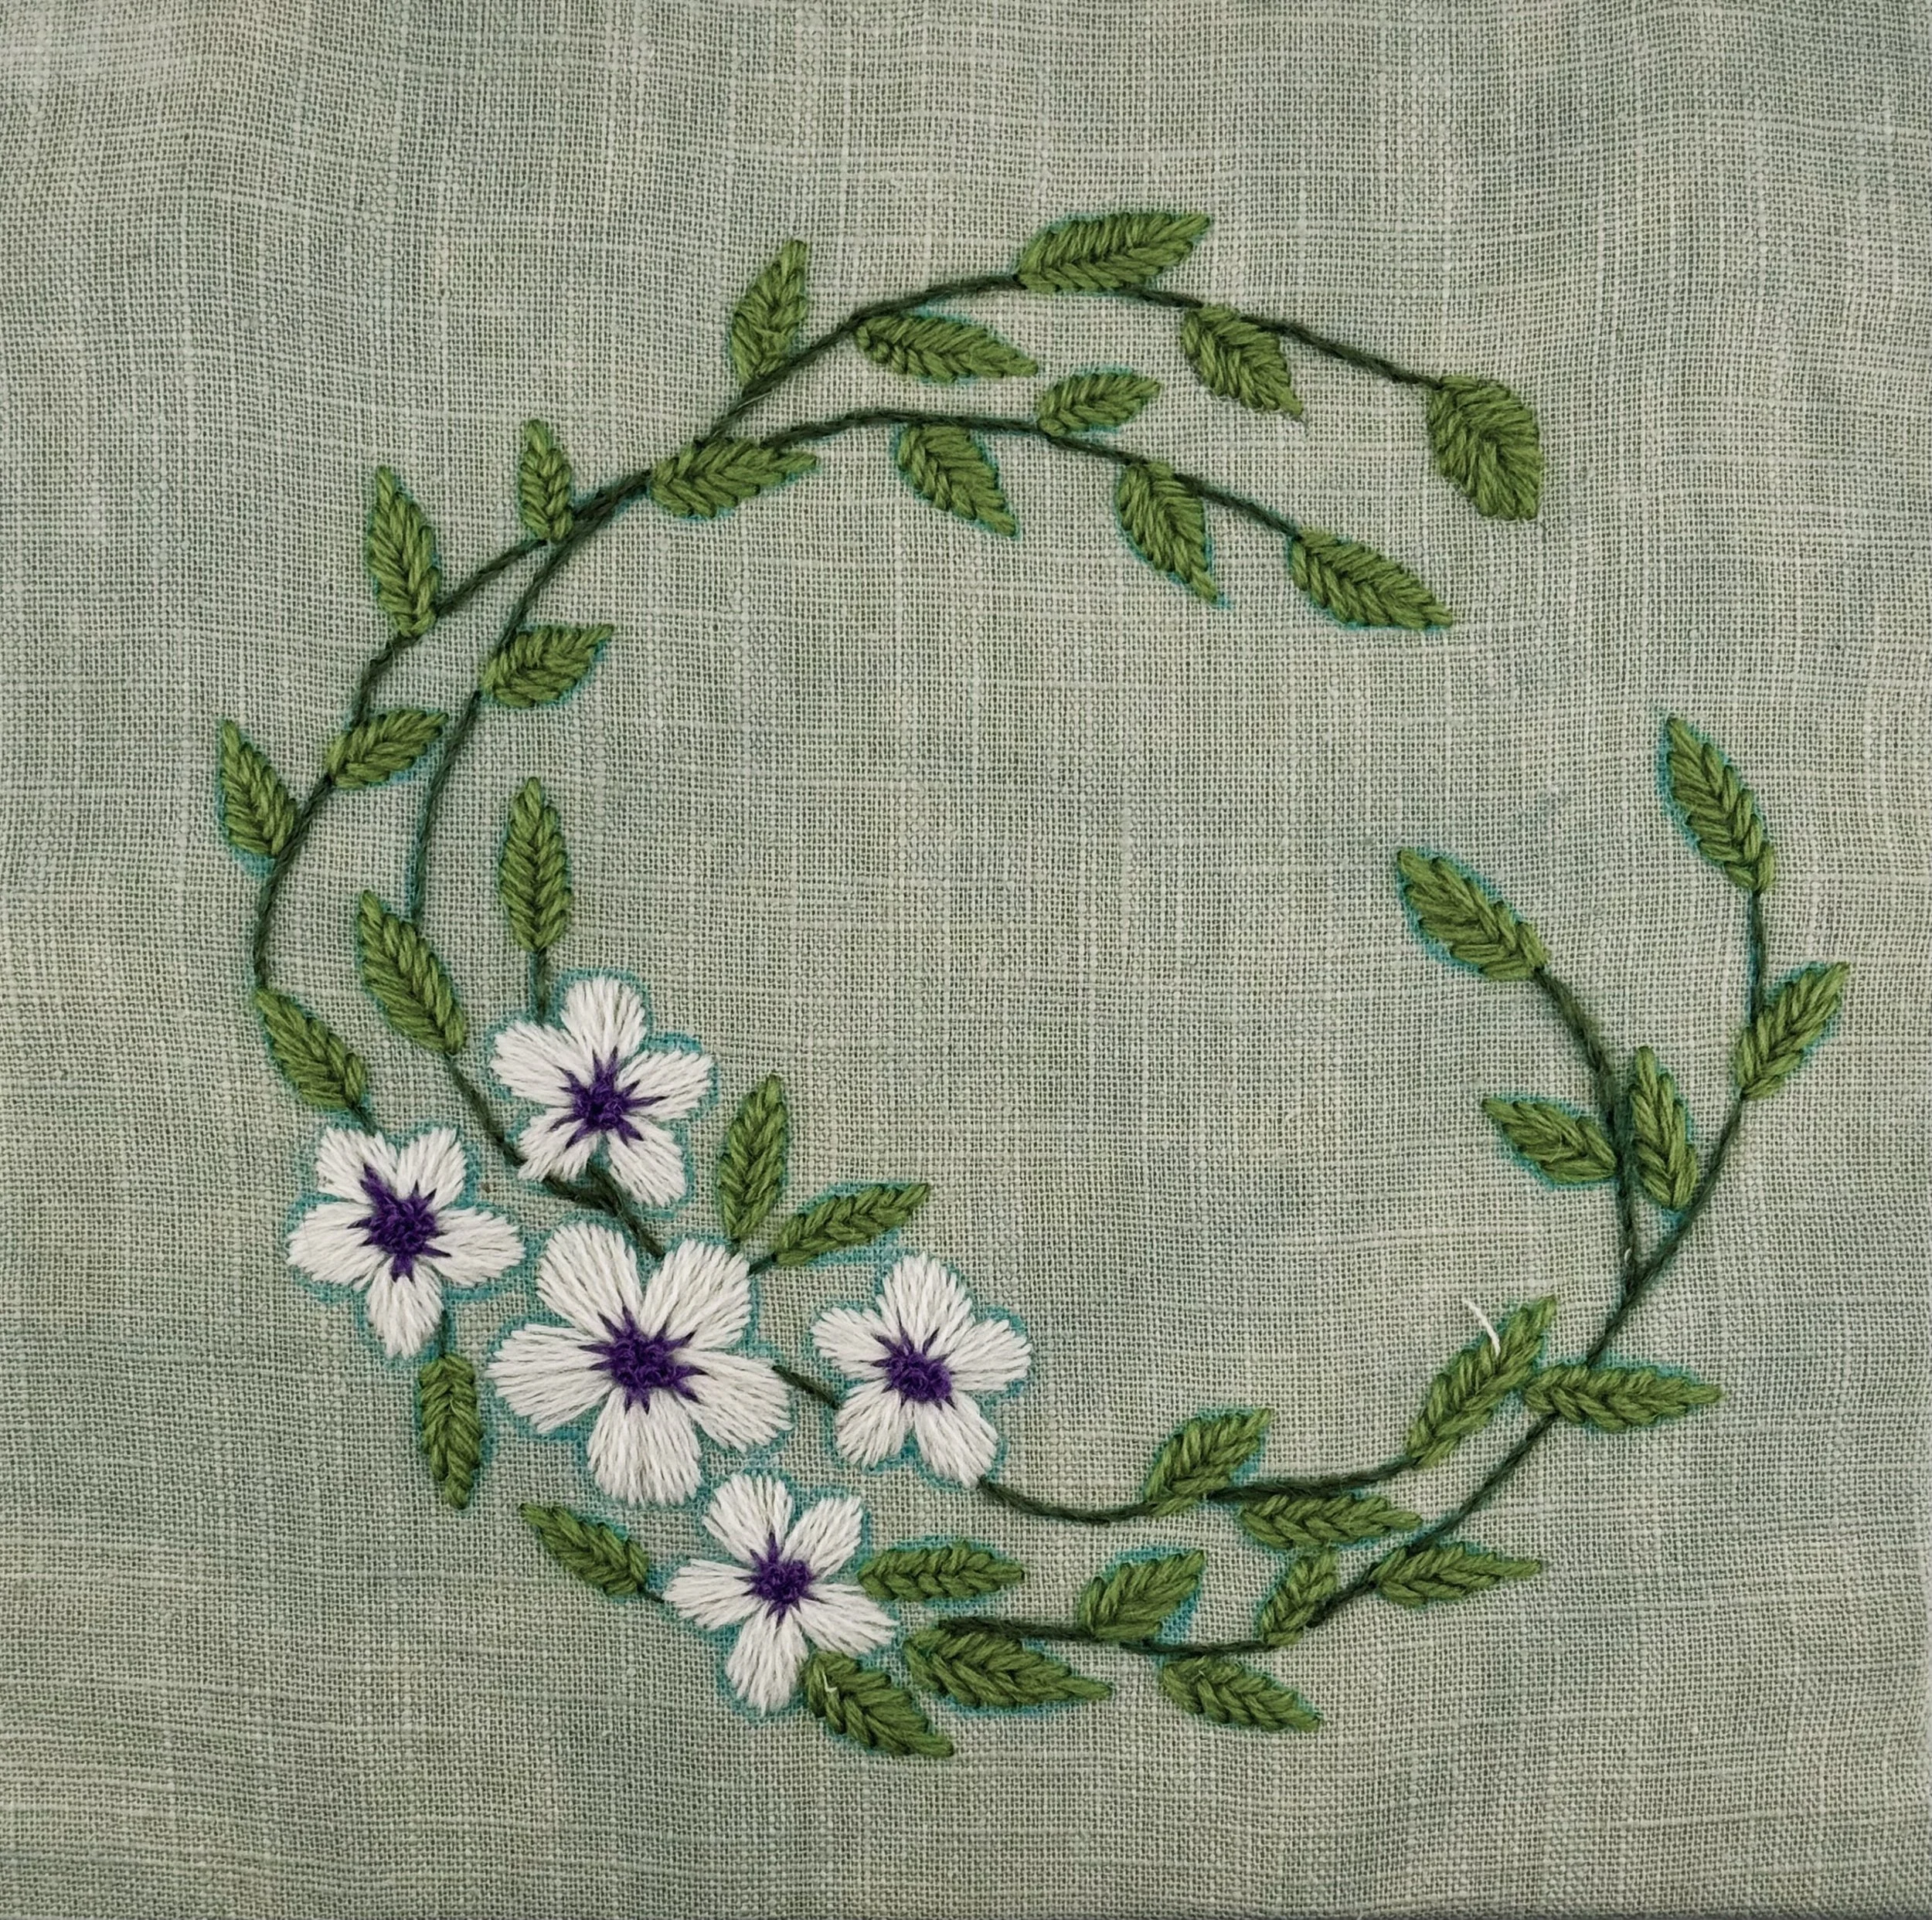
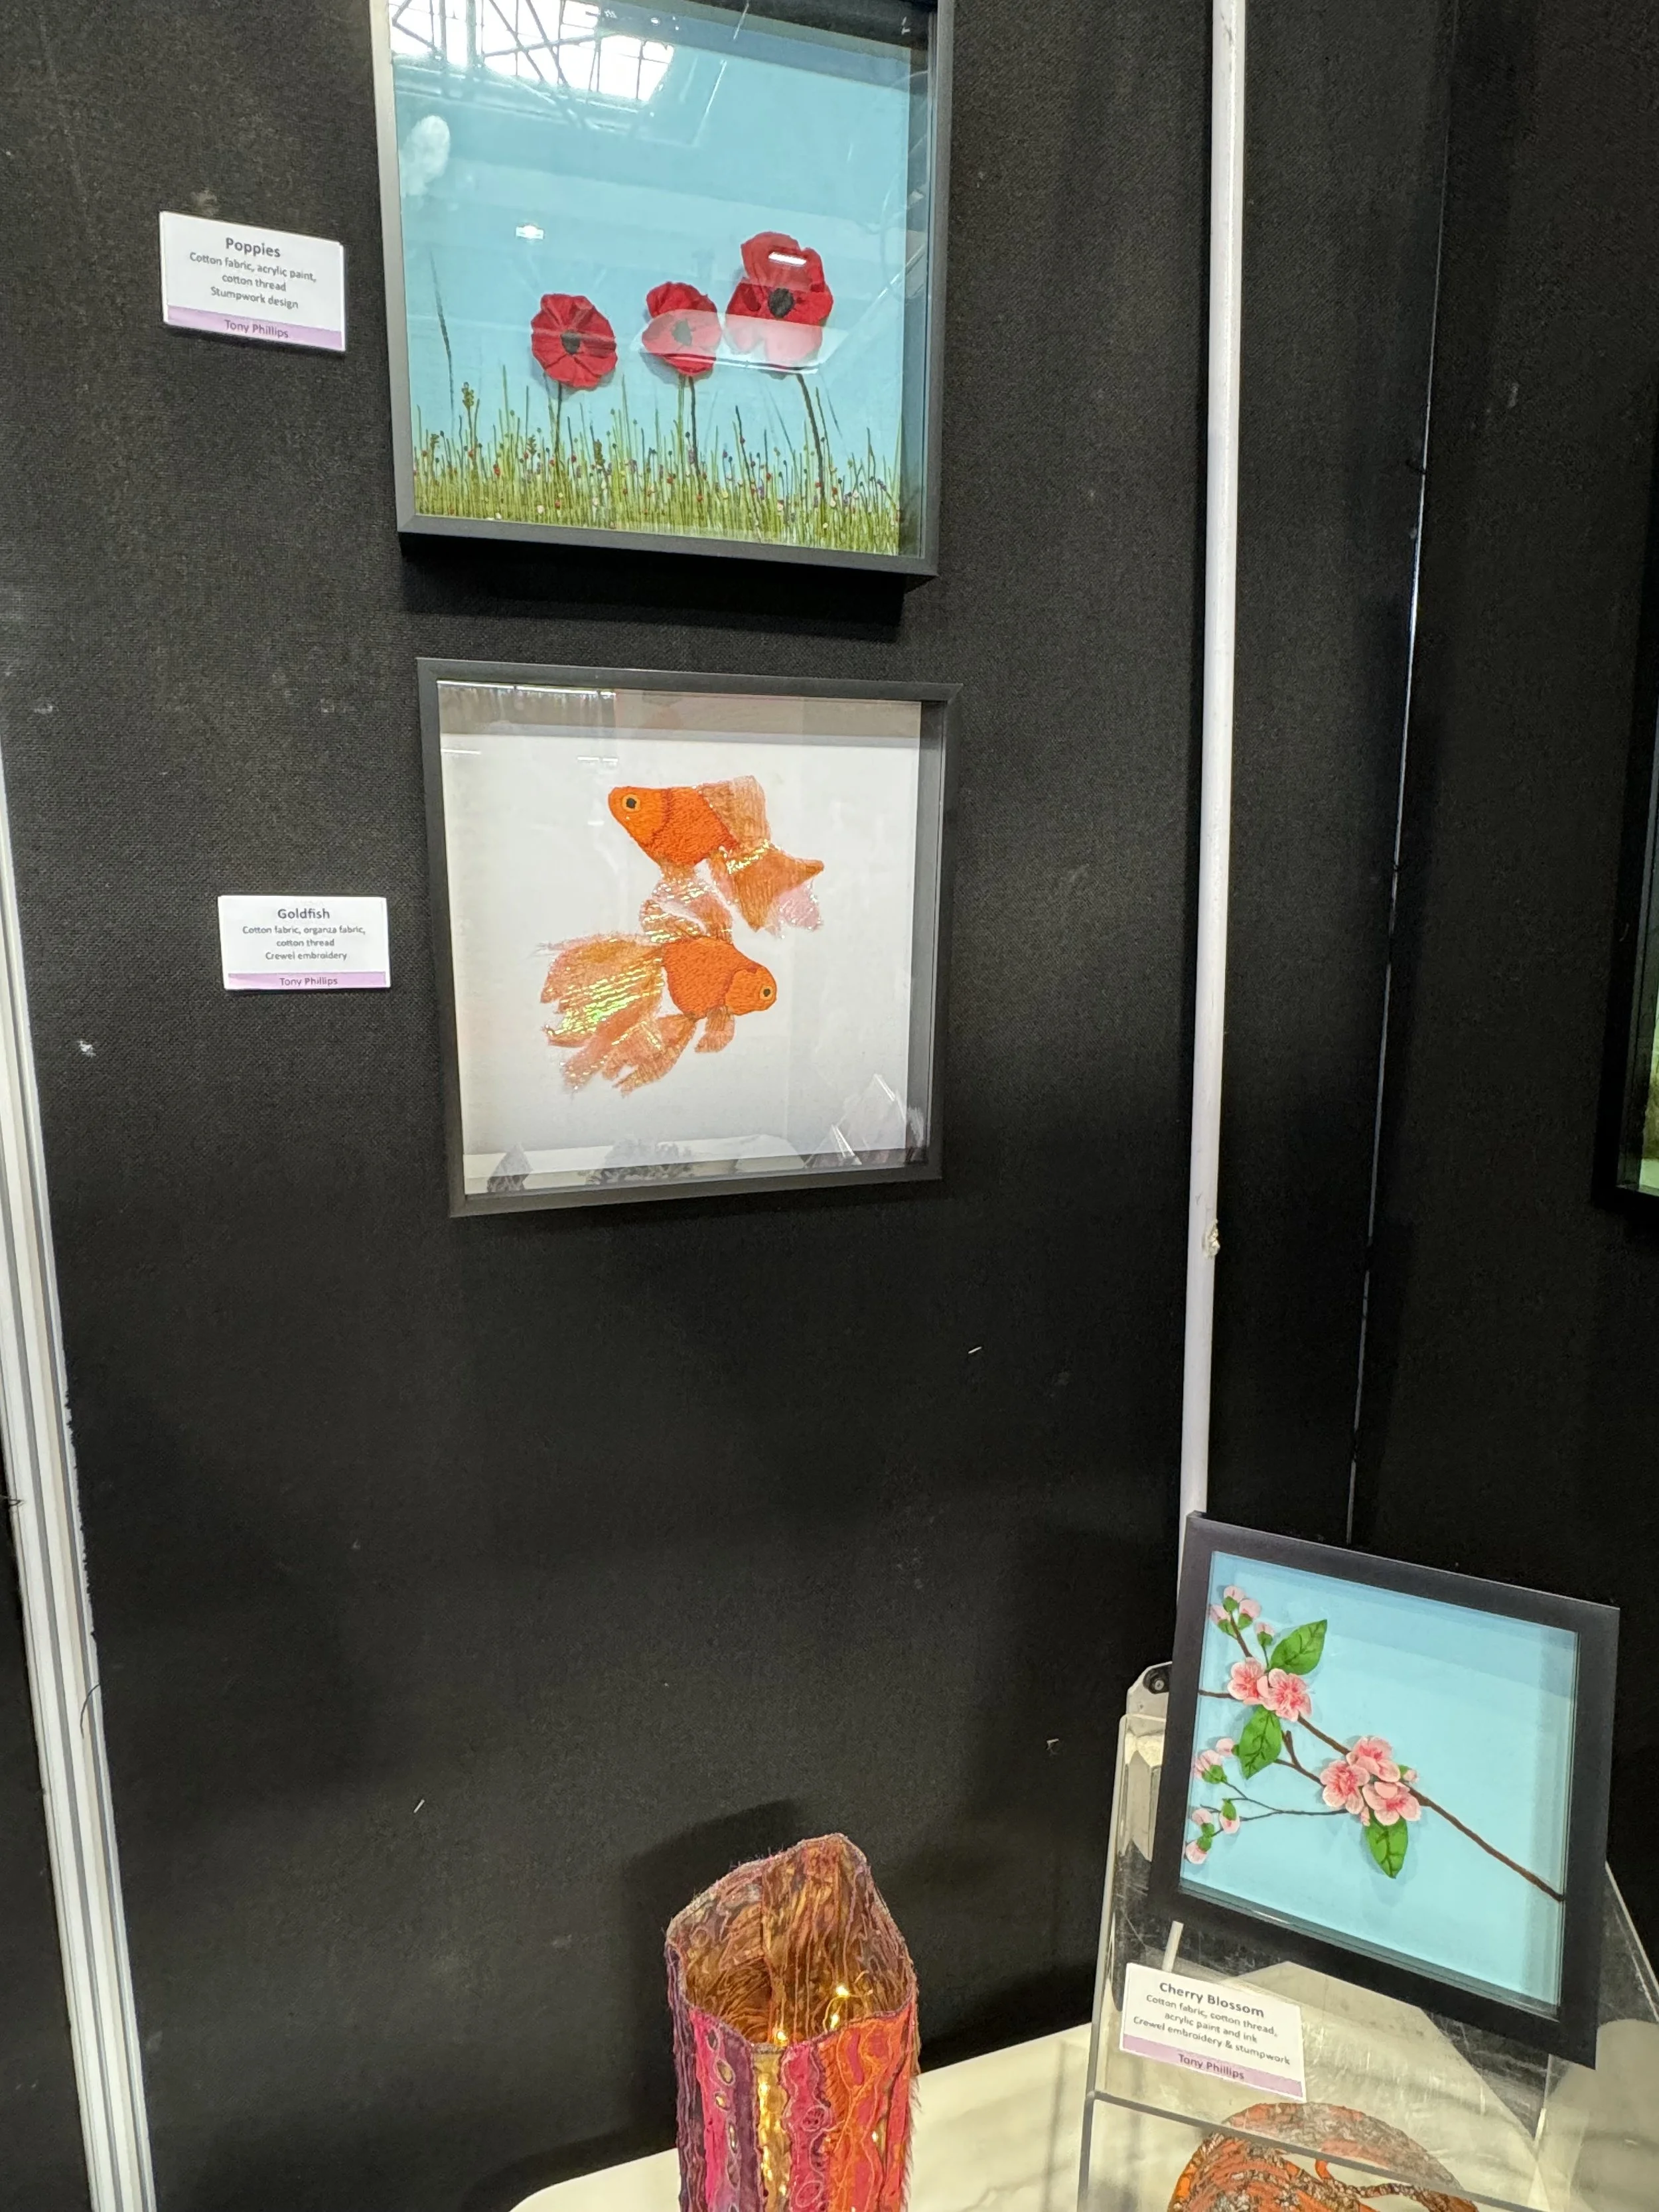
Popping Poppies
I’ve always loved poppies, mainly the kind that grow naturally in fields. Today there are many different types which as beautiful as they are, they don’t hold the same meaning to me.
obviously the poppies found wild in fields symbolise both world wars, which I admit I am obsessed with. It just grows anywhere and makes a boring meadow or fallow field into something truly beautiful, those small pops of red are just striking.
this new piece I have created is a stylised poppy field image that I hope emulates what I mean. Using a series of stem stitch and straight stitch to create a hay field, dotted with French knot coloured “flowers”. I’ve created poppies using cotton fabric, stiffened with Aleenes fabric stiffener, stitched in the centre with dozens of black French knots. I really hope you all like it.
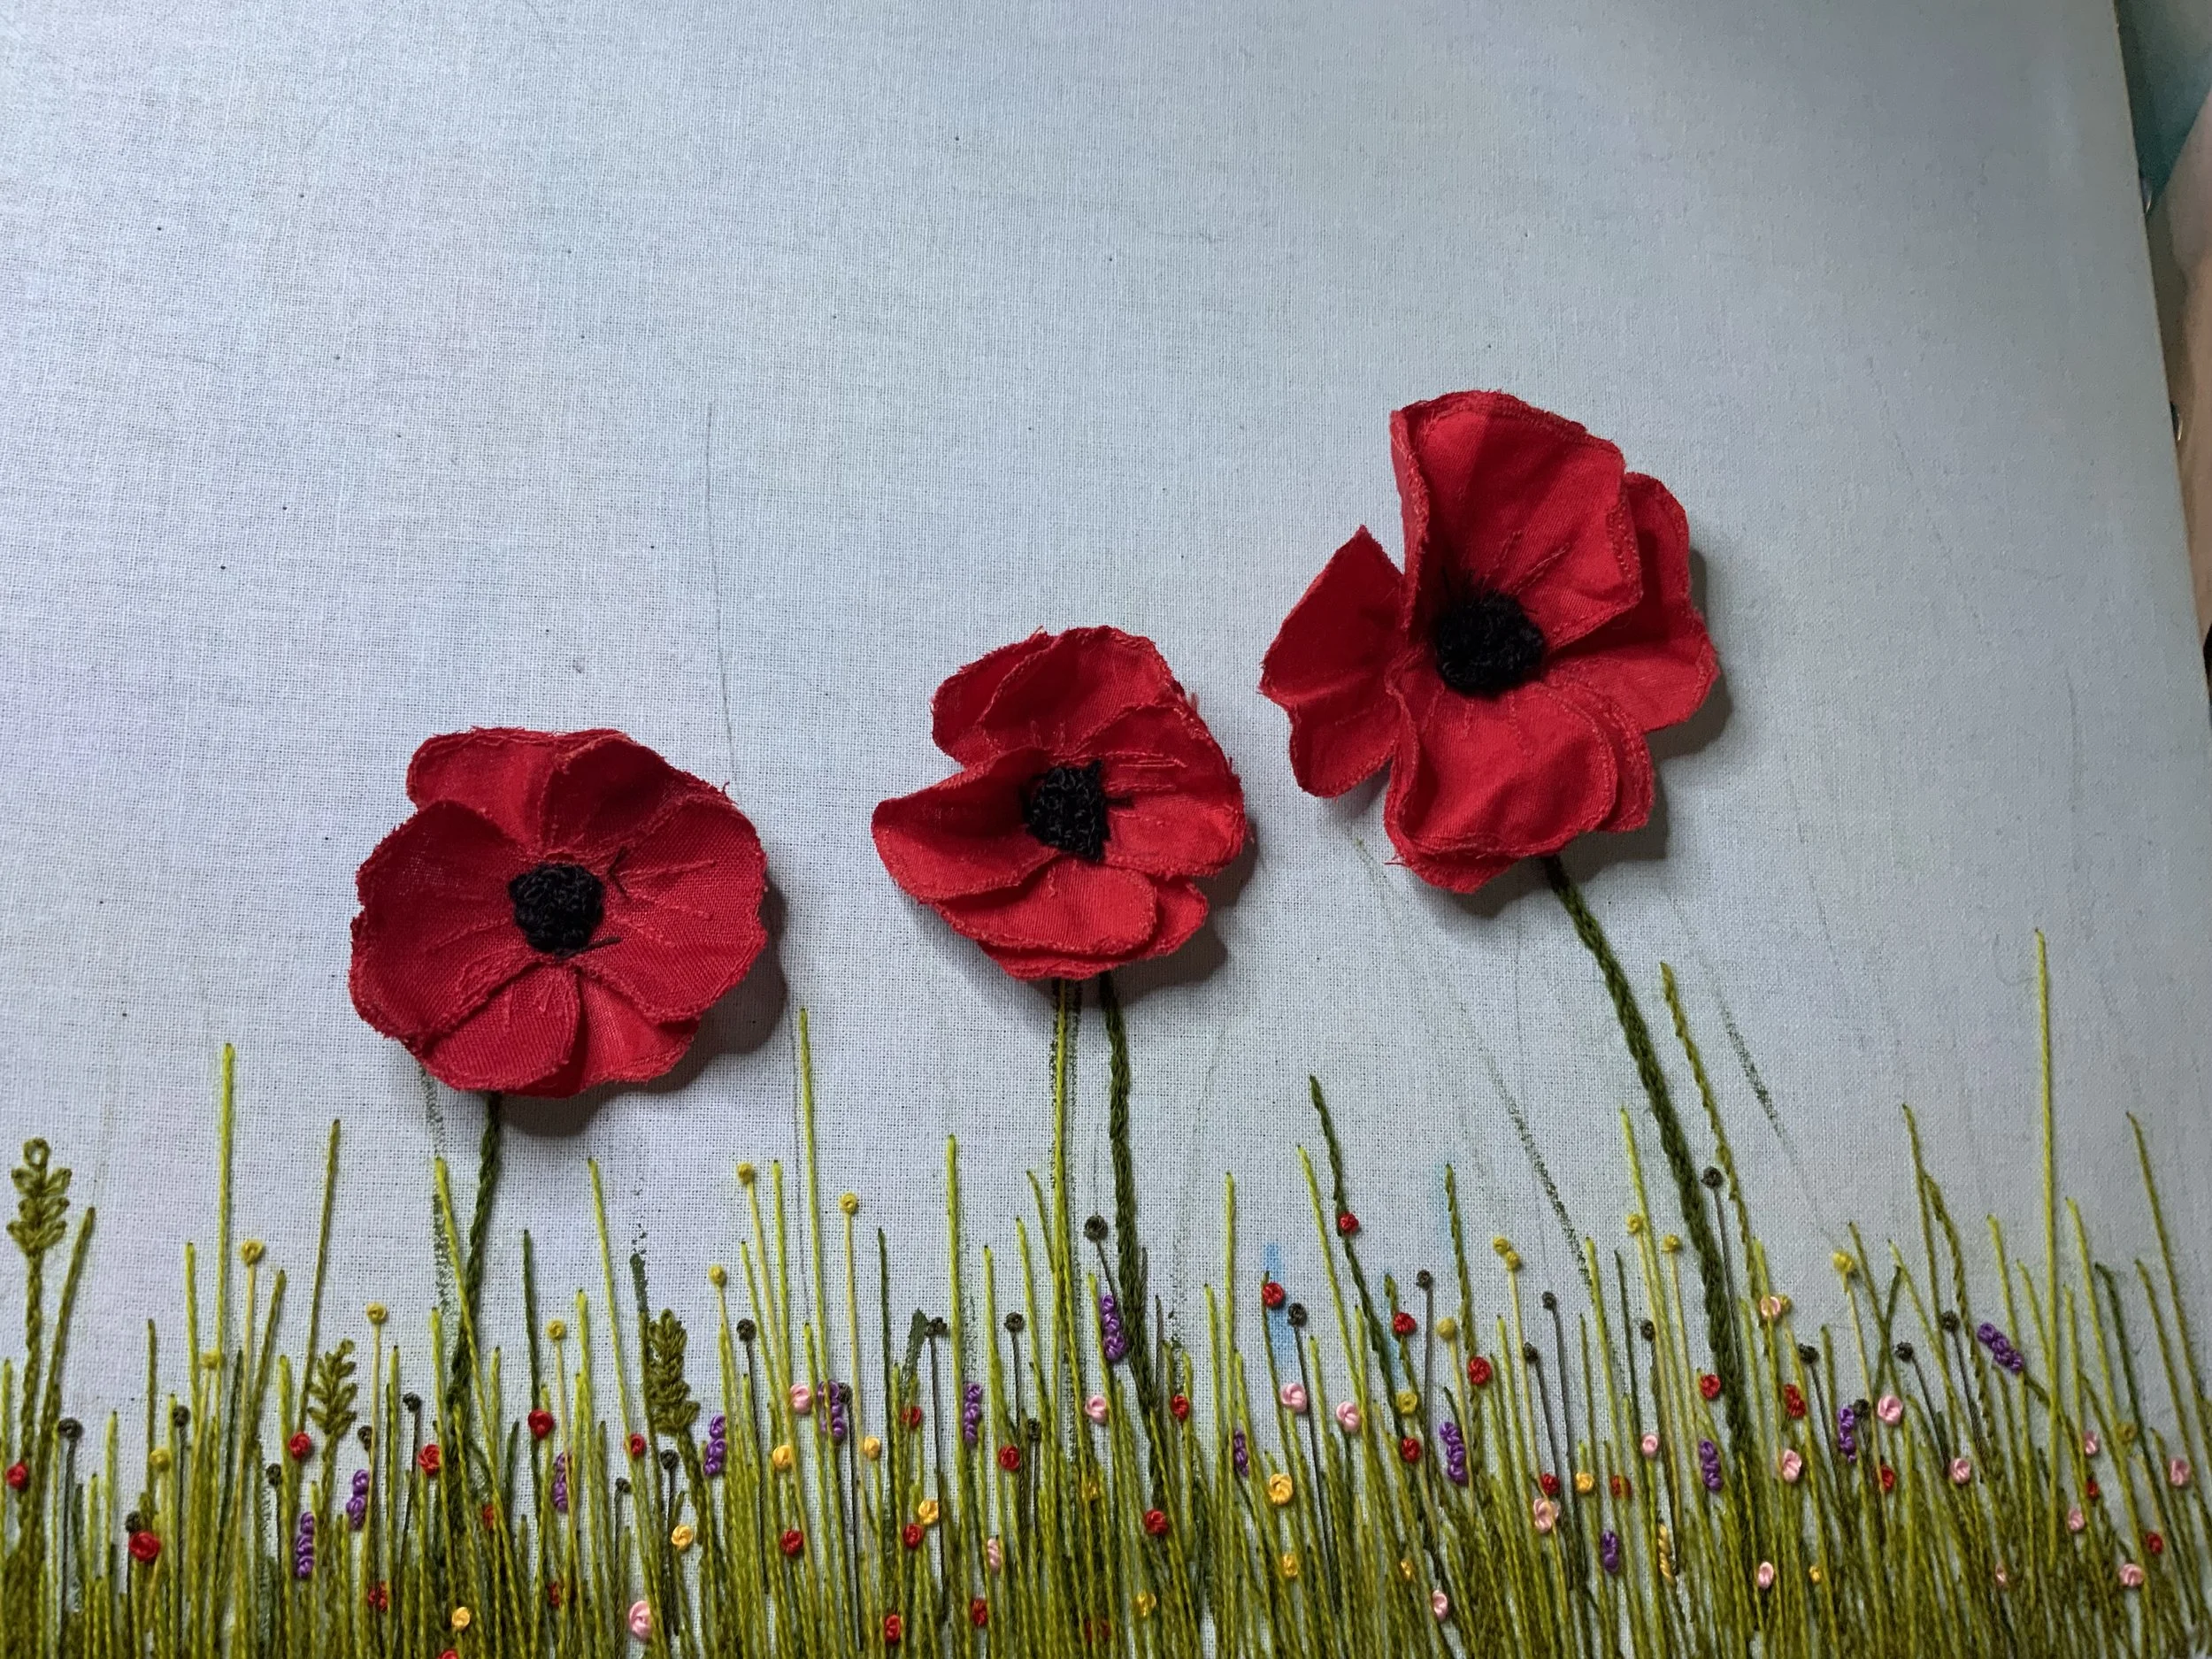
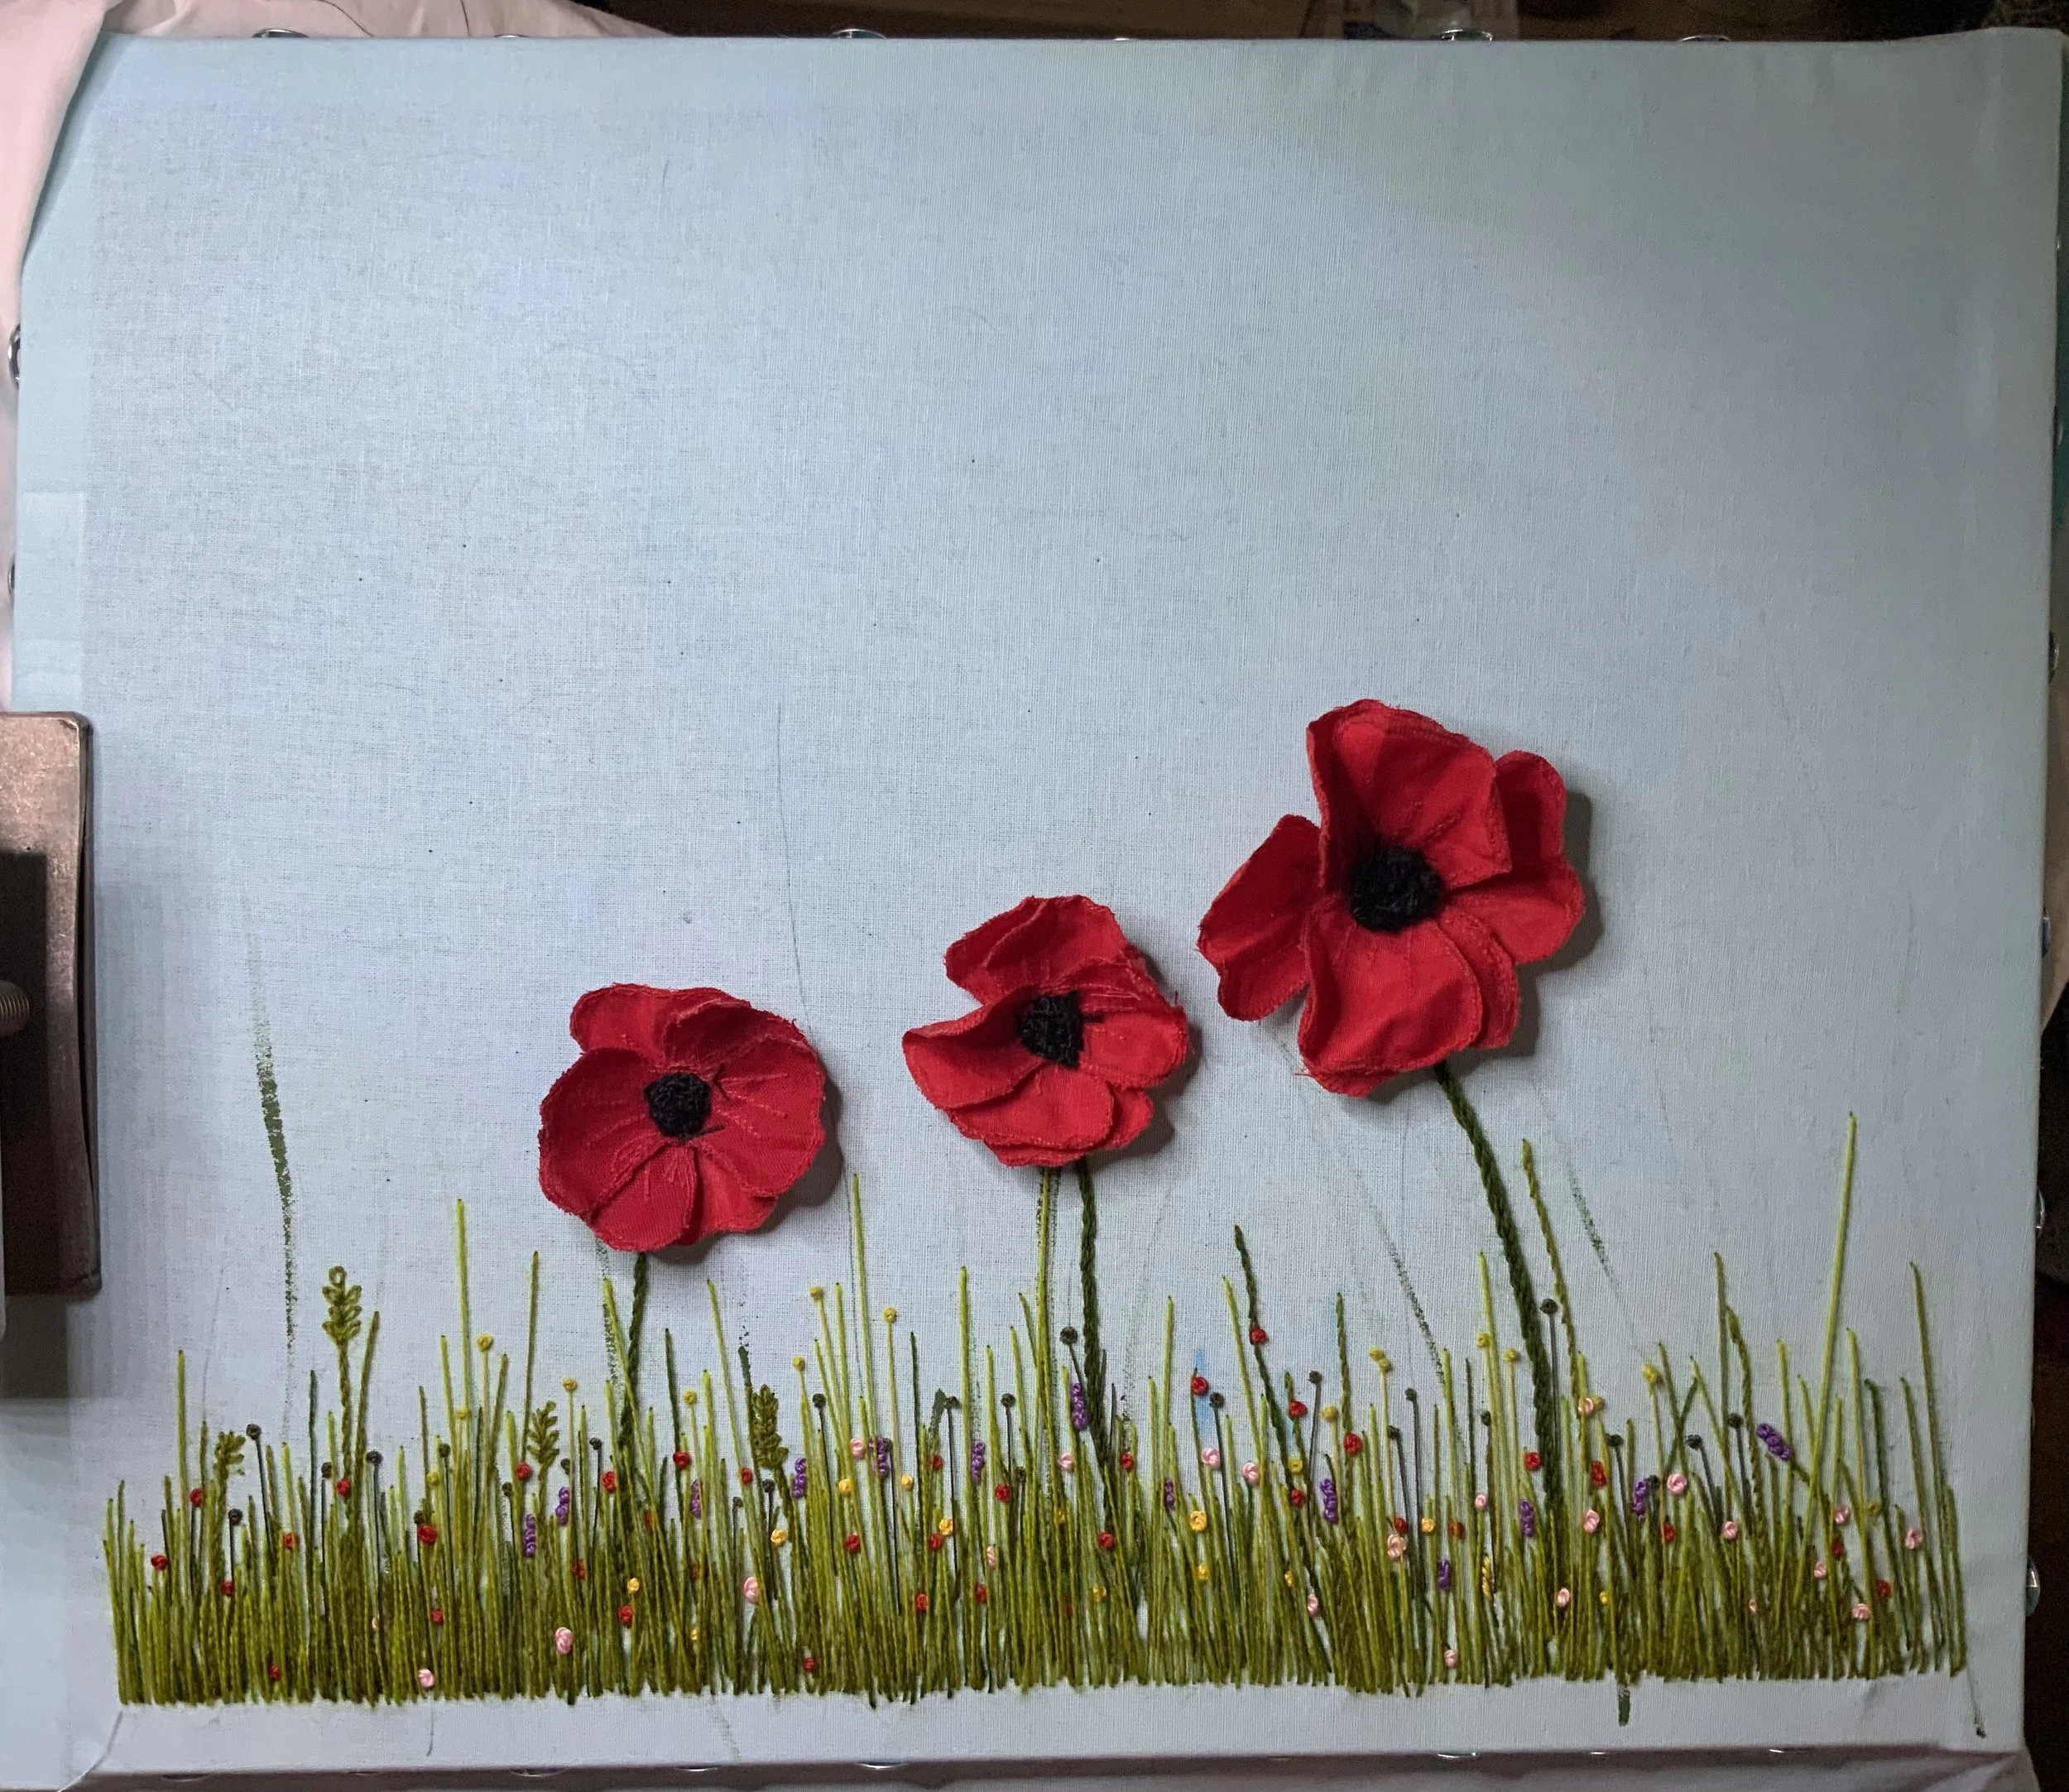
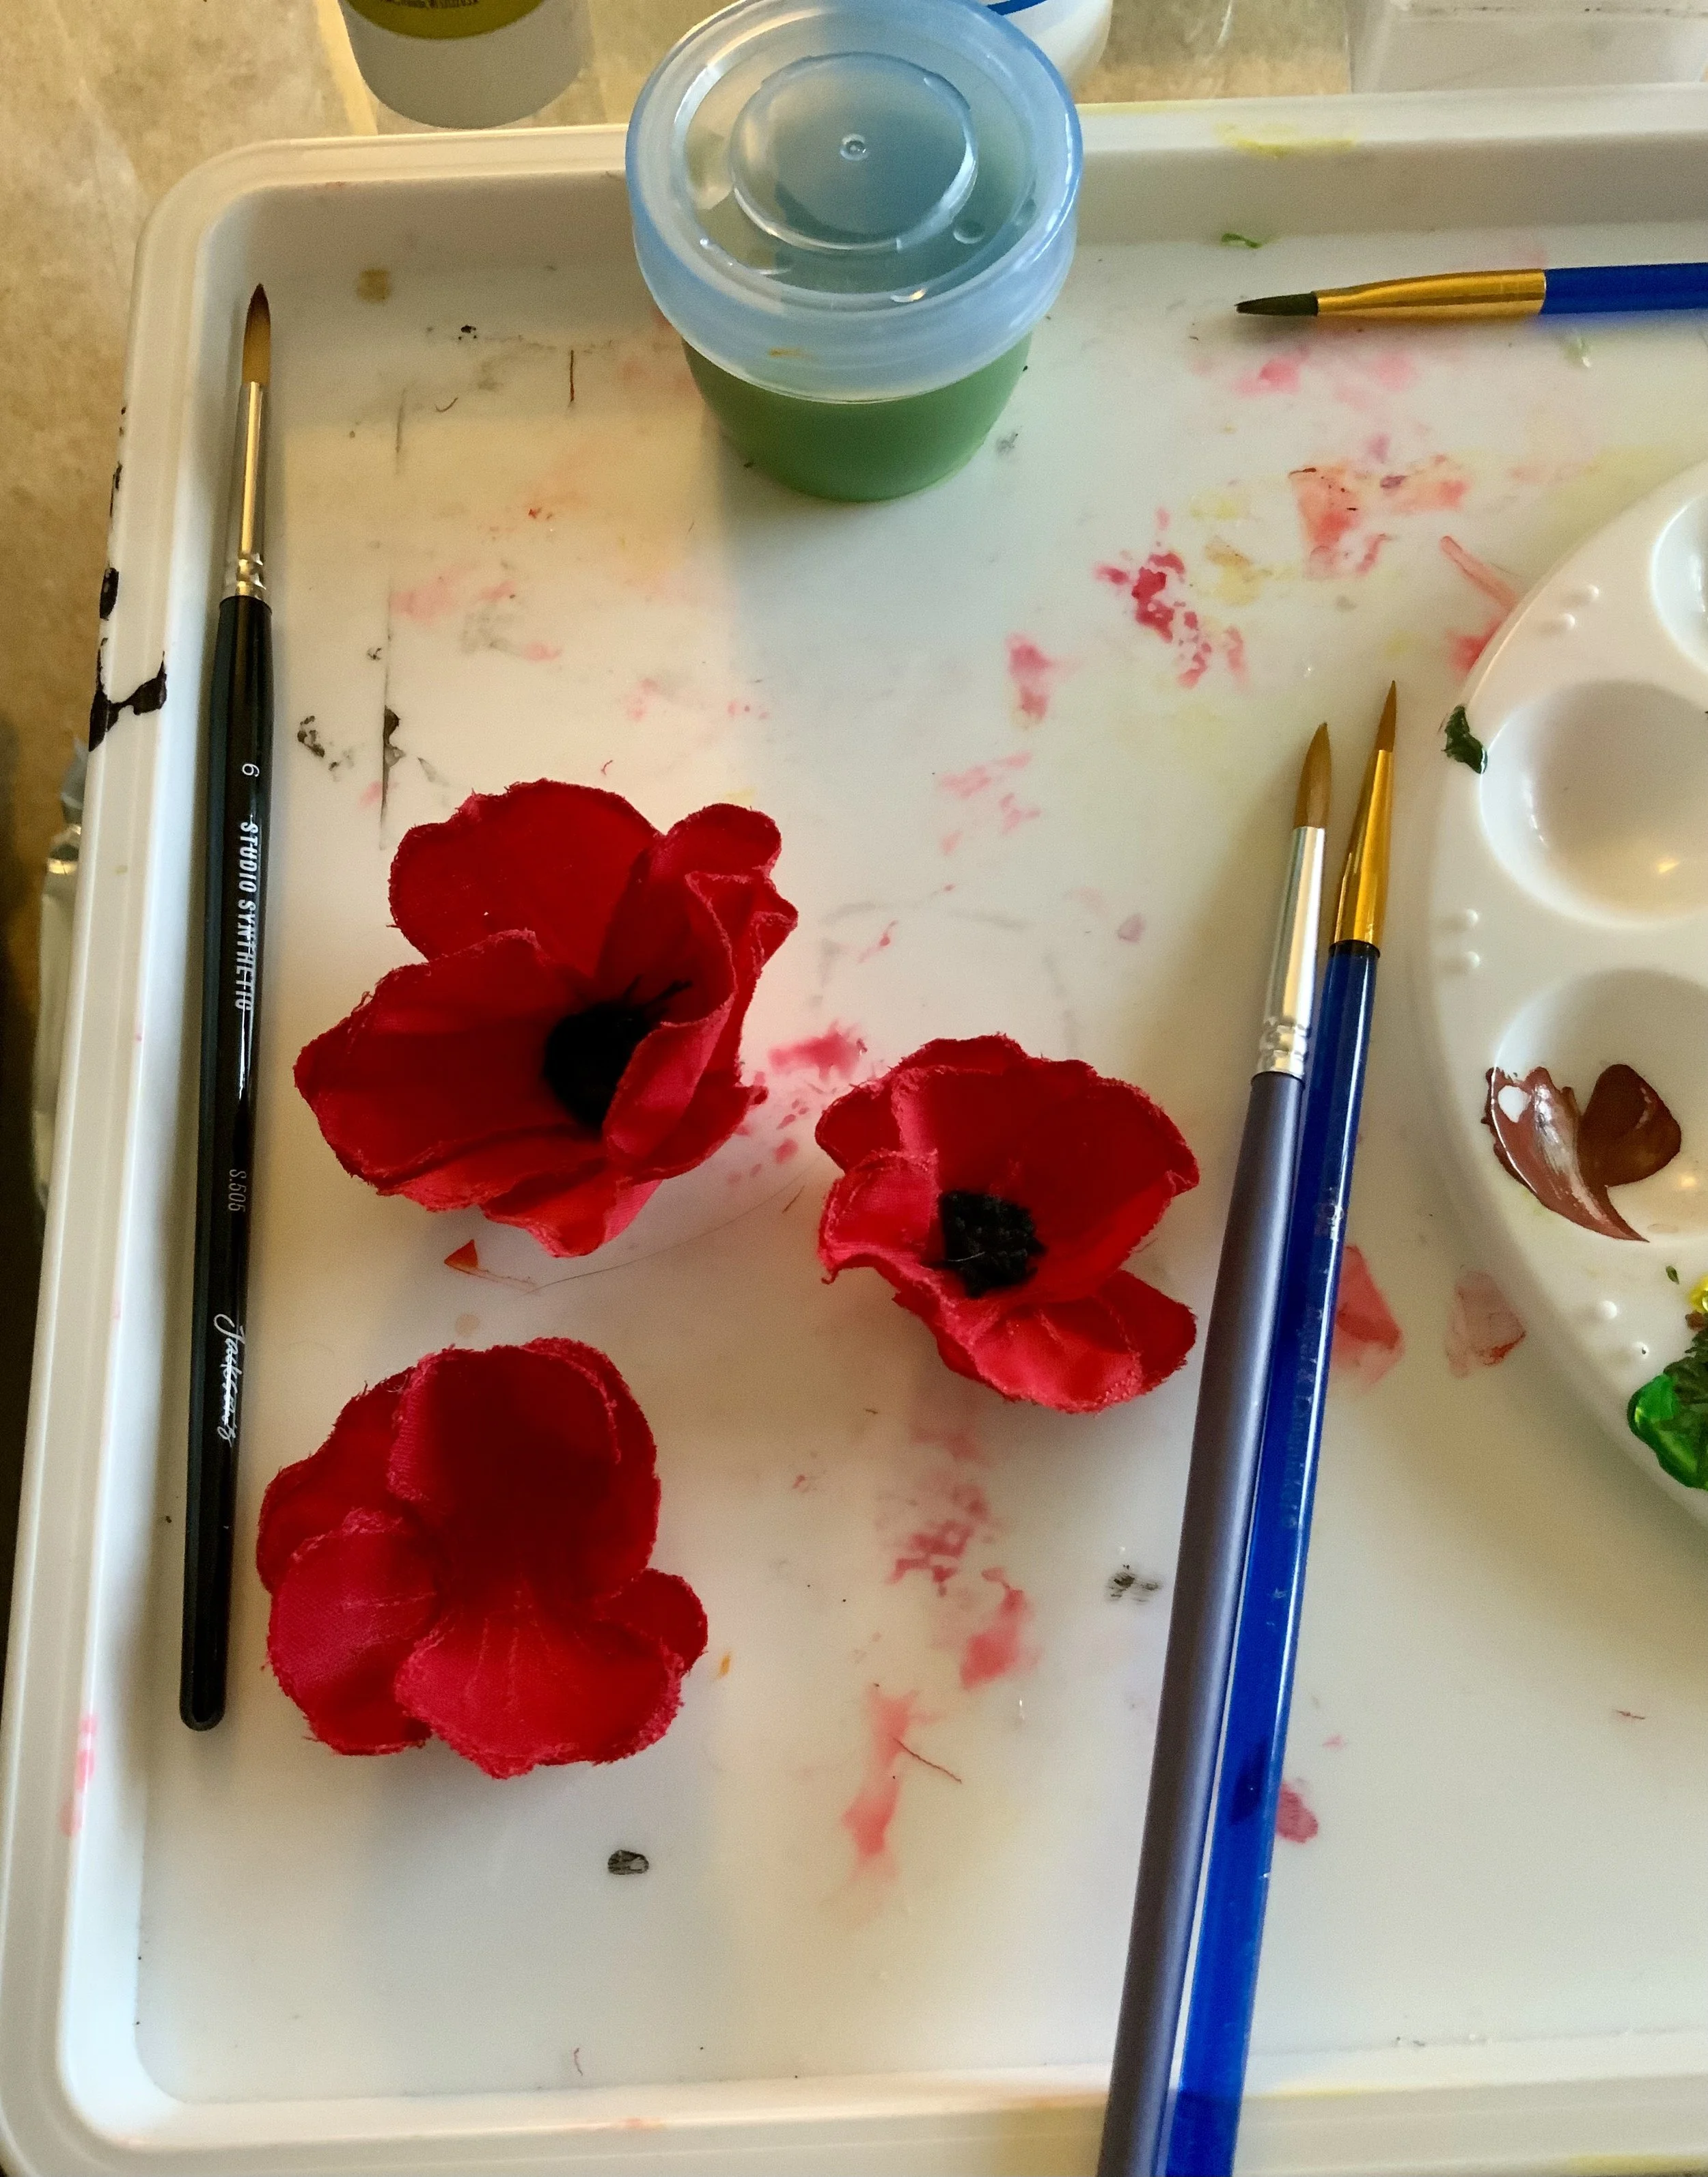

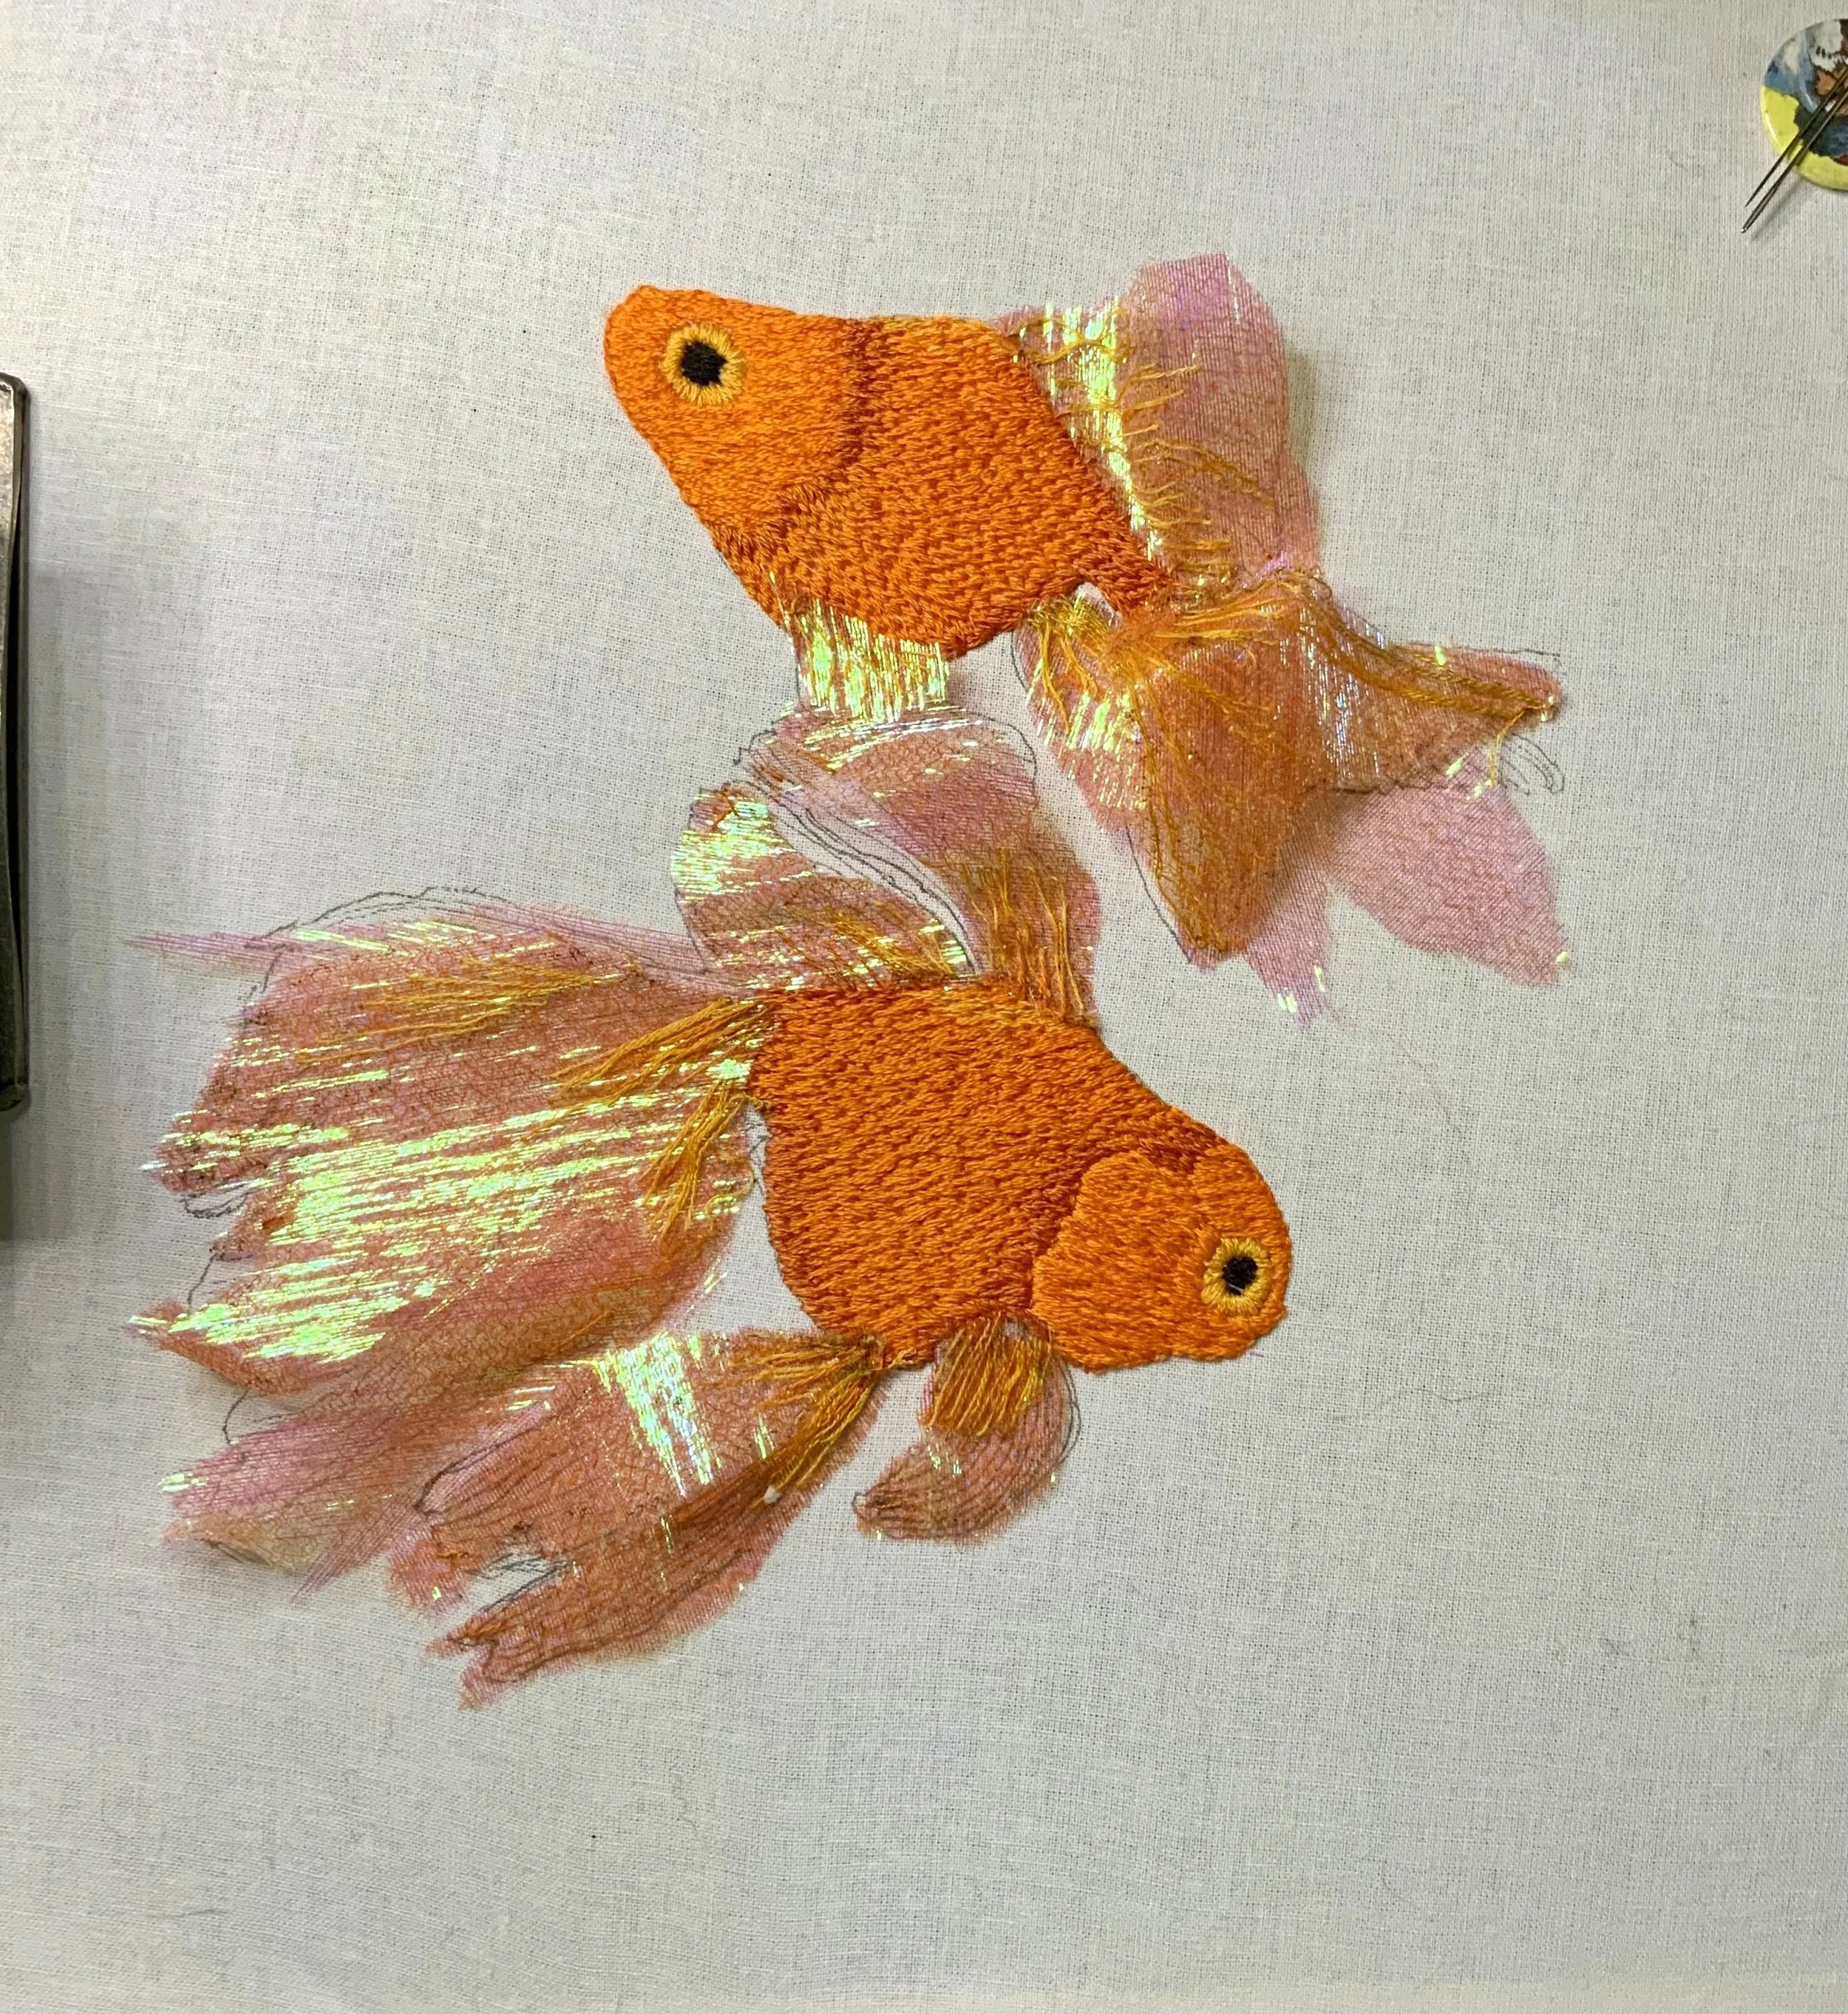
Fishy Art
I love fish, more specifically aquarium fish, so after my last projects all being floral, I thought my next would be animals.
I found the orange crystal organza and knew exactly what I was going to do, it was made for being the fins of a goldfish, so after sketching out the fish I started the crewel work.
Using paintbox cotton threads and loads of short stitches this is the final piece, as you can see the organza really did need to be fins, in my opinion it looks stunning. I am considering turning this into a kit, would you be interested?

Fashion & Embroidery Show
It all begins with an idea.

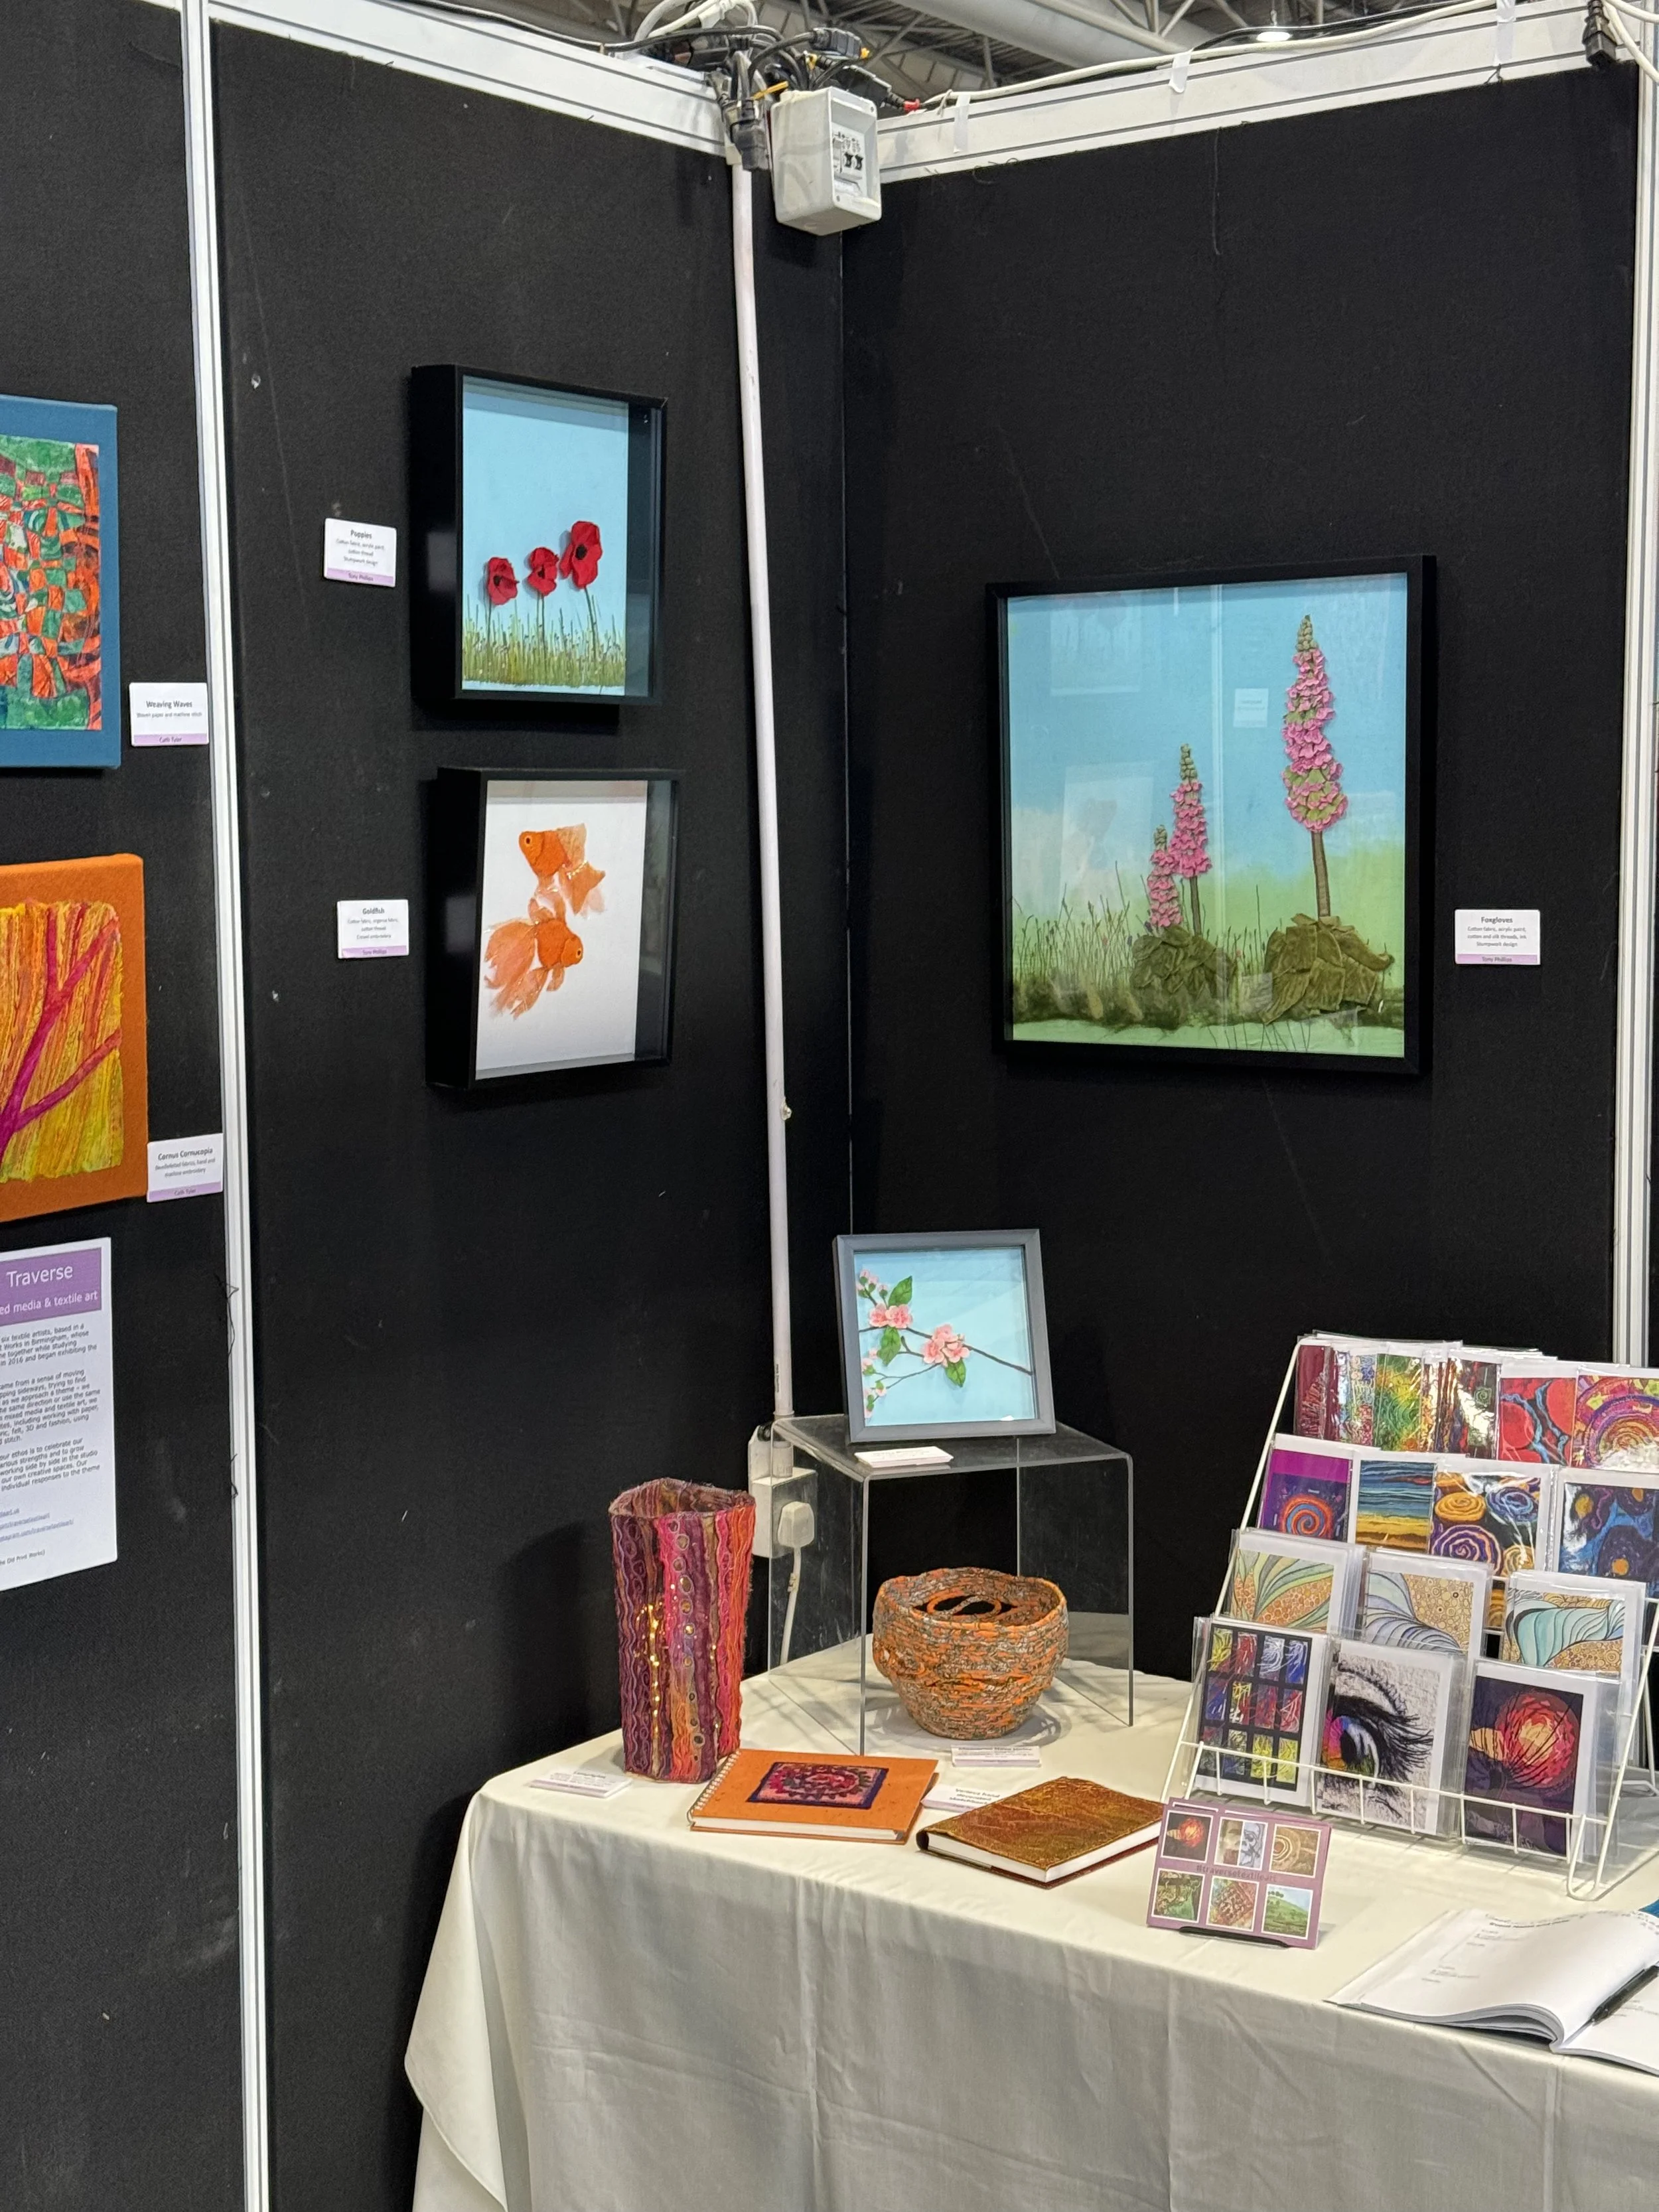

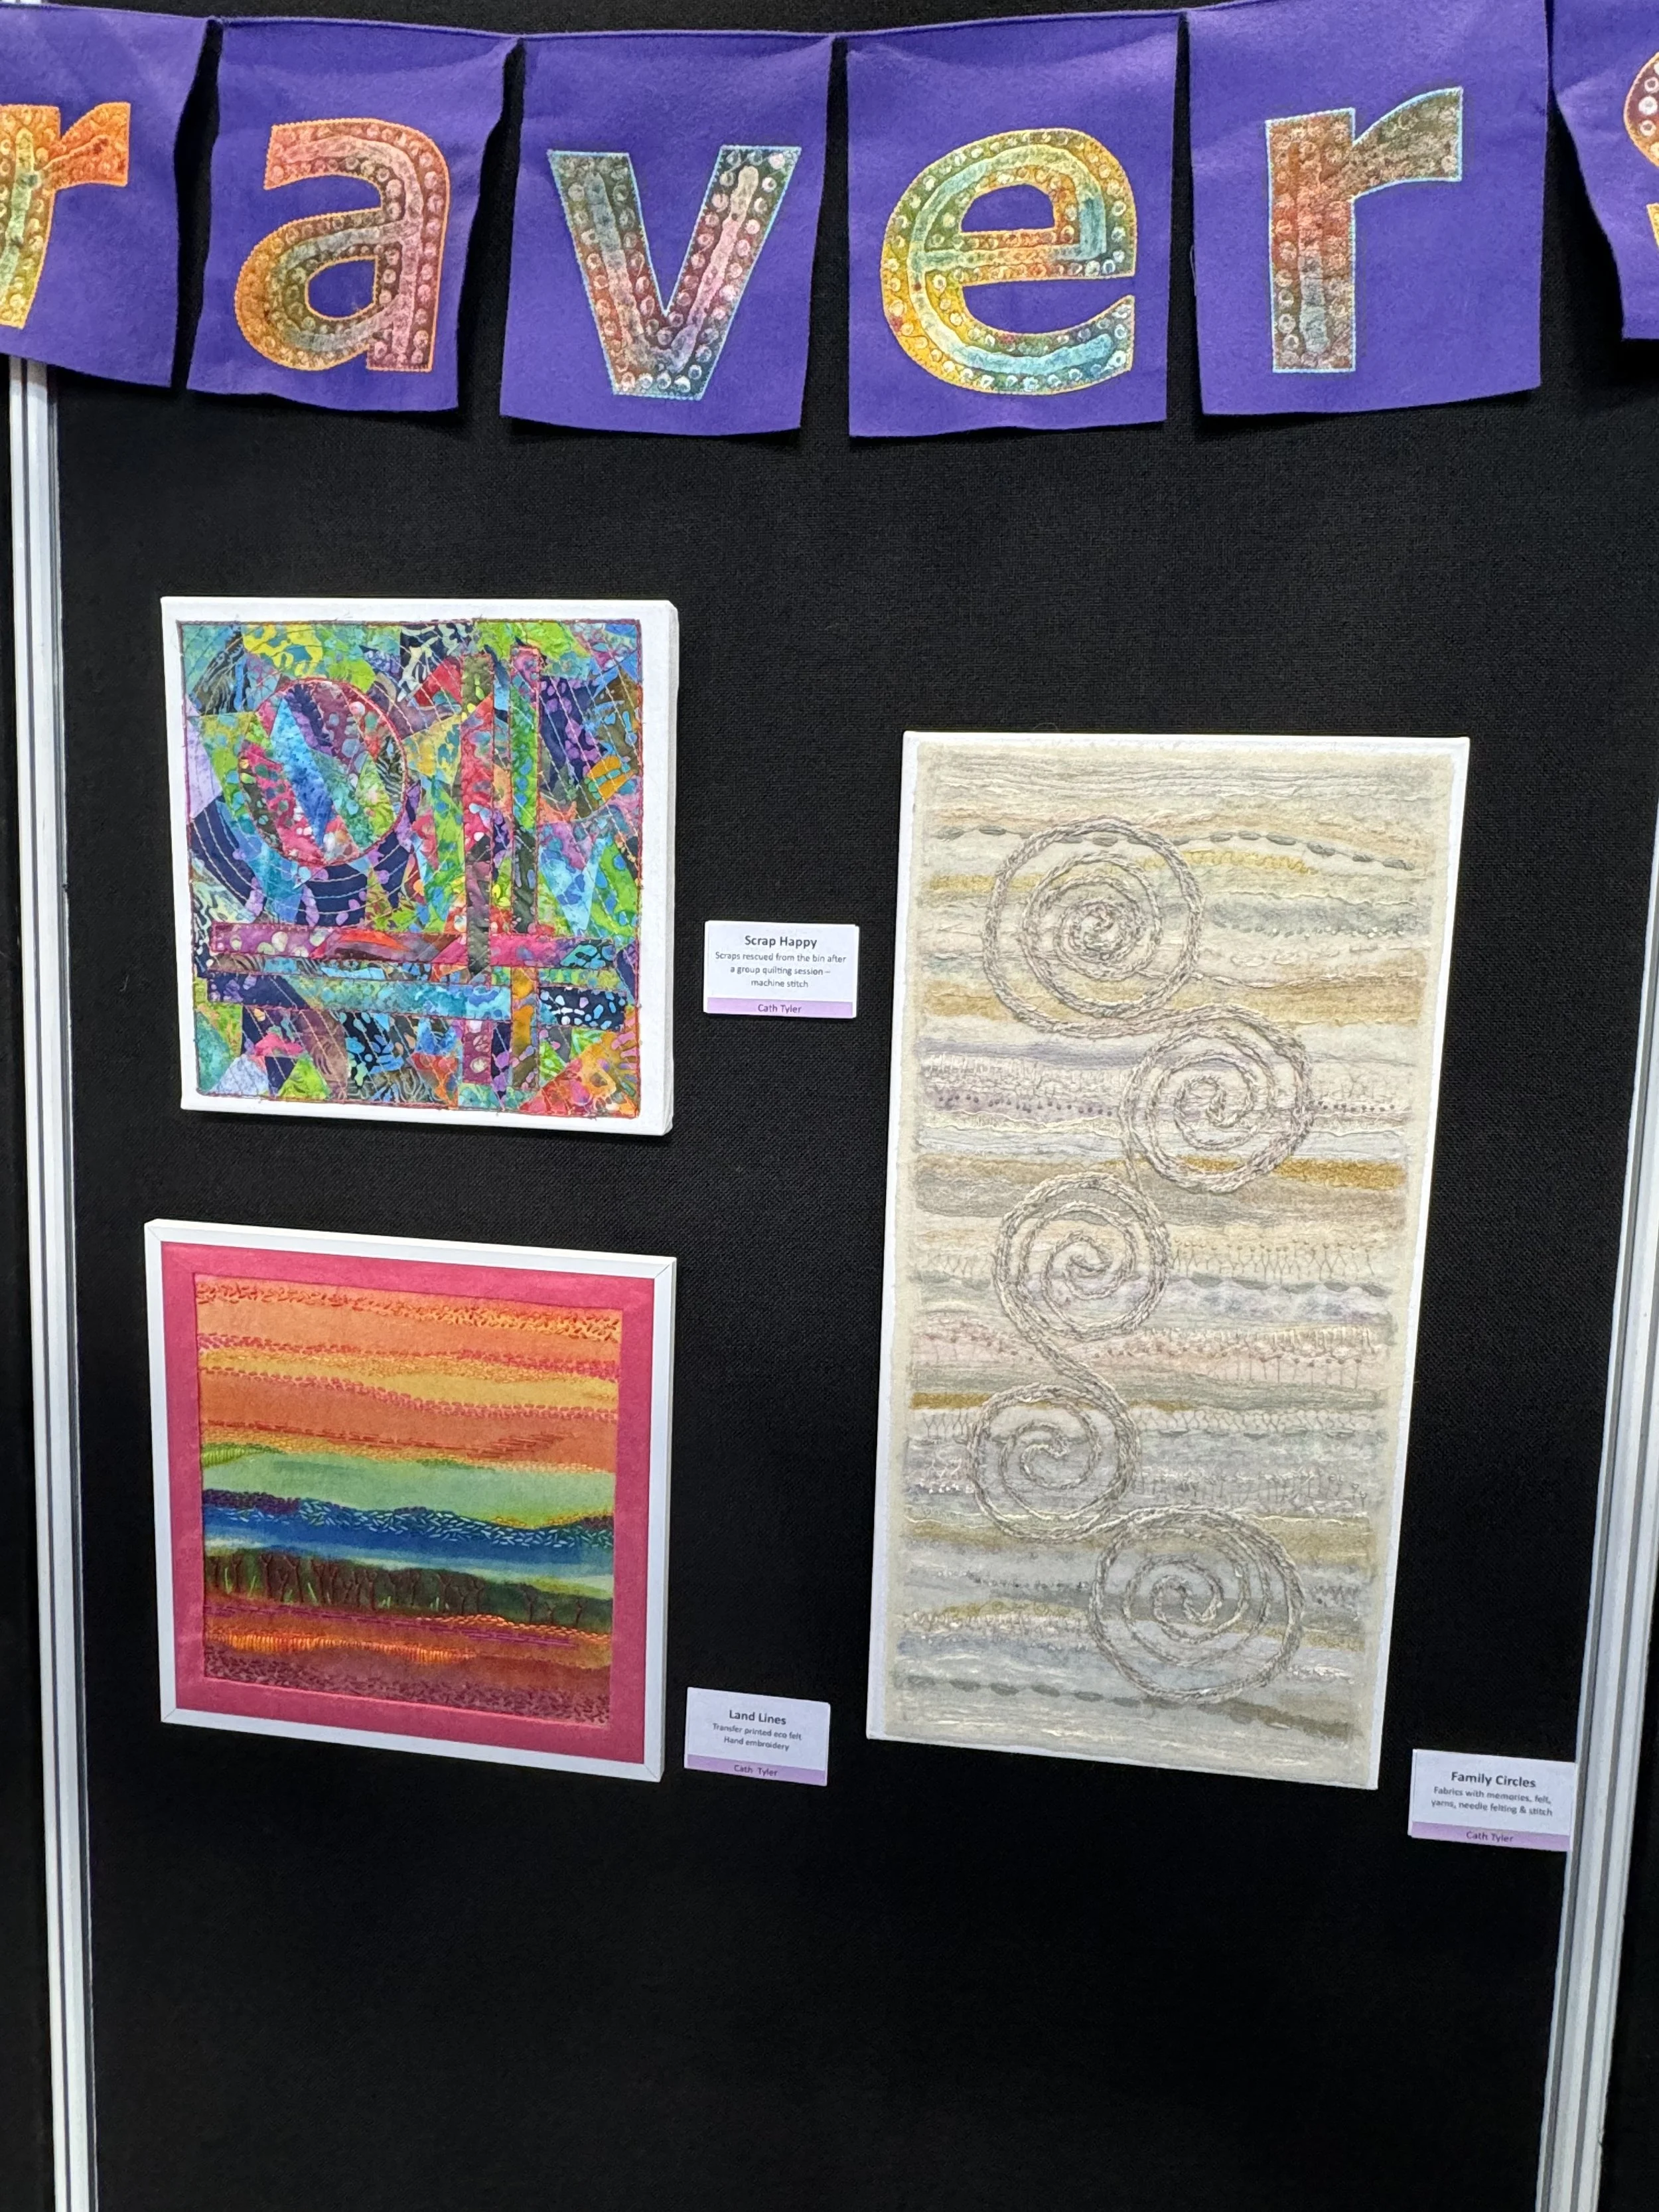
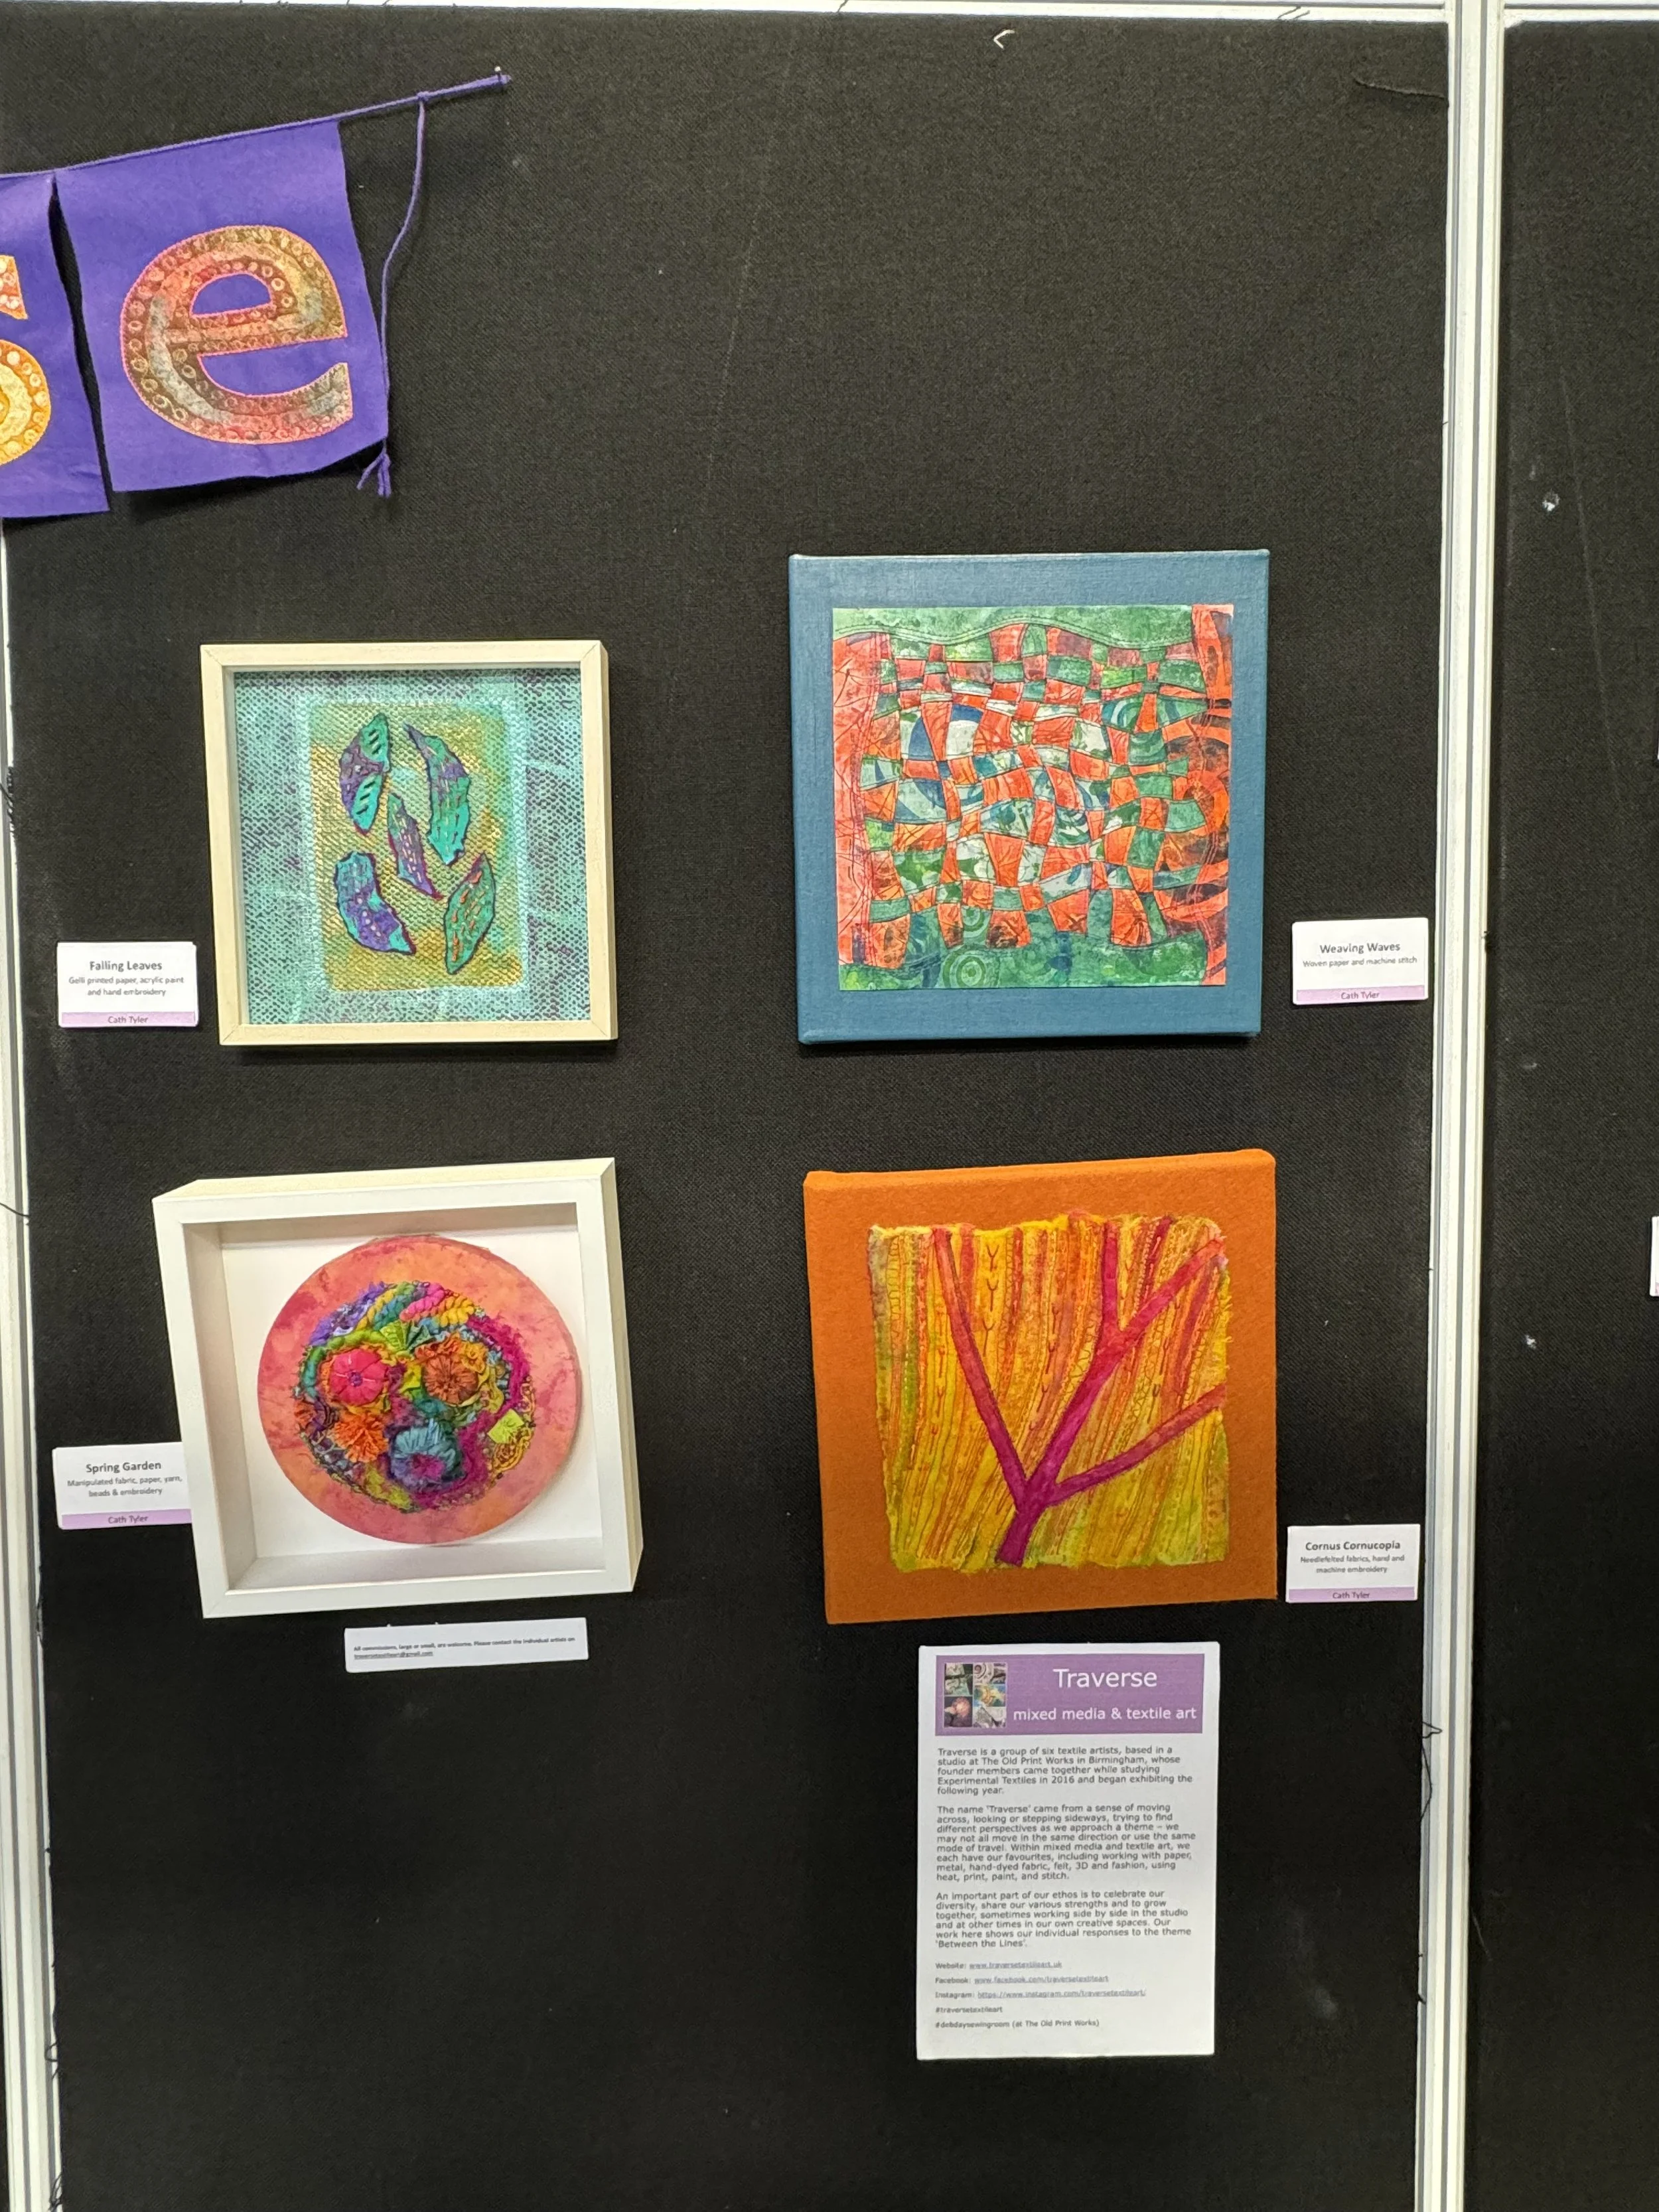

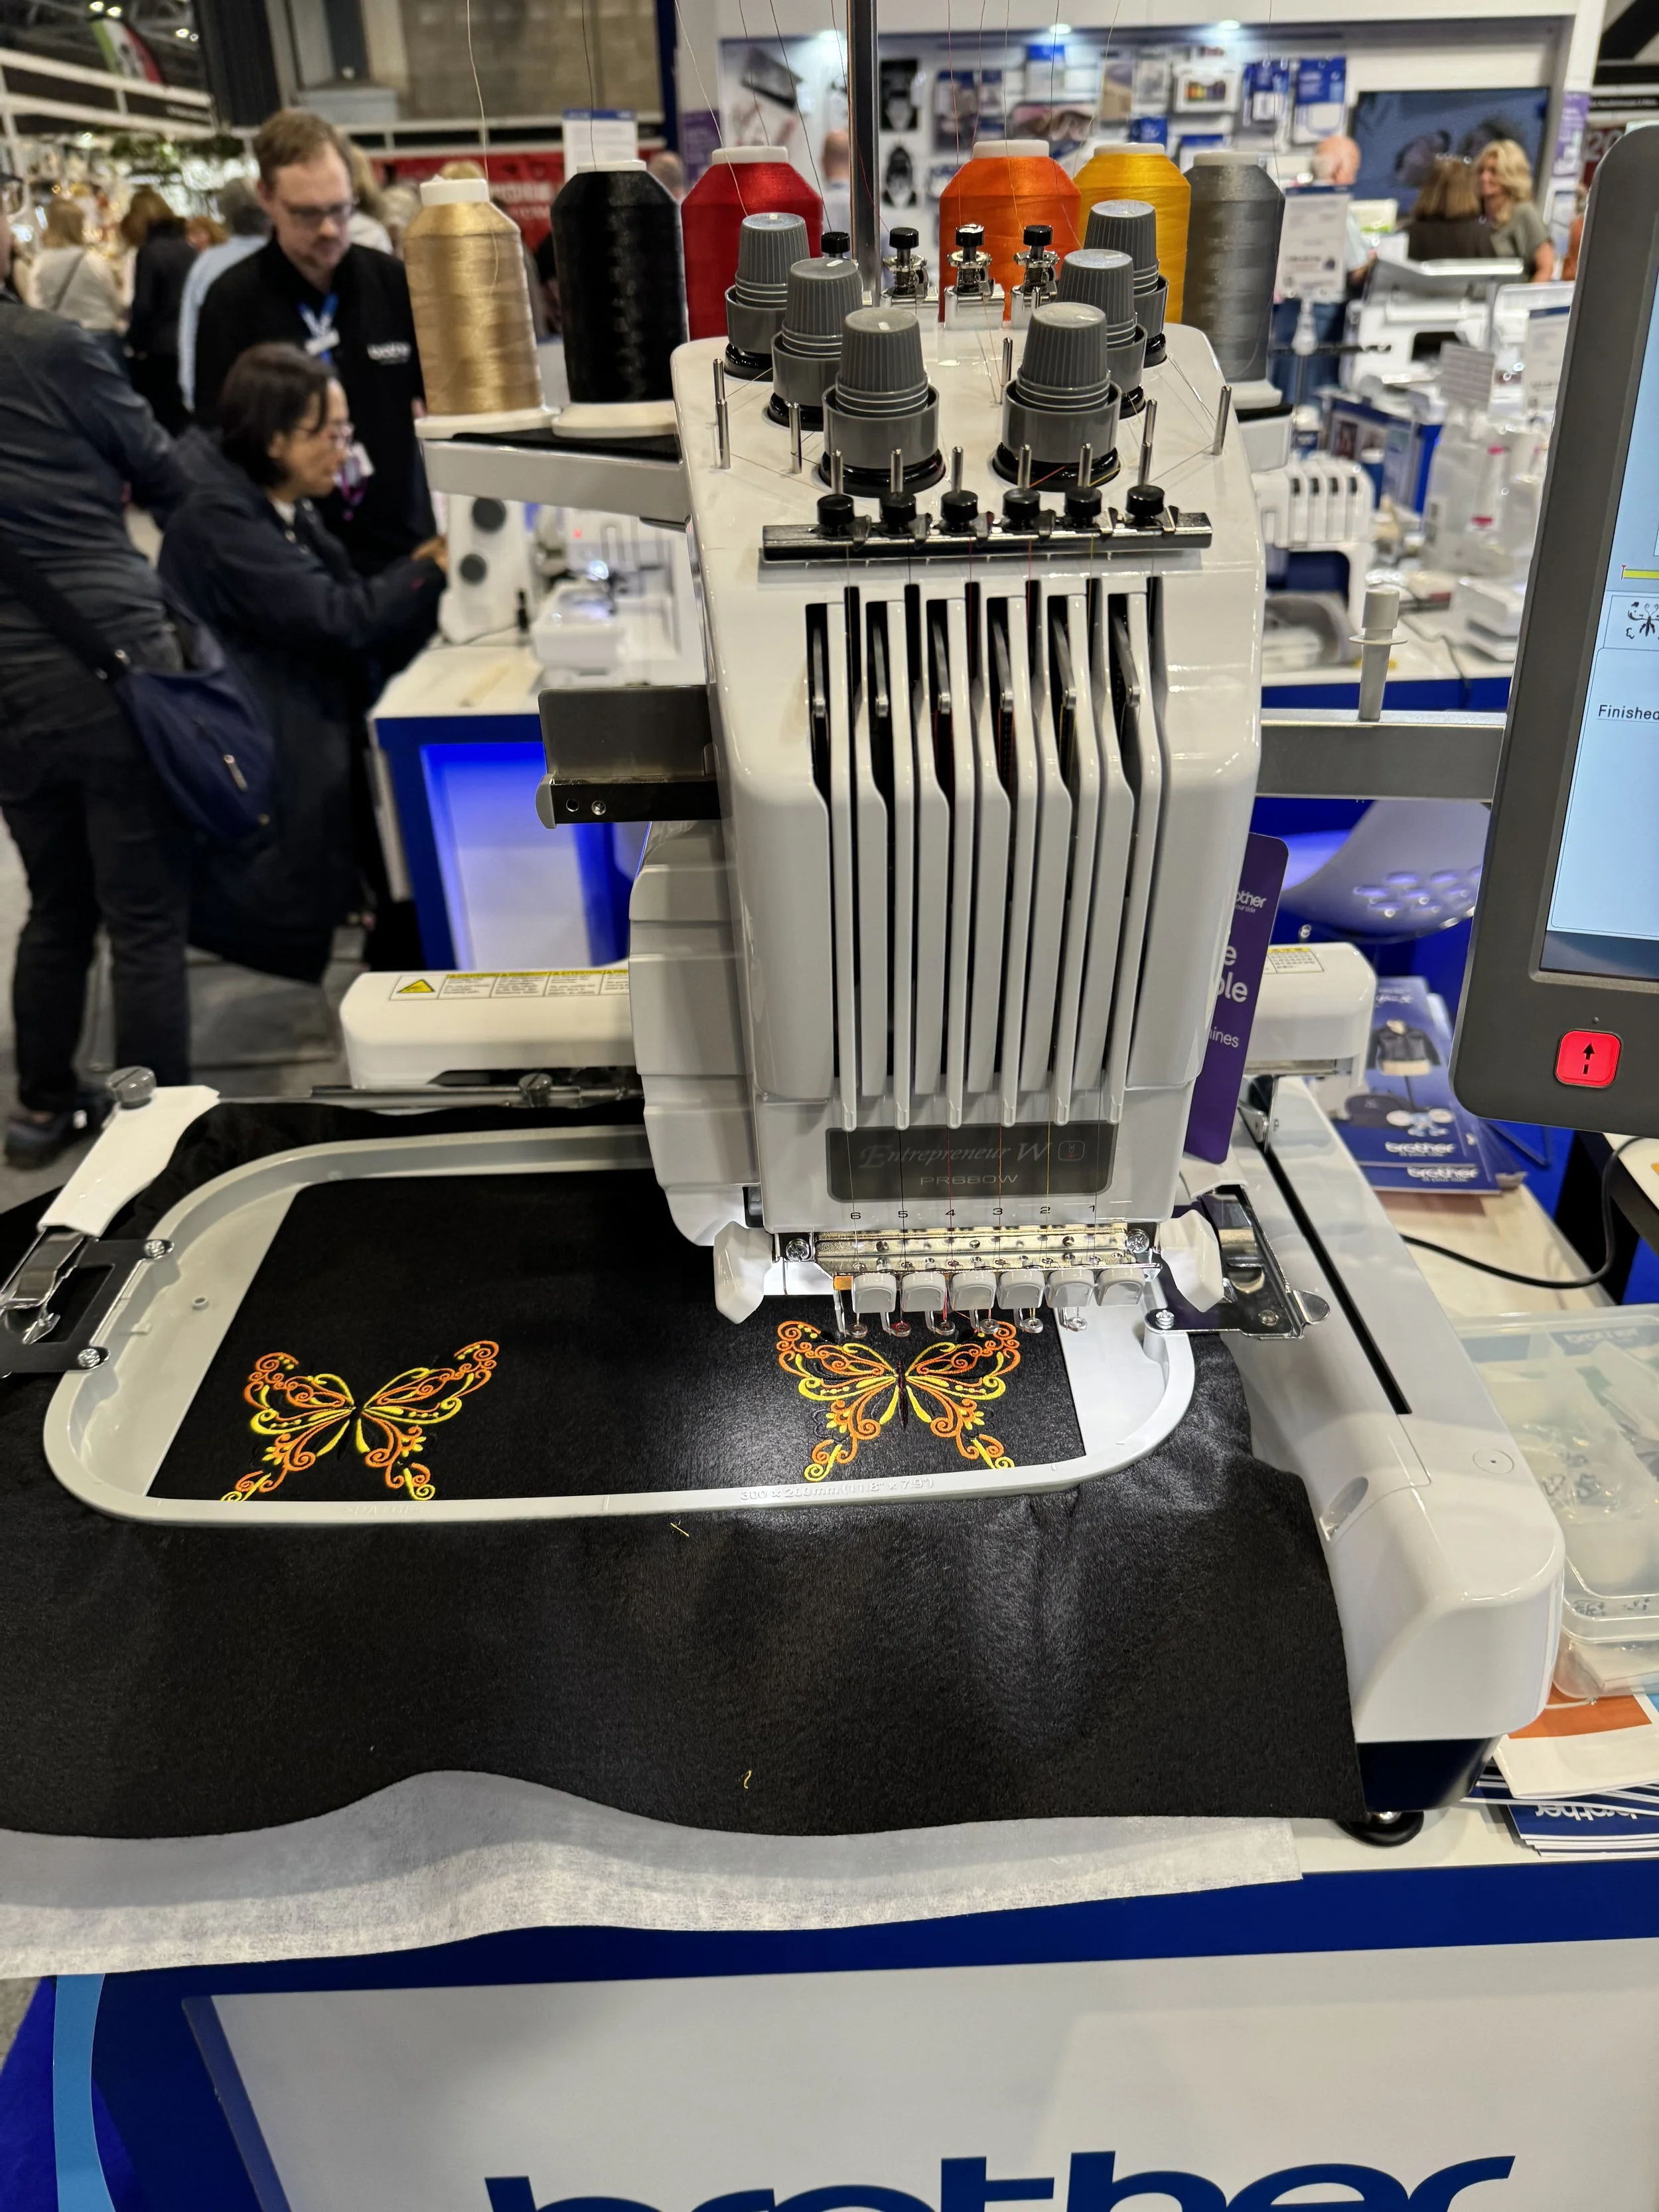
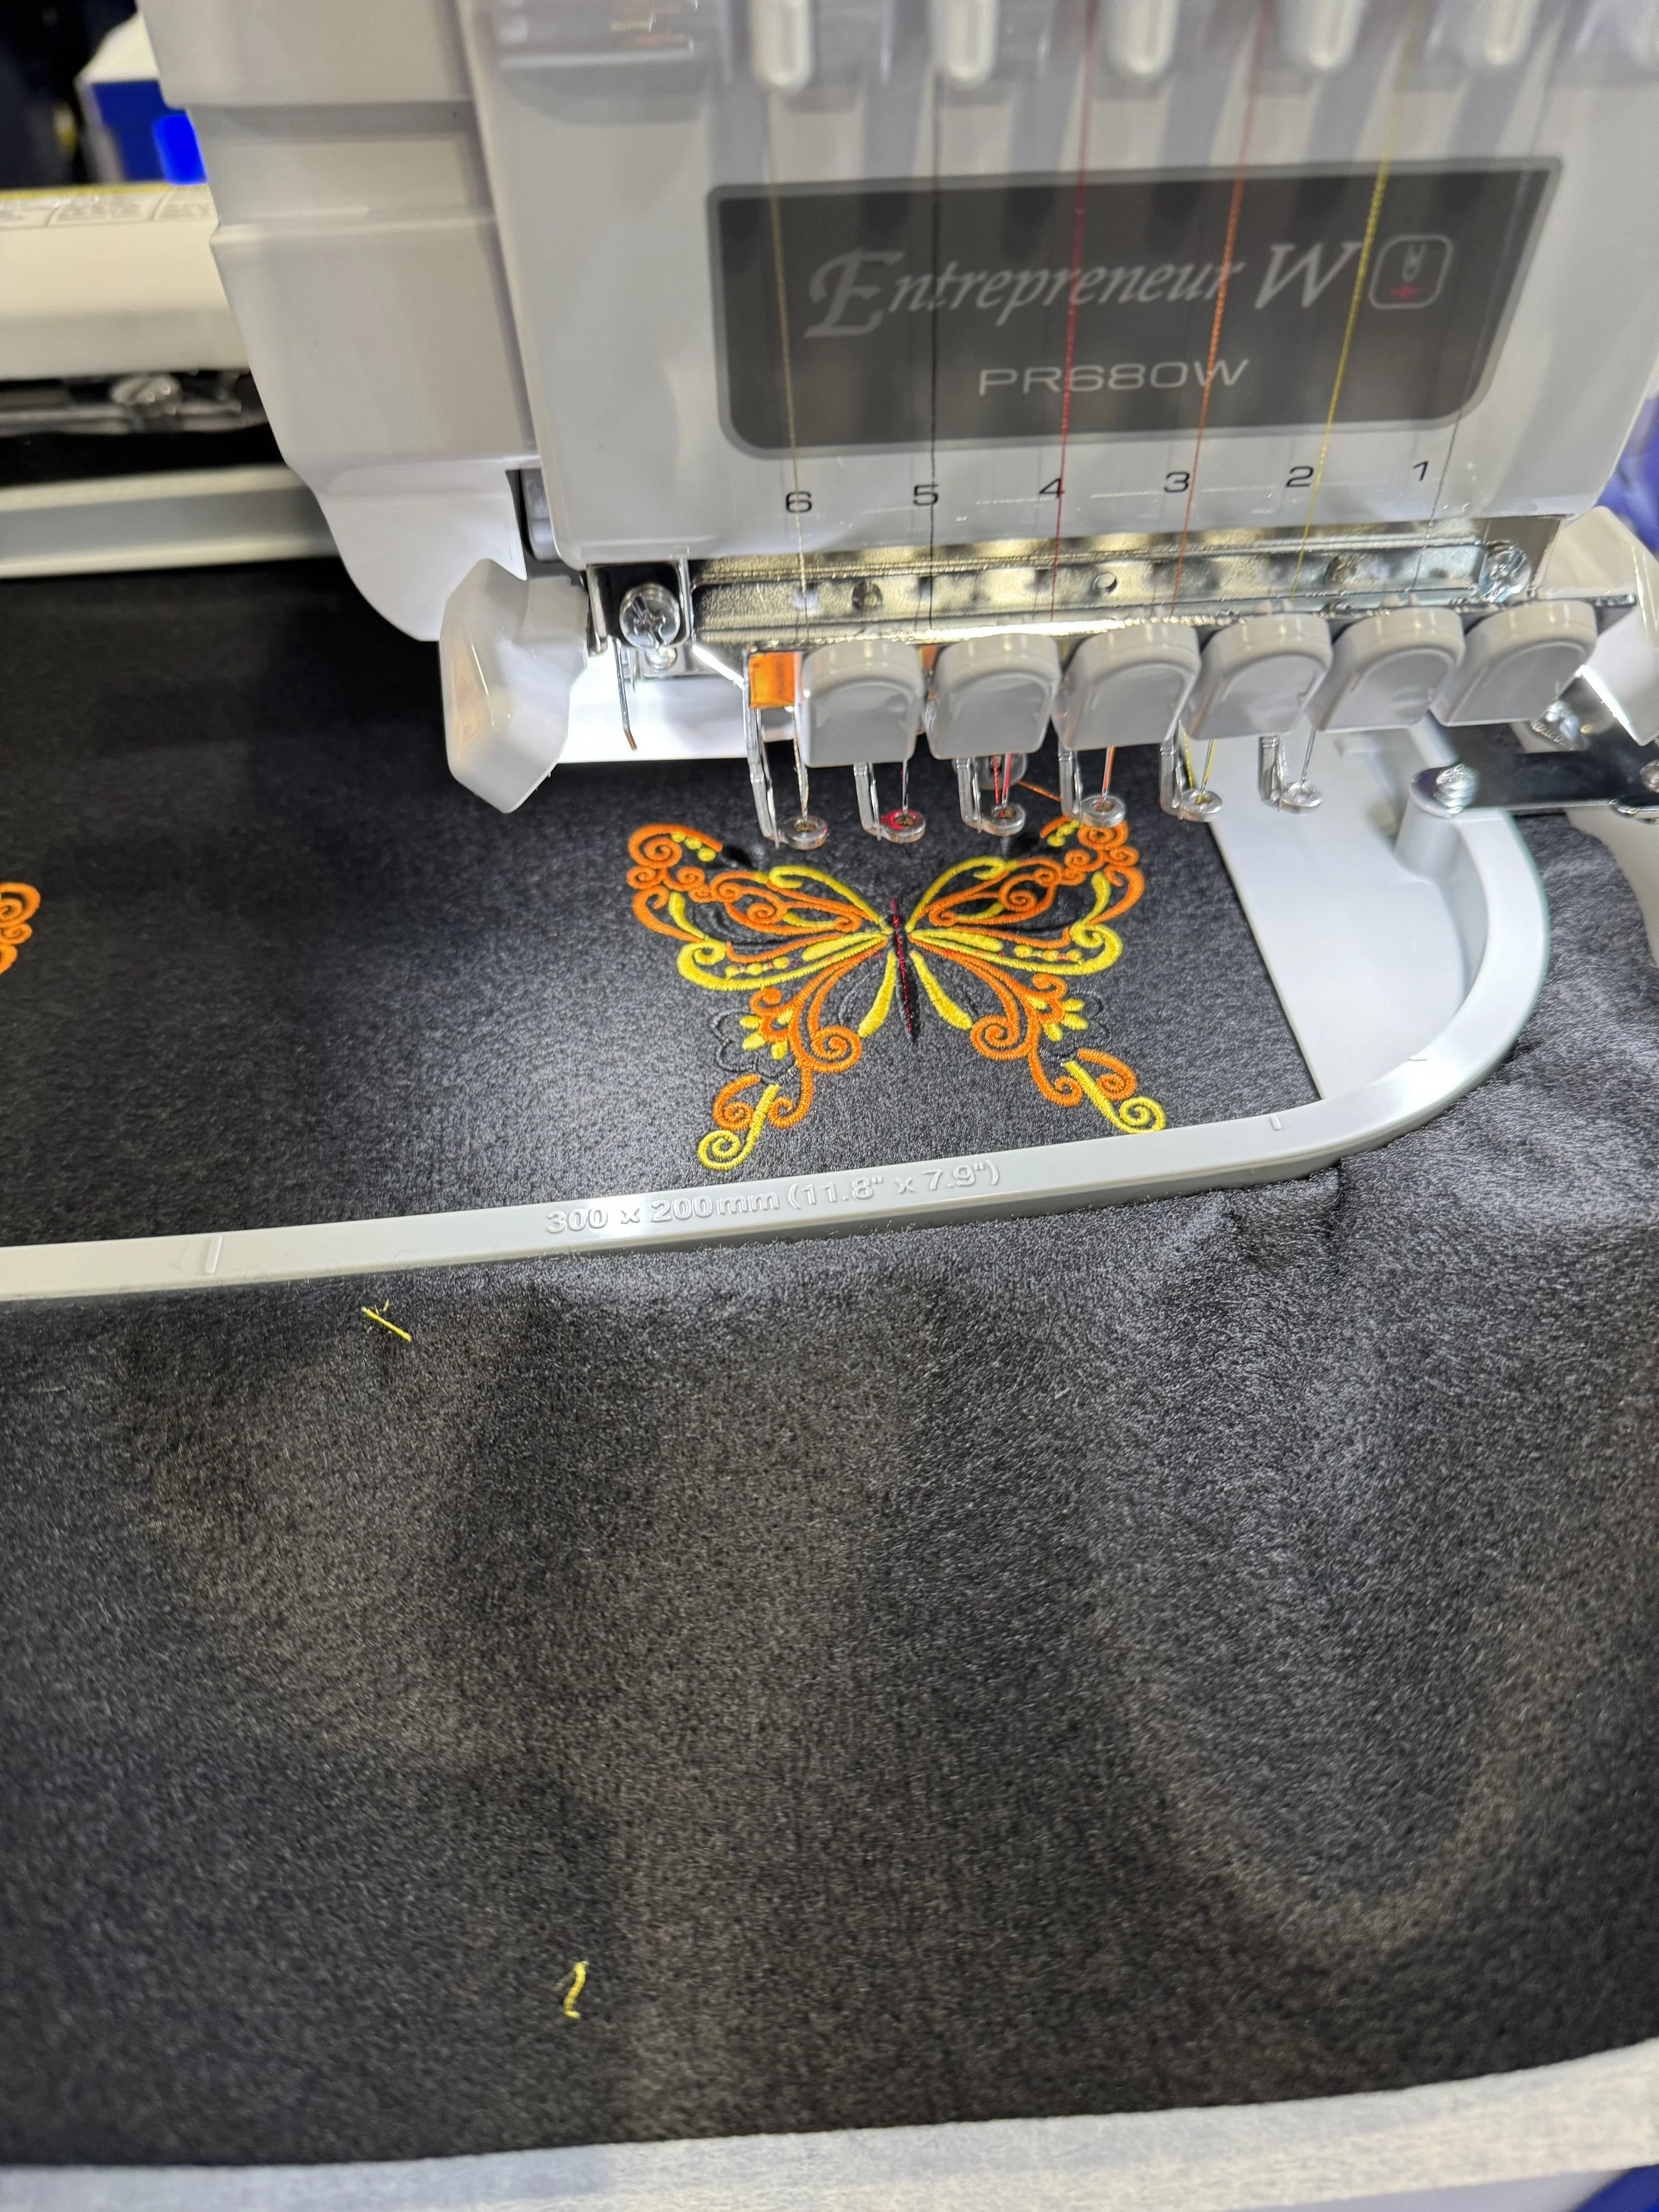
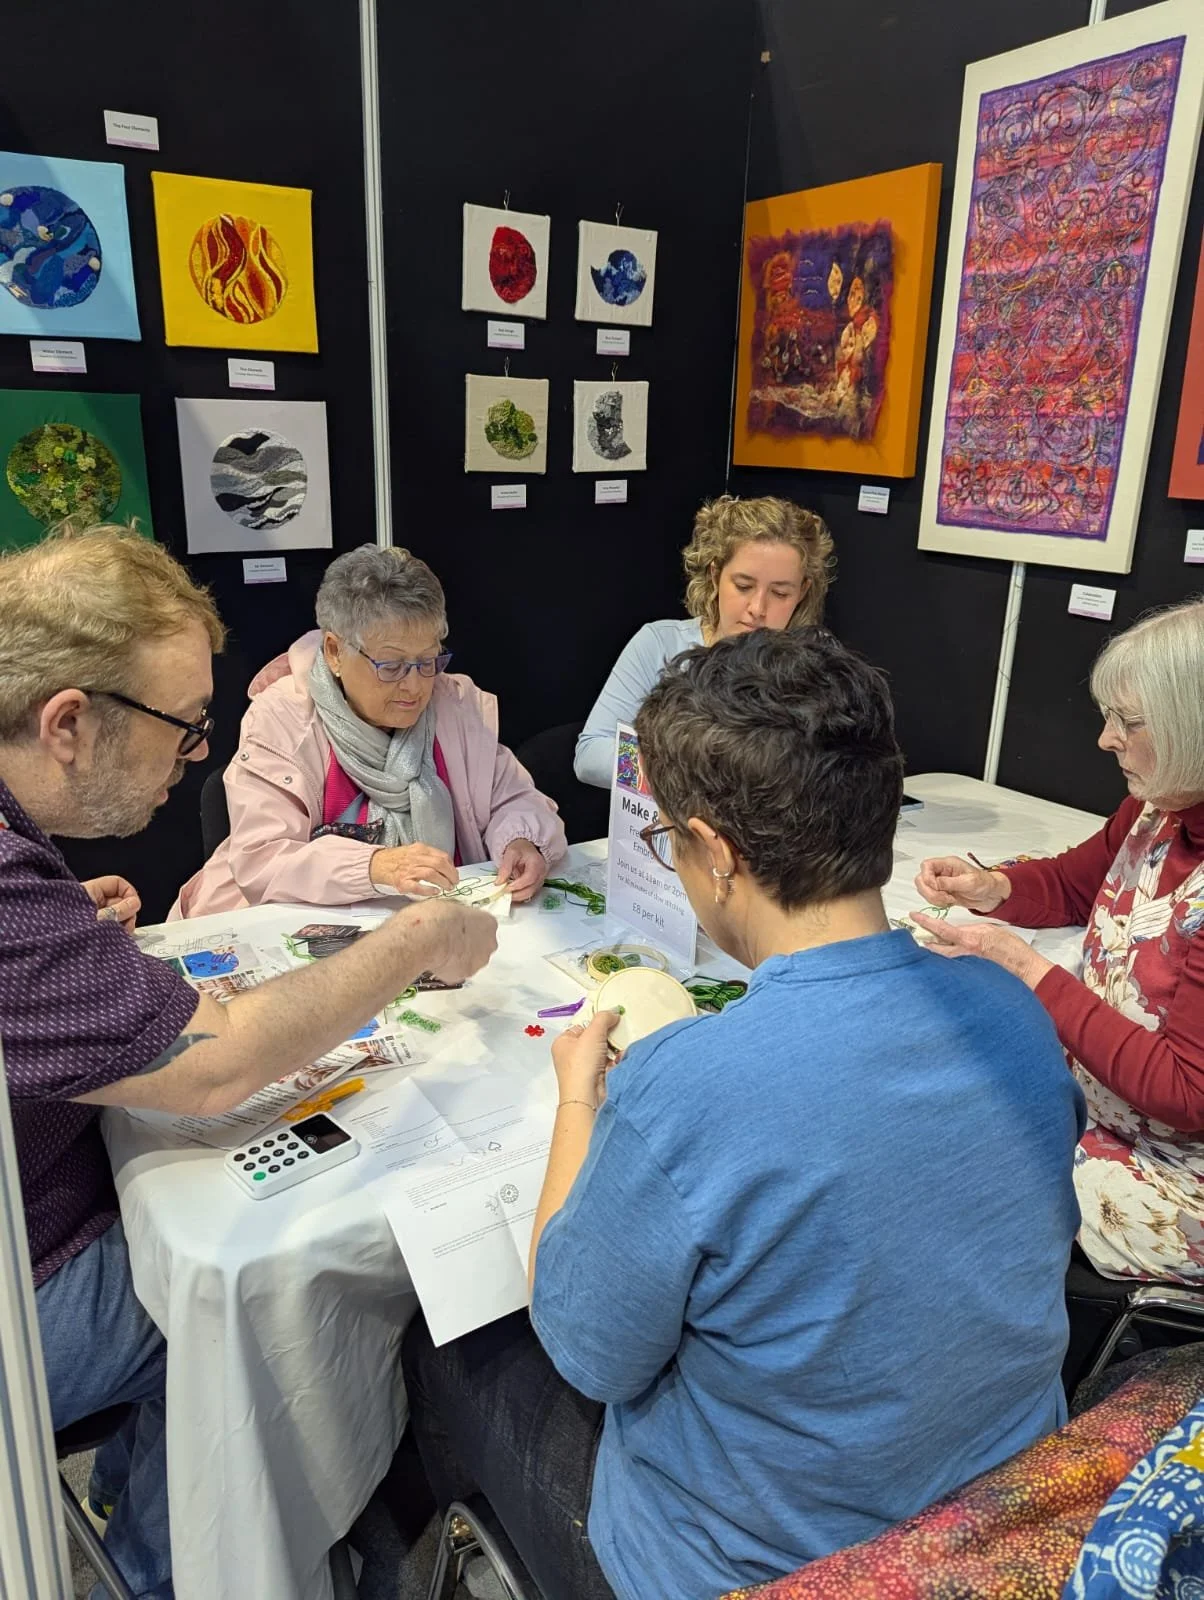
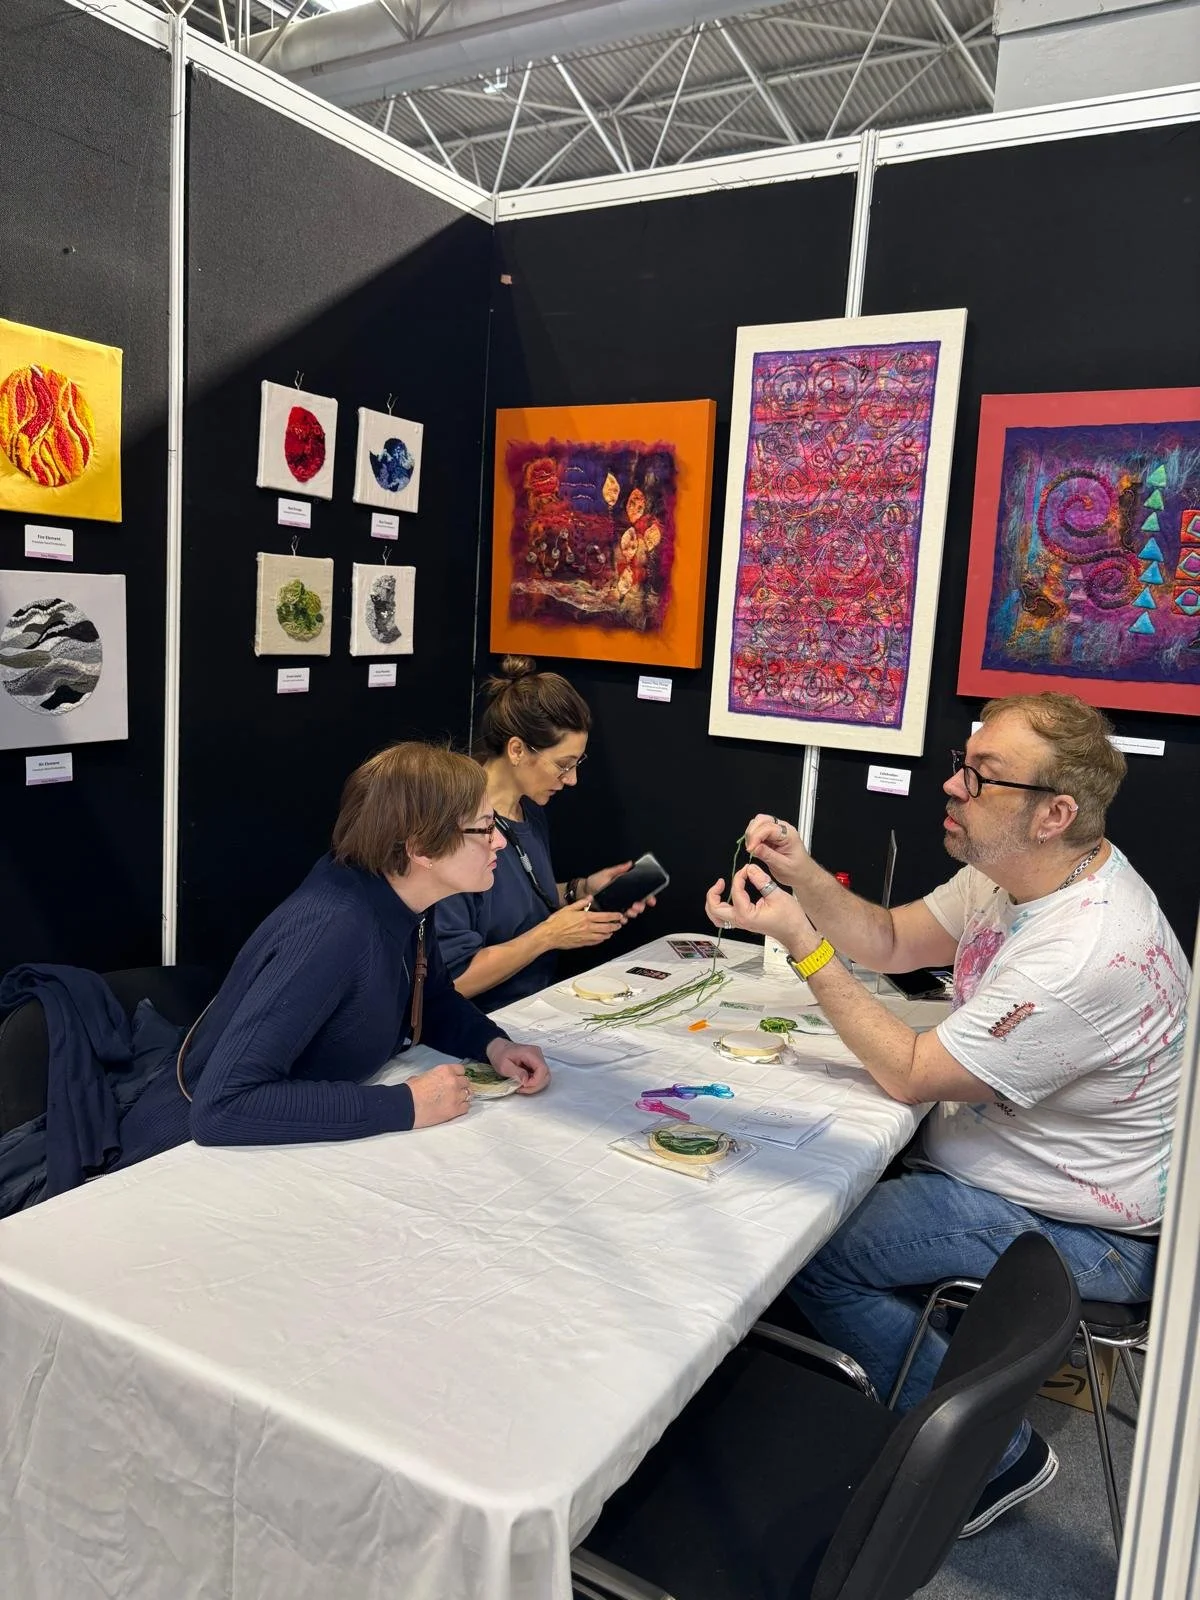
This week I was fortunate to be a part of the Sewing for Pleasure and Fashion & Embroidery show at the N.E.C Birmingham. I am part of the Traverse Textile art group and we had a stand showcasing our work.
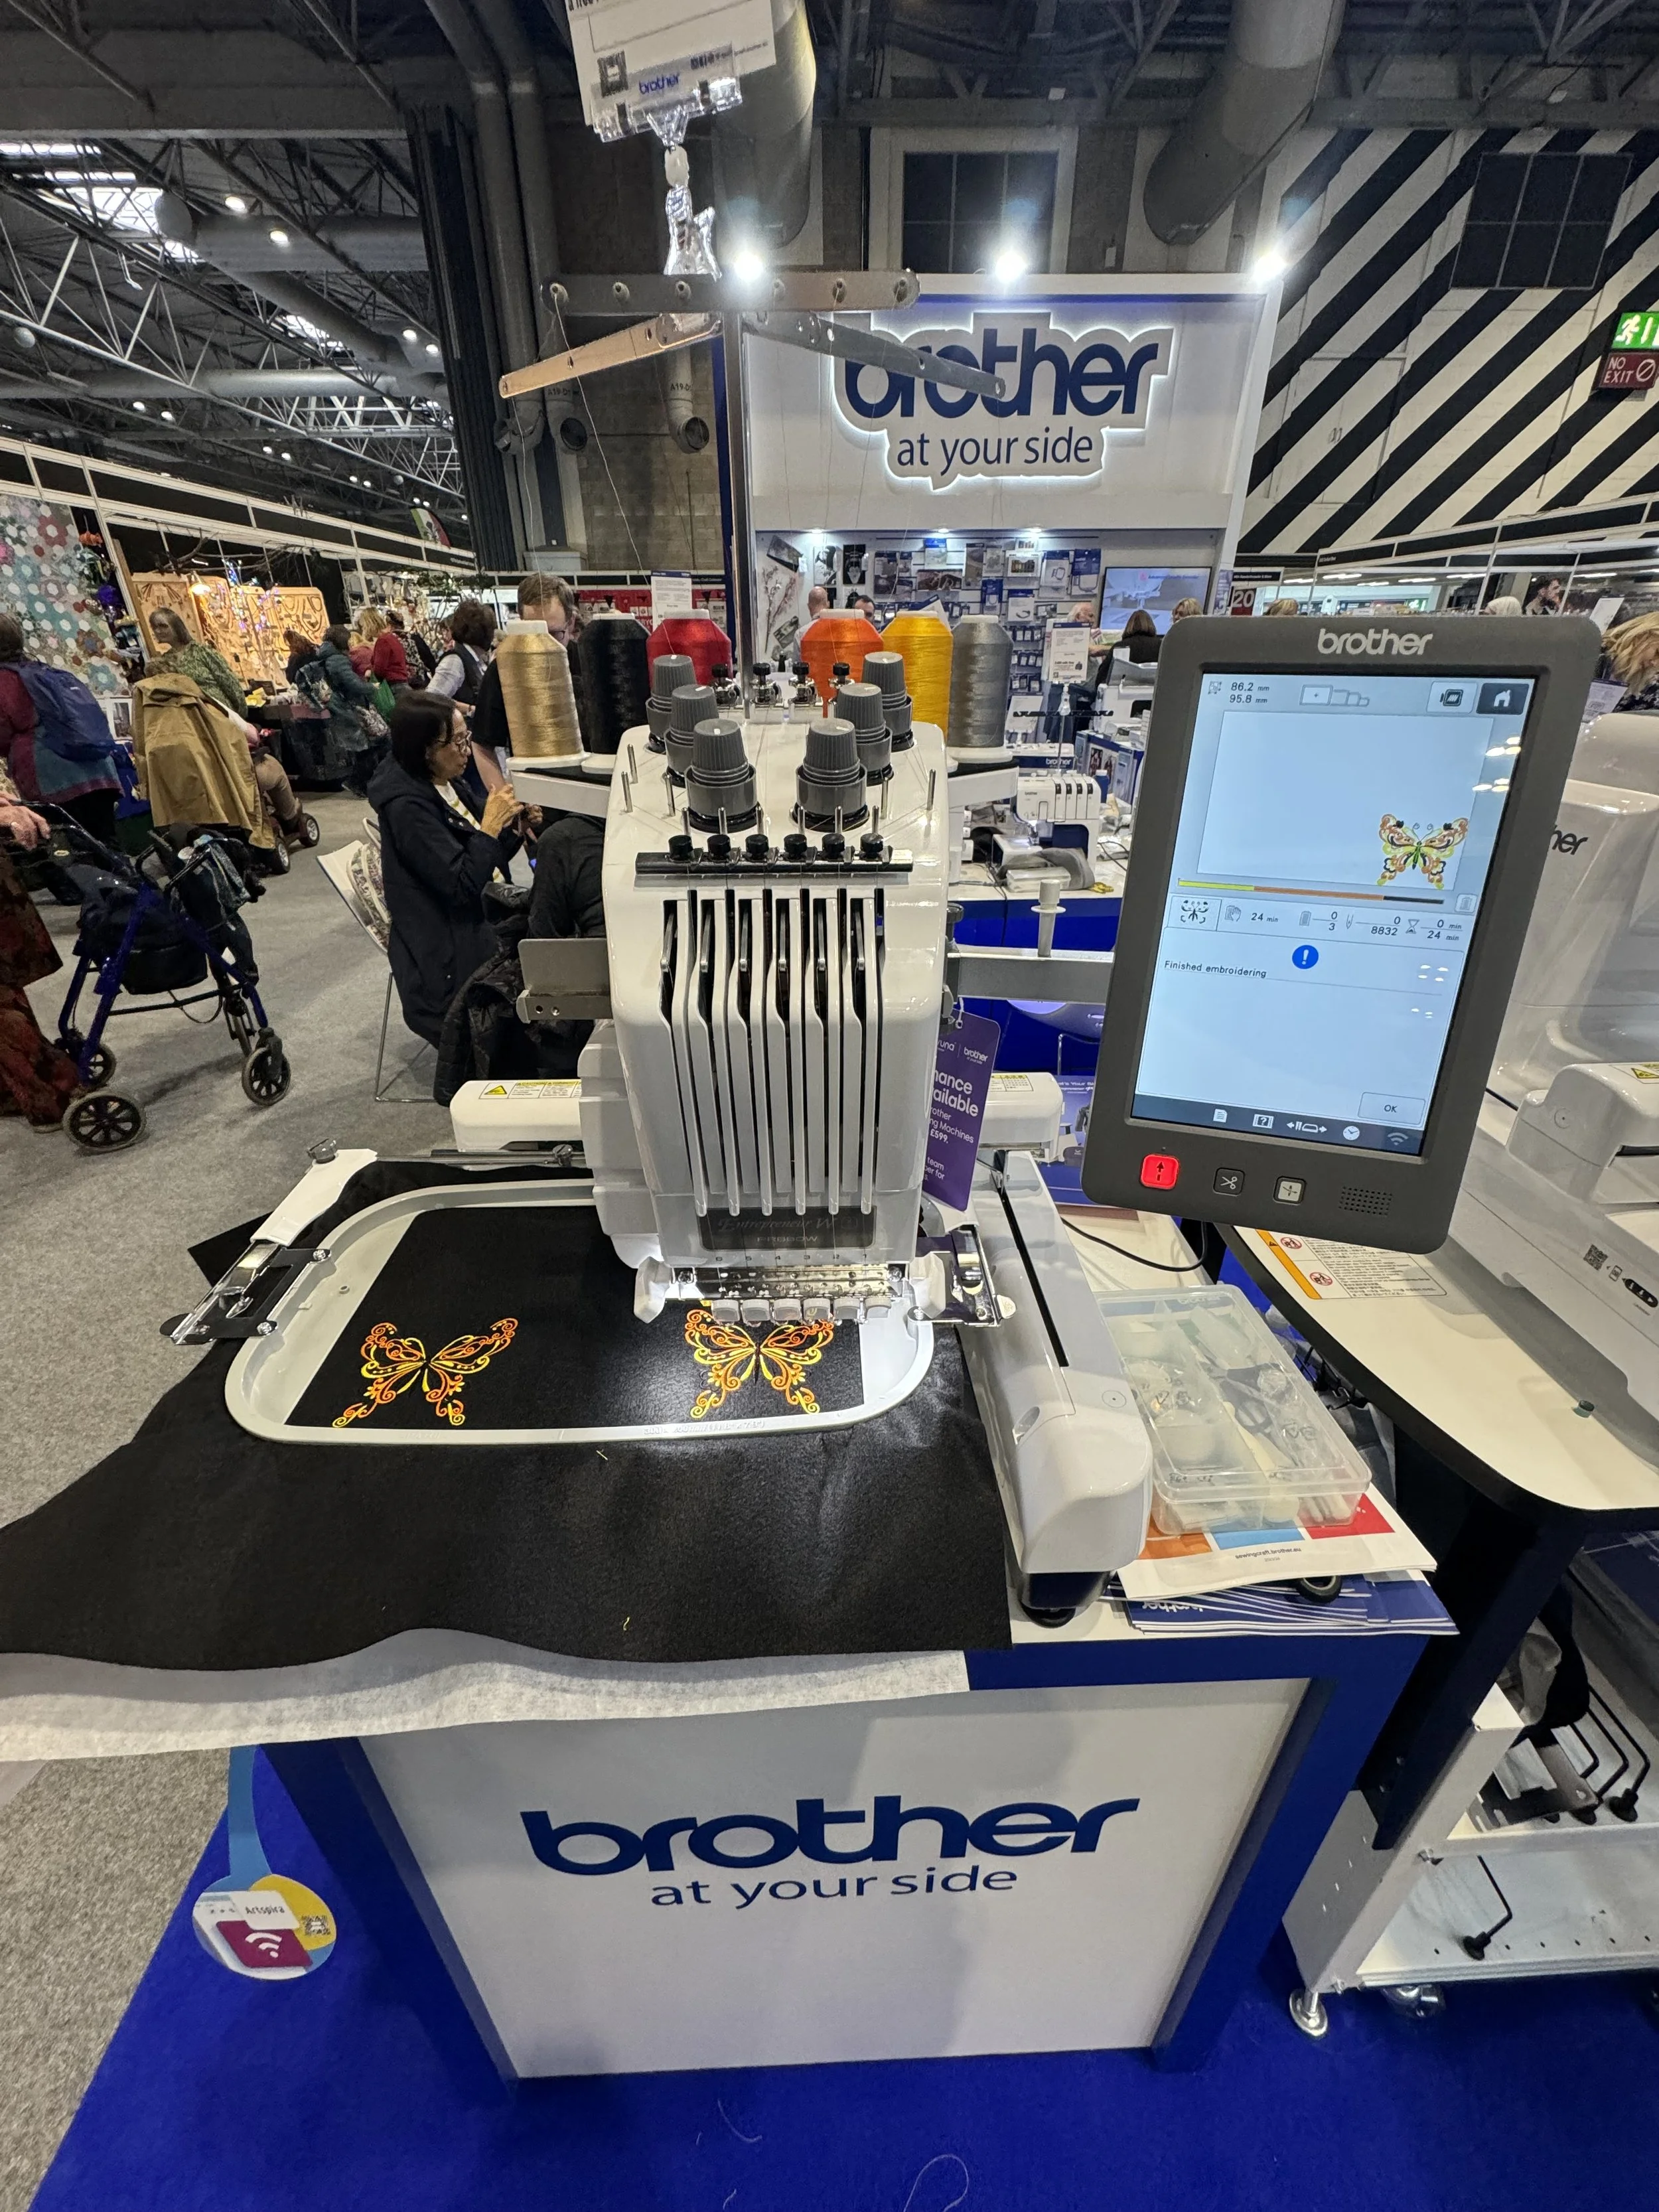
The whole show was full of inspiration from fellow sewists and stitchers. Alongside many traders selling beautiful fabrics, kits, equipment and all manner of machines. I was particularly taken with the Brother six head embroidery machine, I was impressed by the beautiful designs and the superb quality of the stitching.
It was also lovely to catch up with old friends and create new ones all like minded individuals who are as barmy about textiles as I am. My artwork below had some lovely attention and I really enjoyed chatting to people about my work and process.
Can’t wait for the next show at Uttoxeter Racecourse taking place on 11th - 14th April, hope to see you all, and please do come and say hello, I’ll see you there.

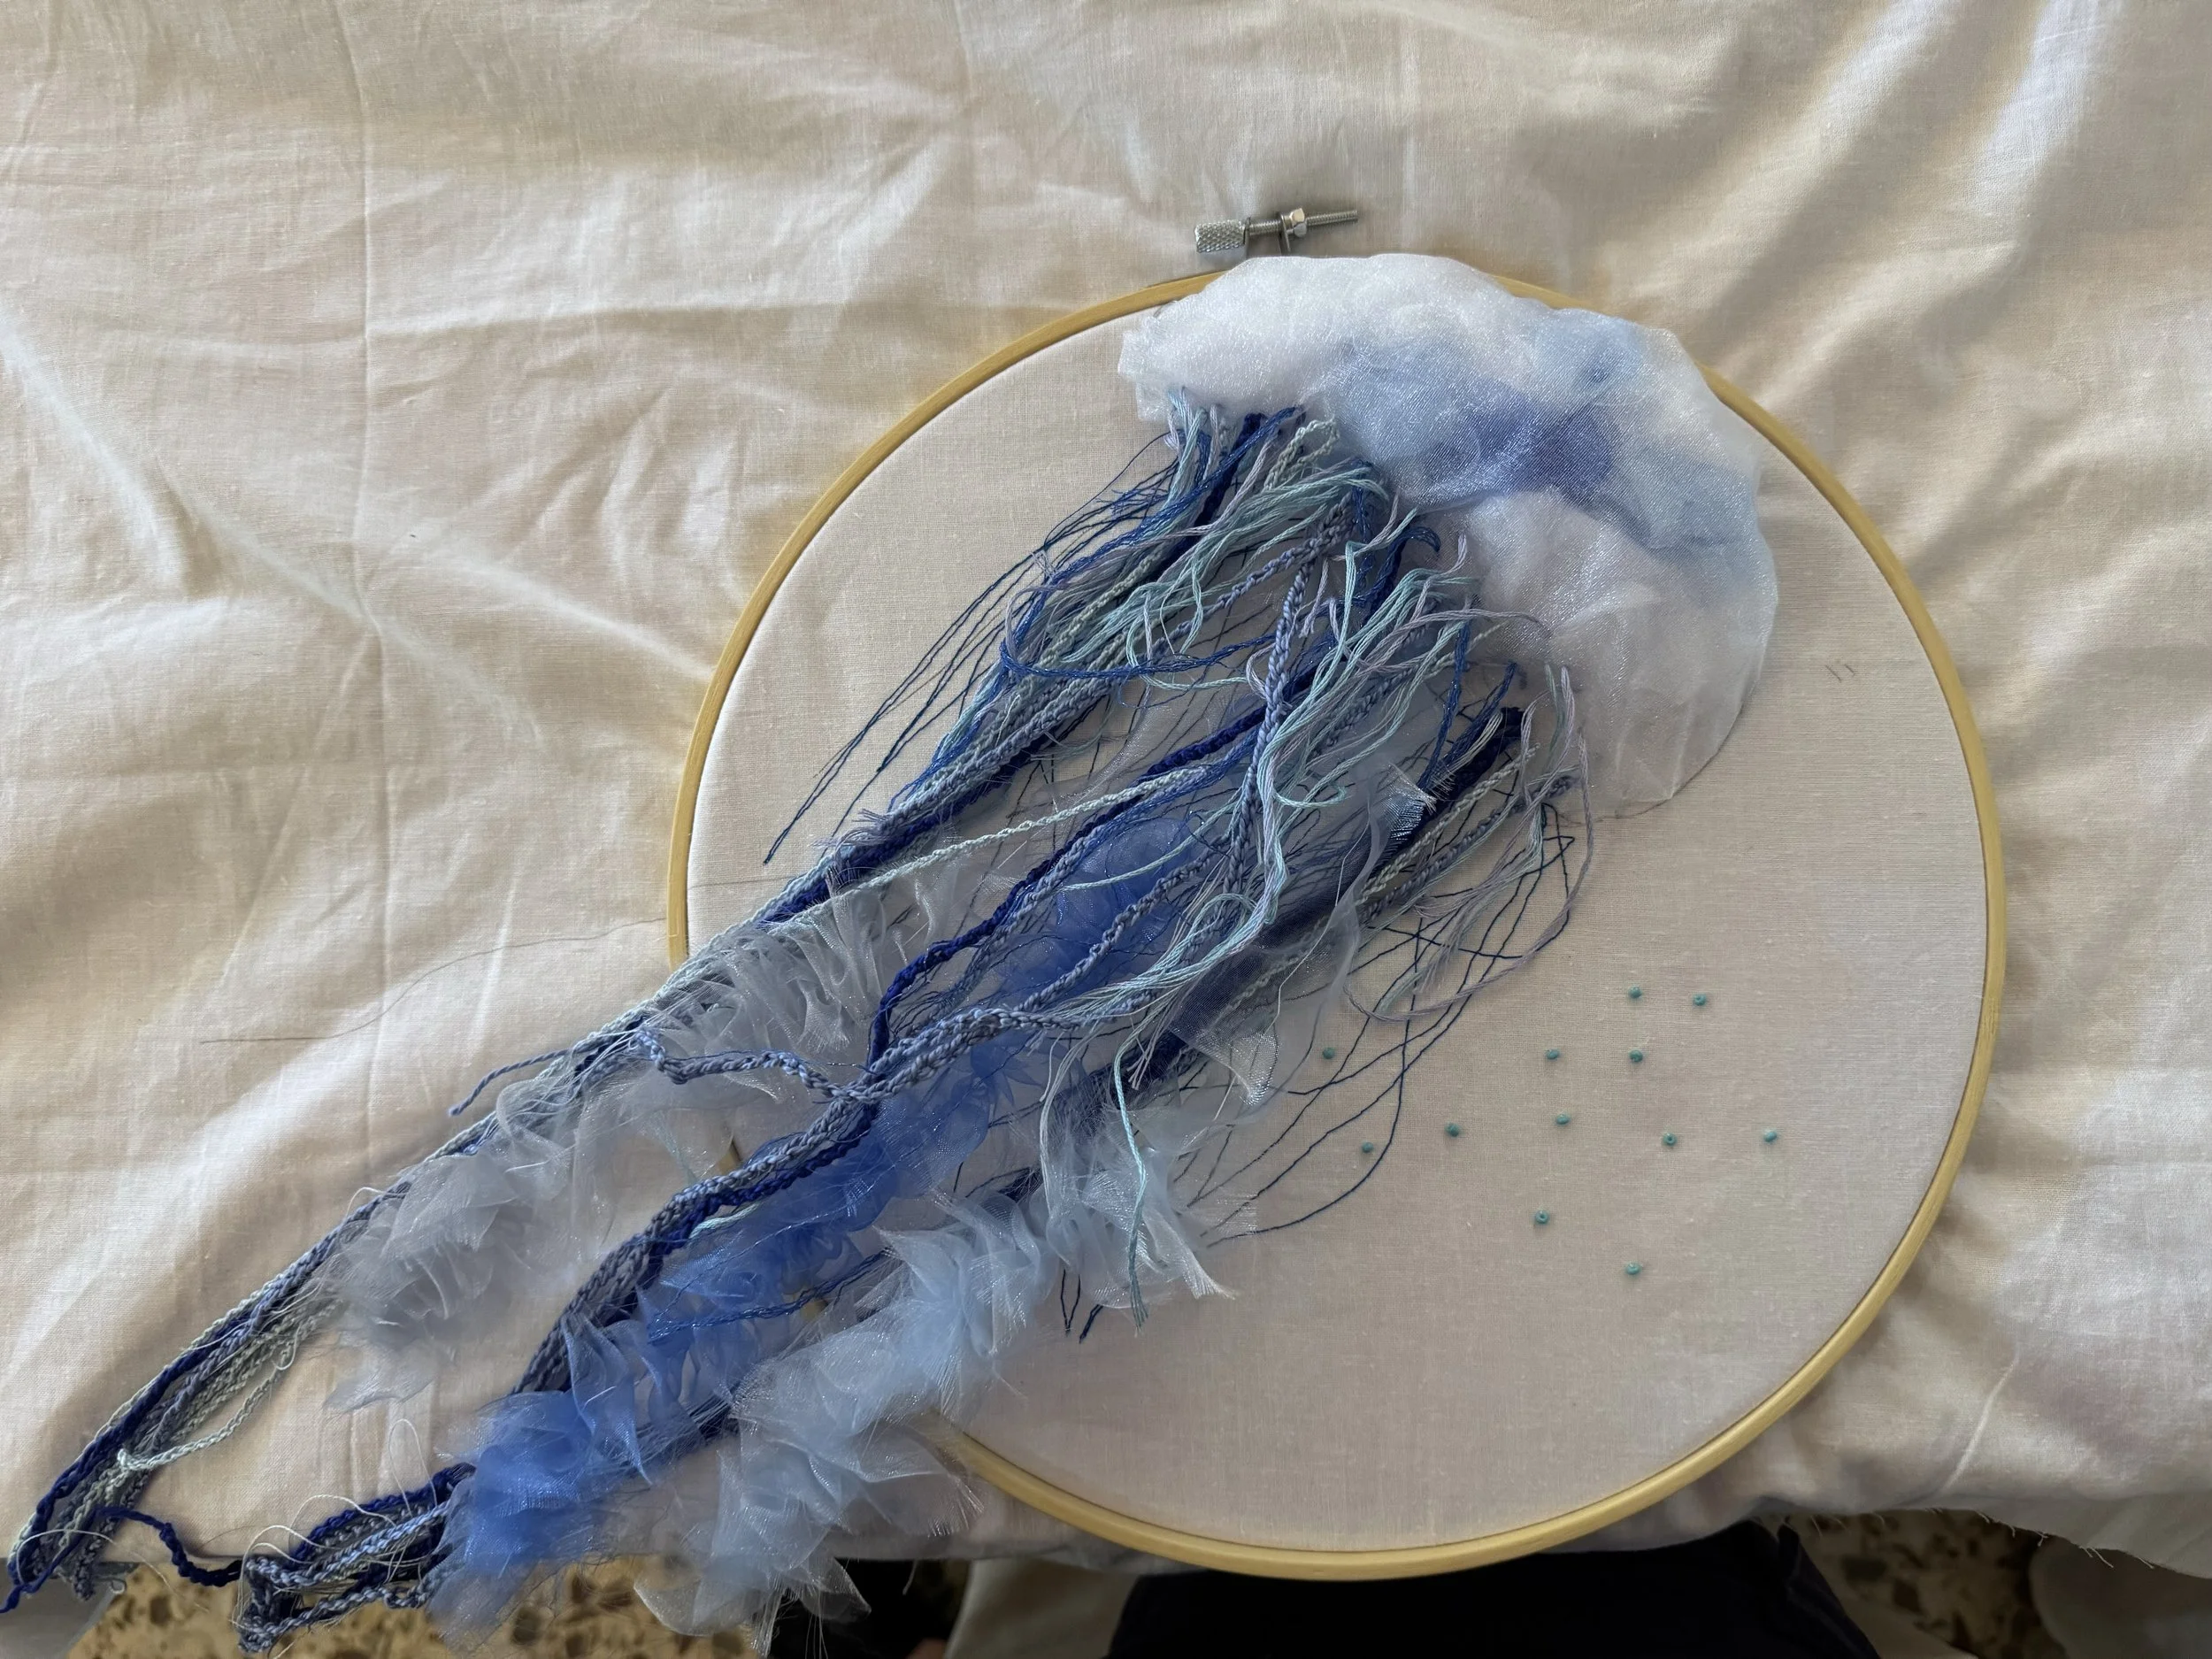
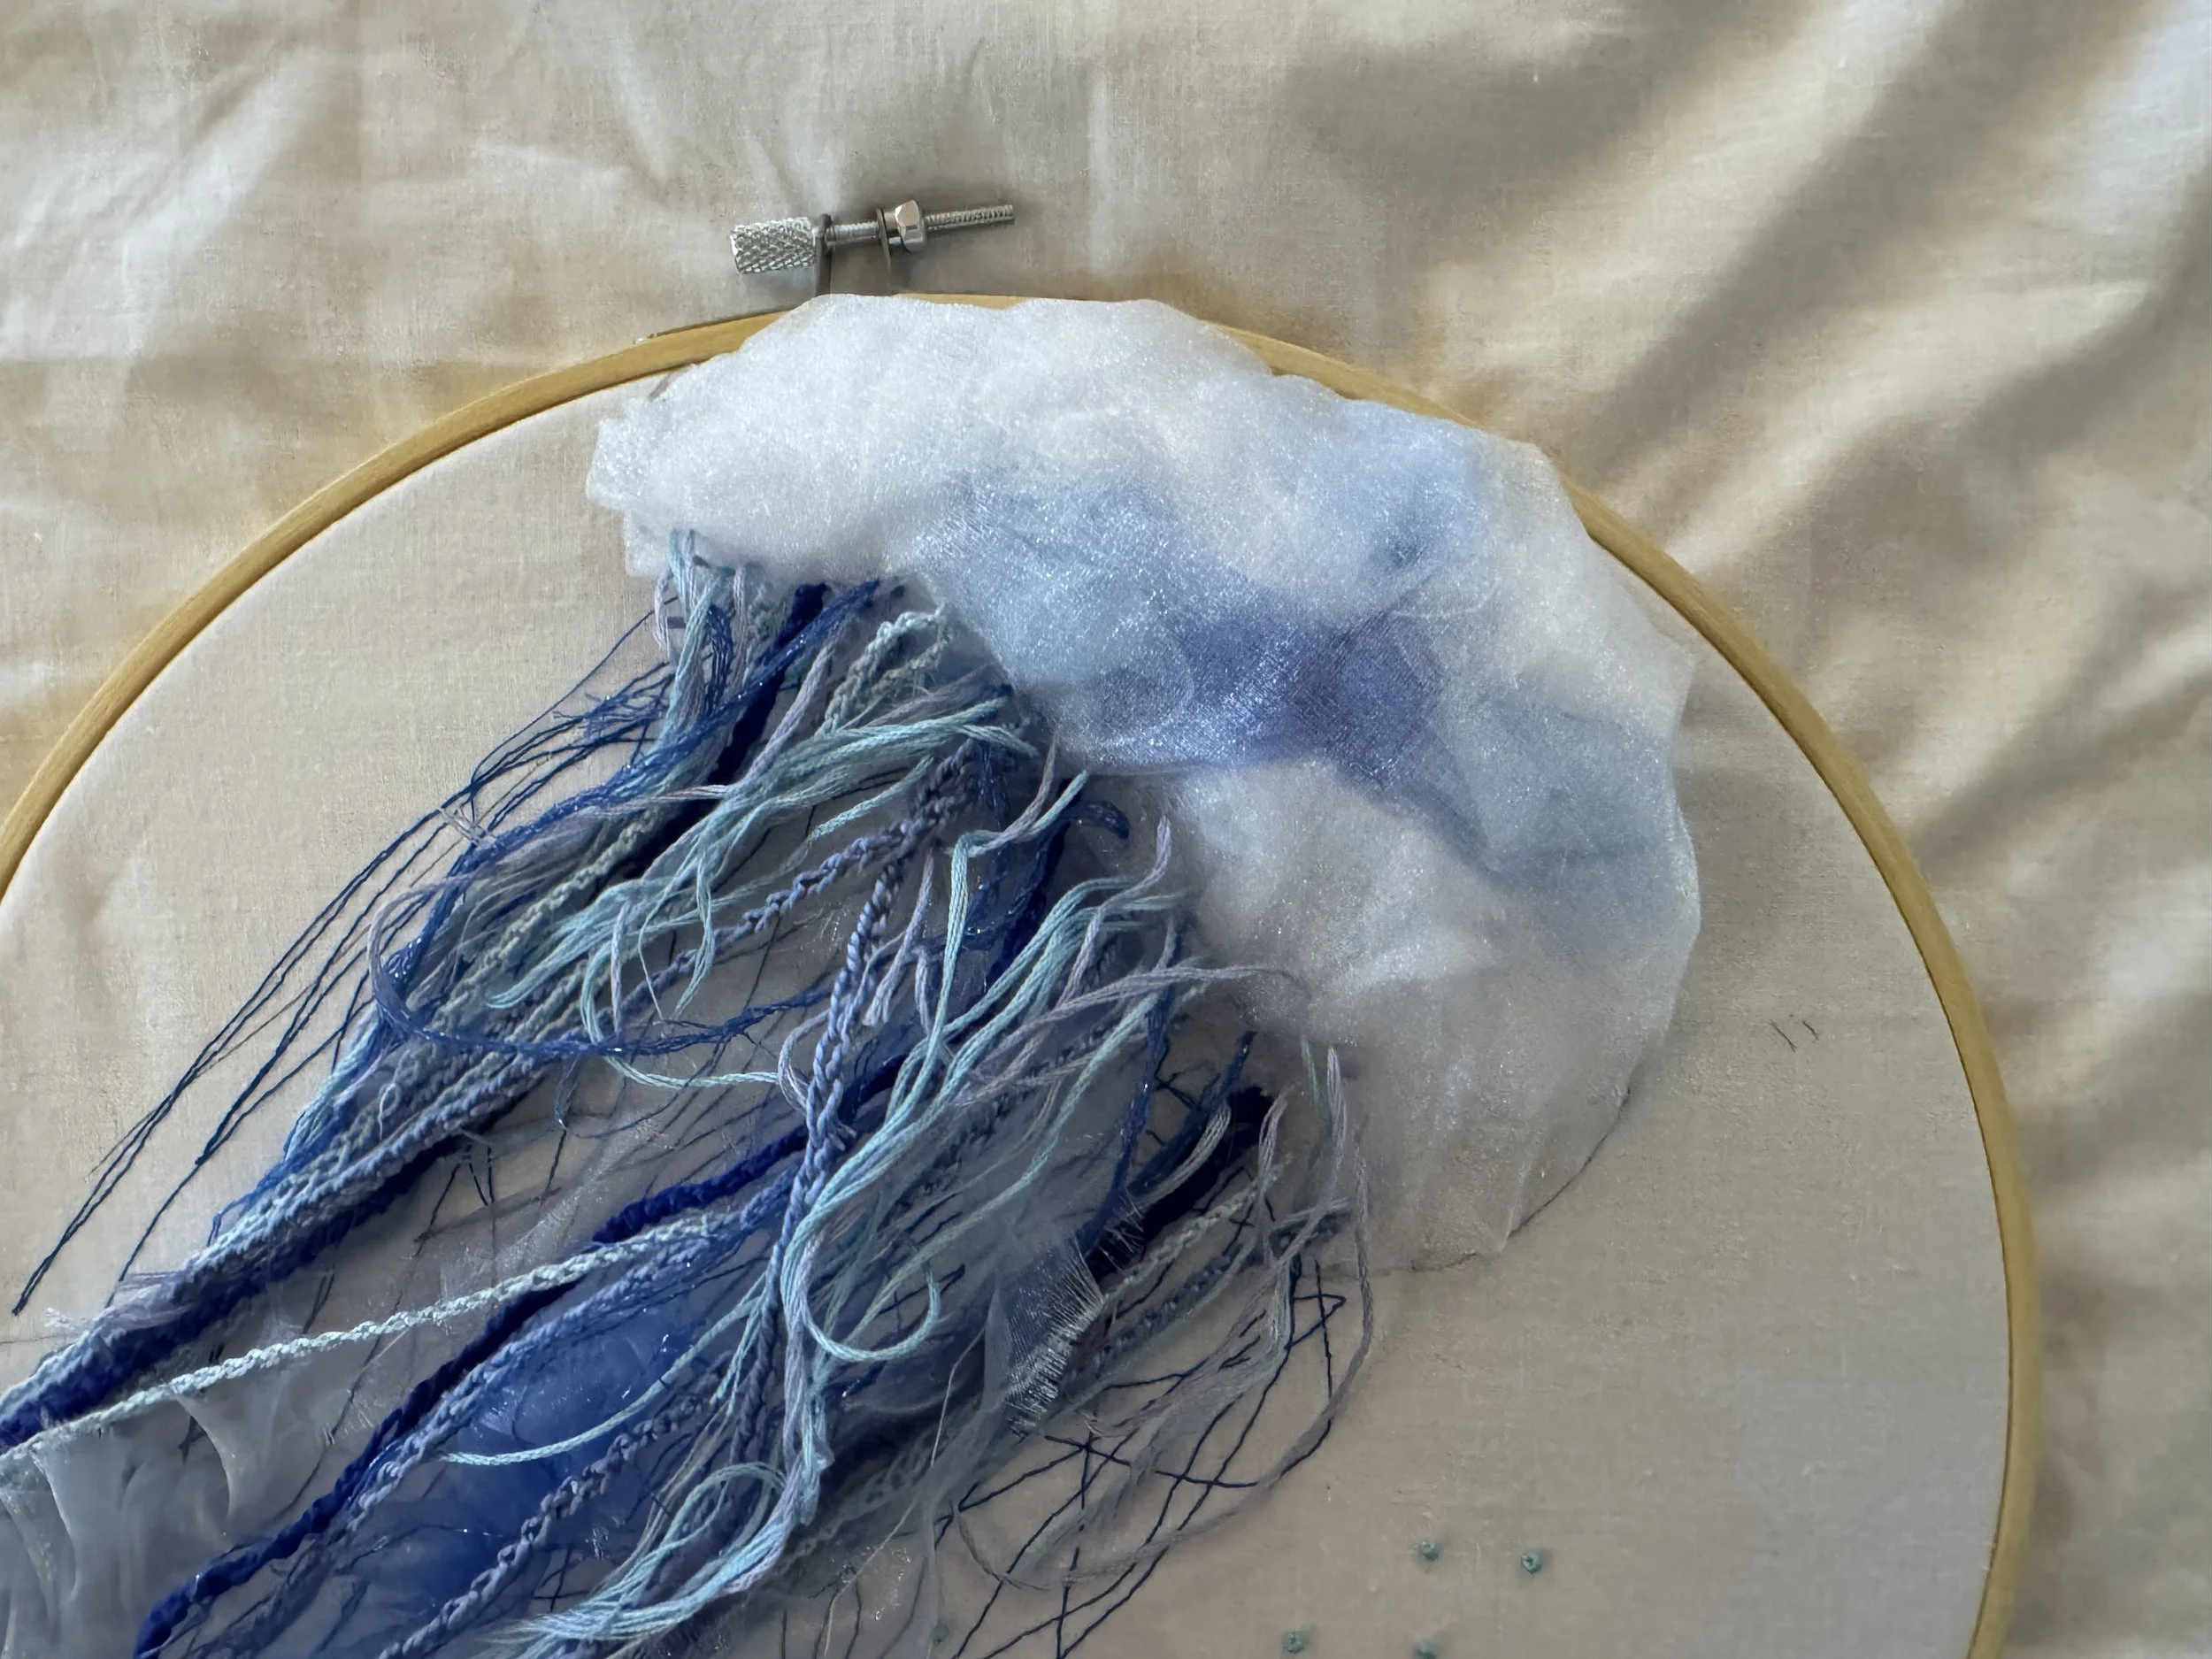
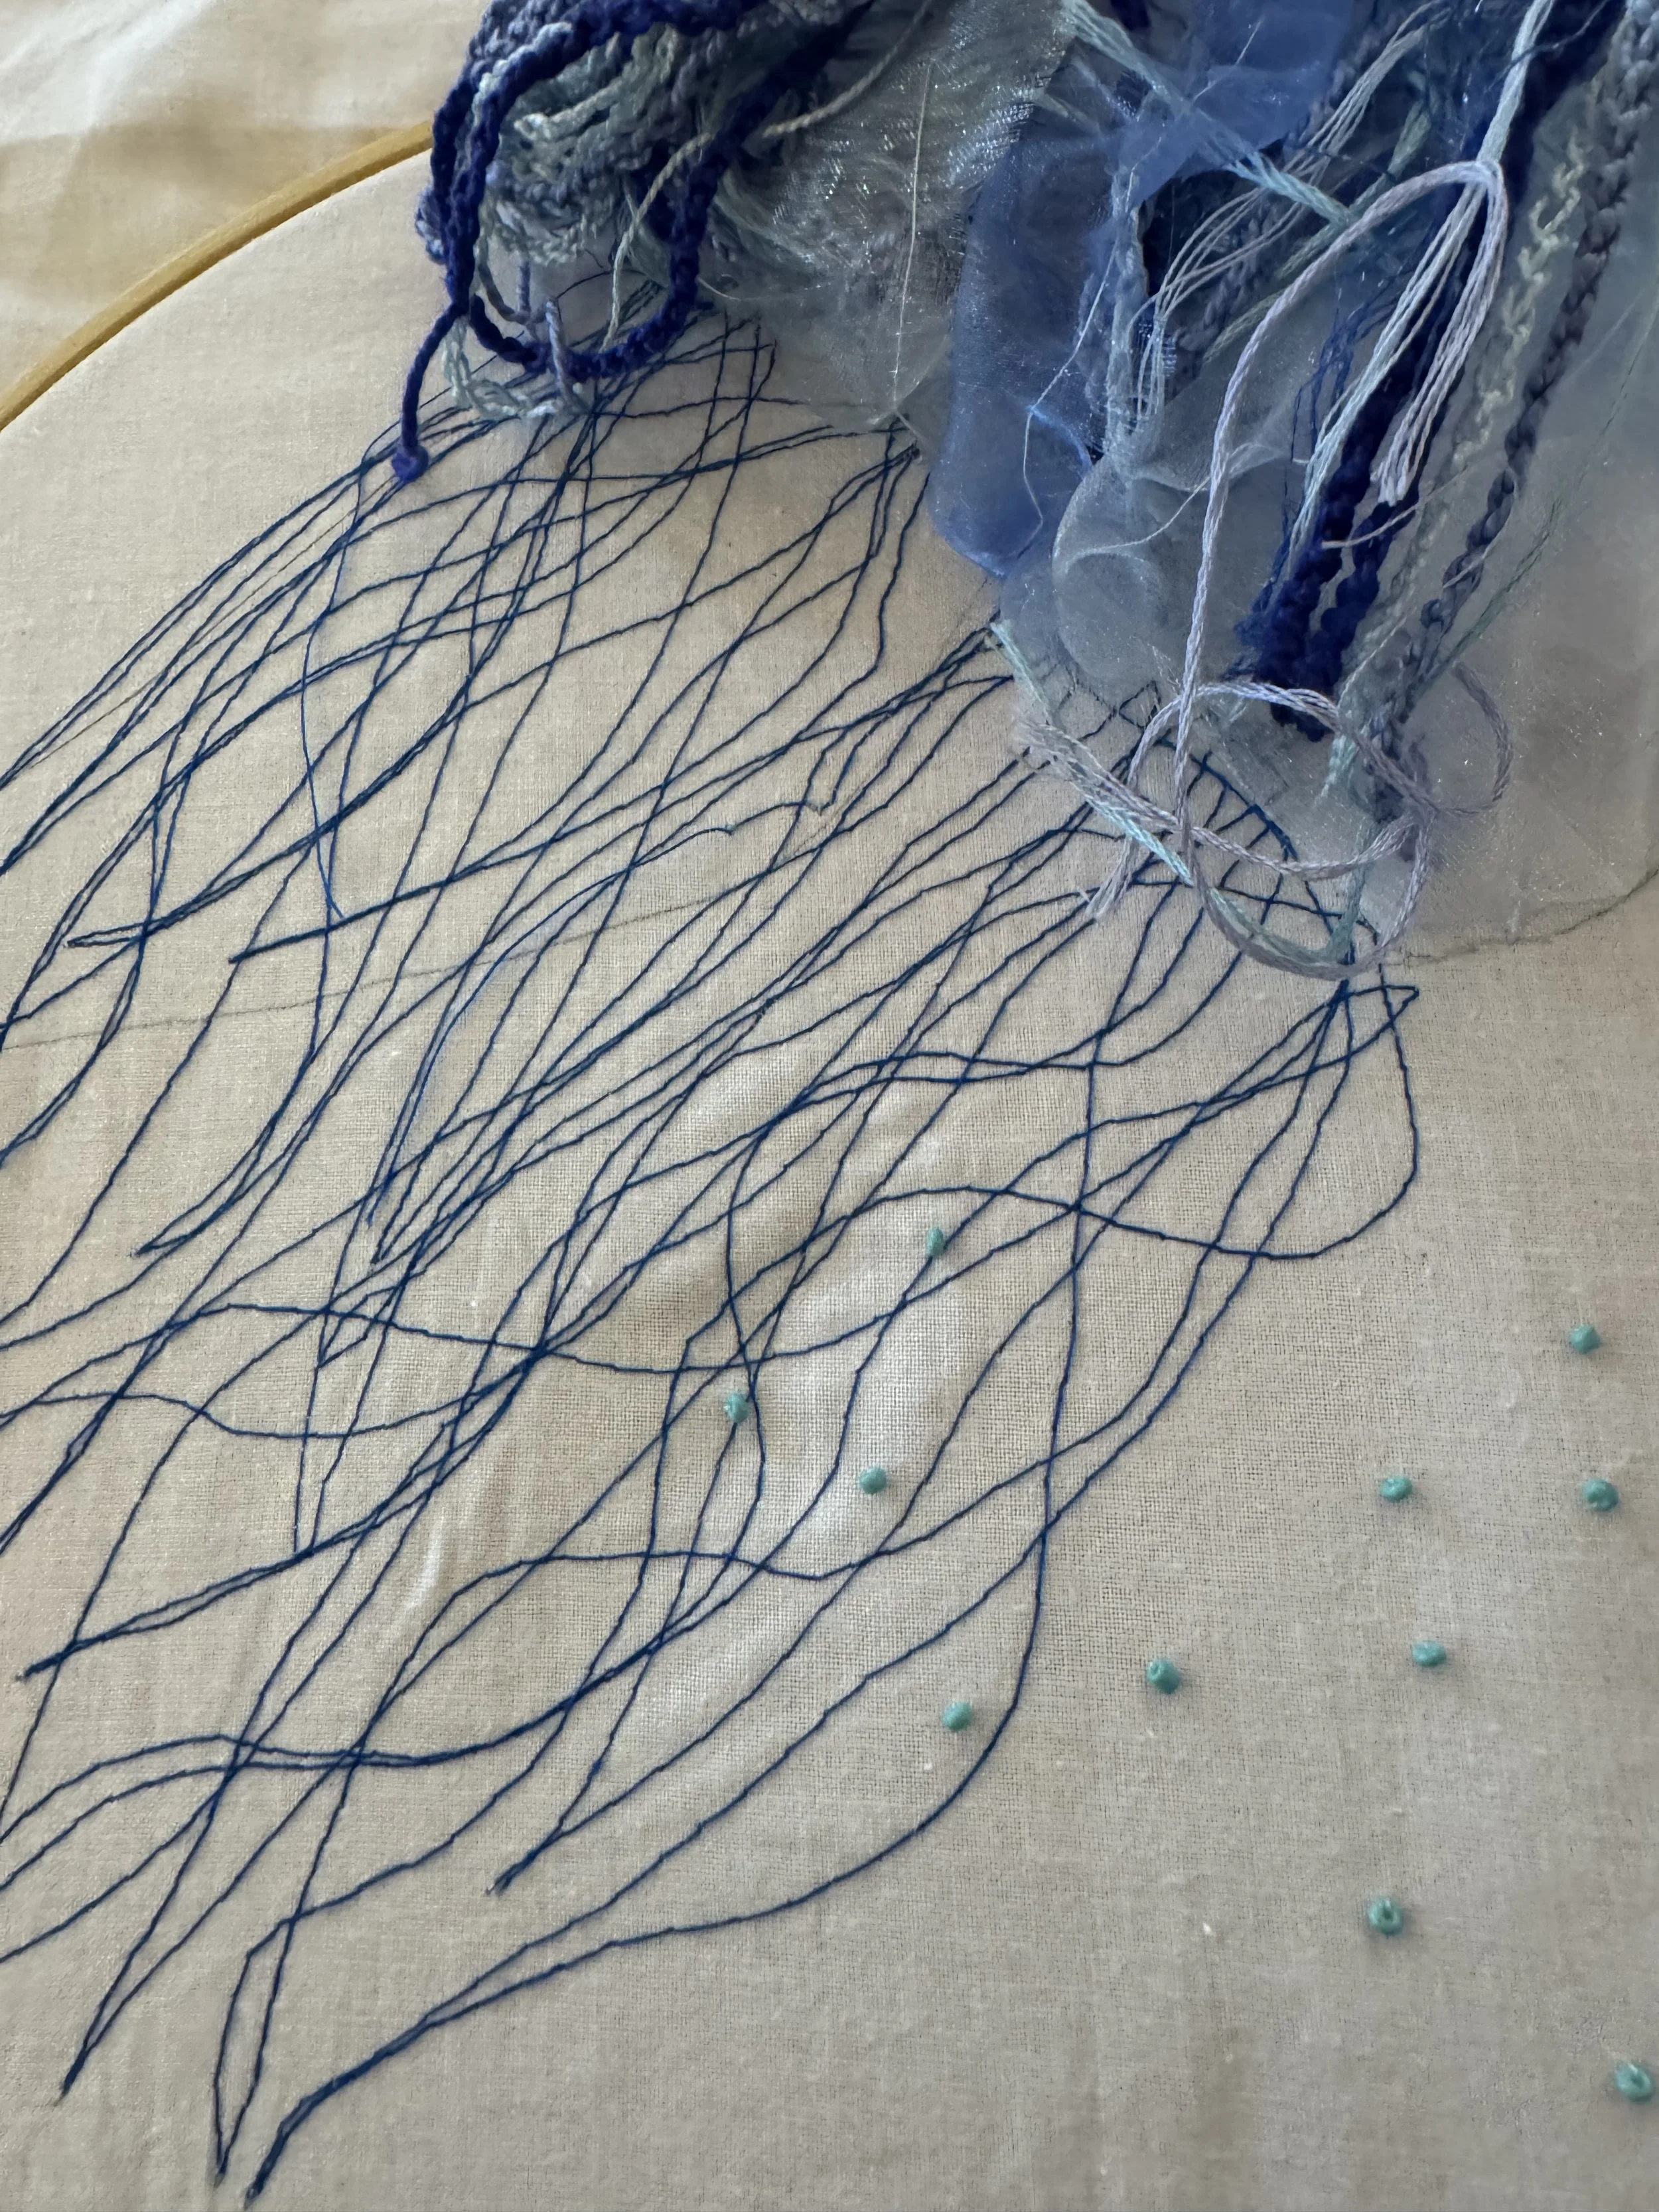
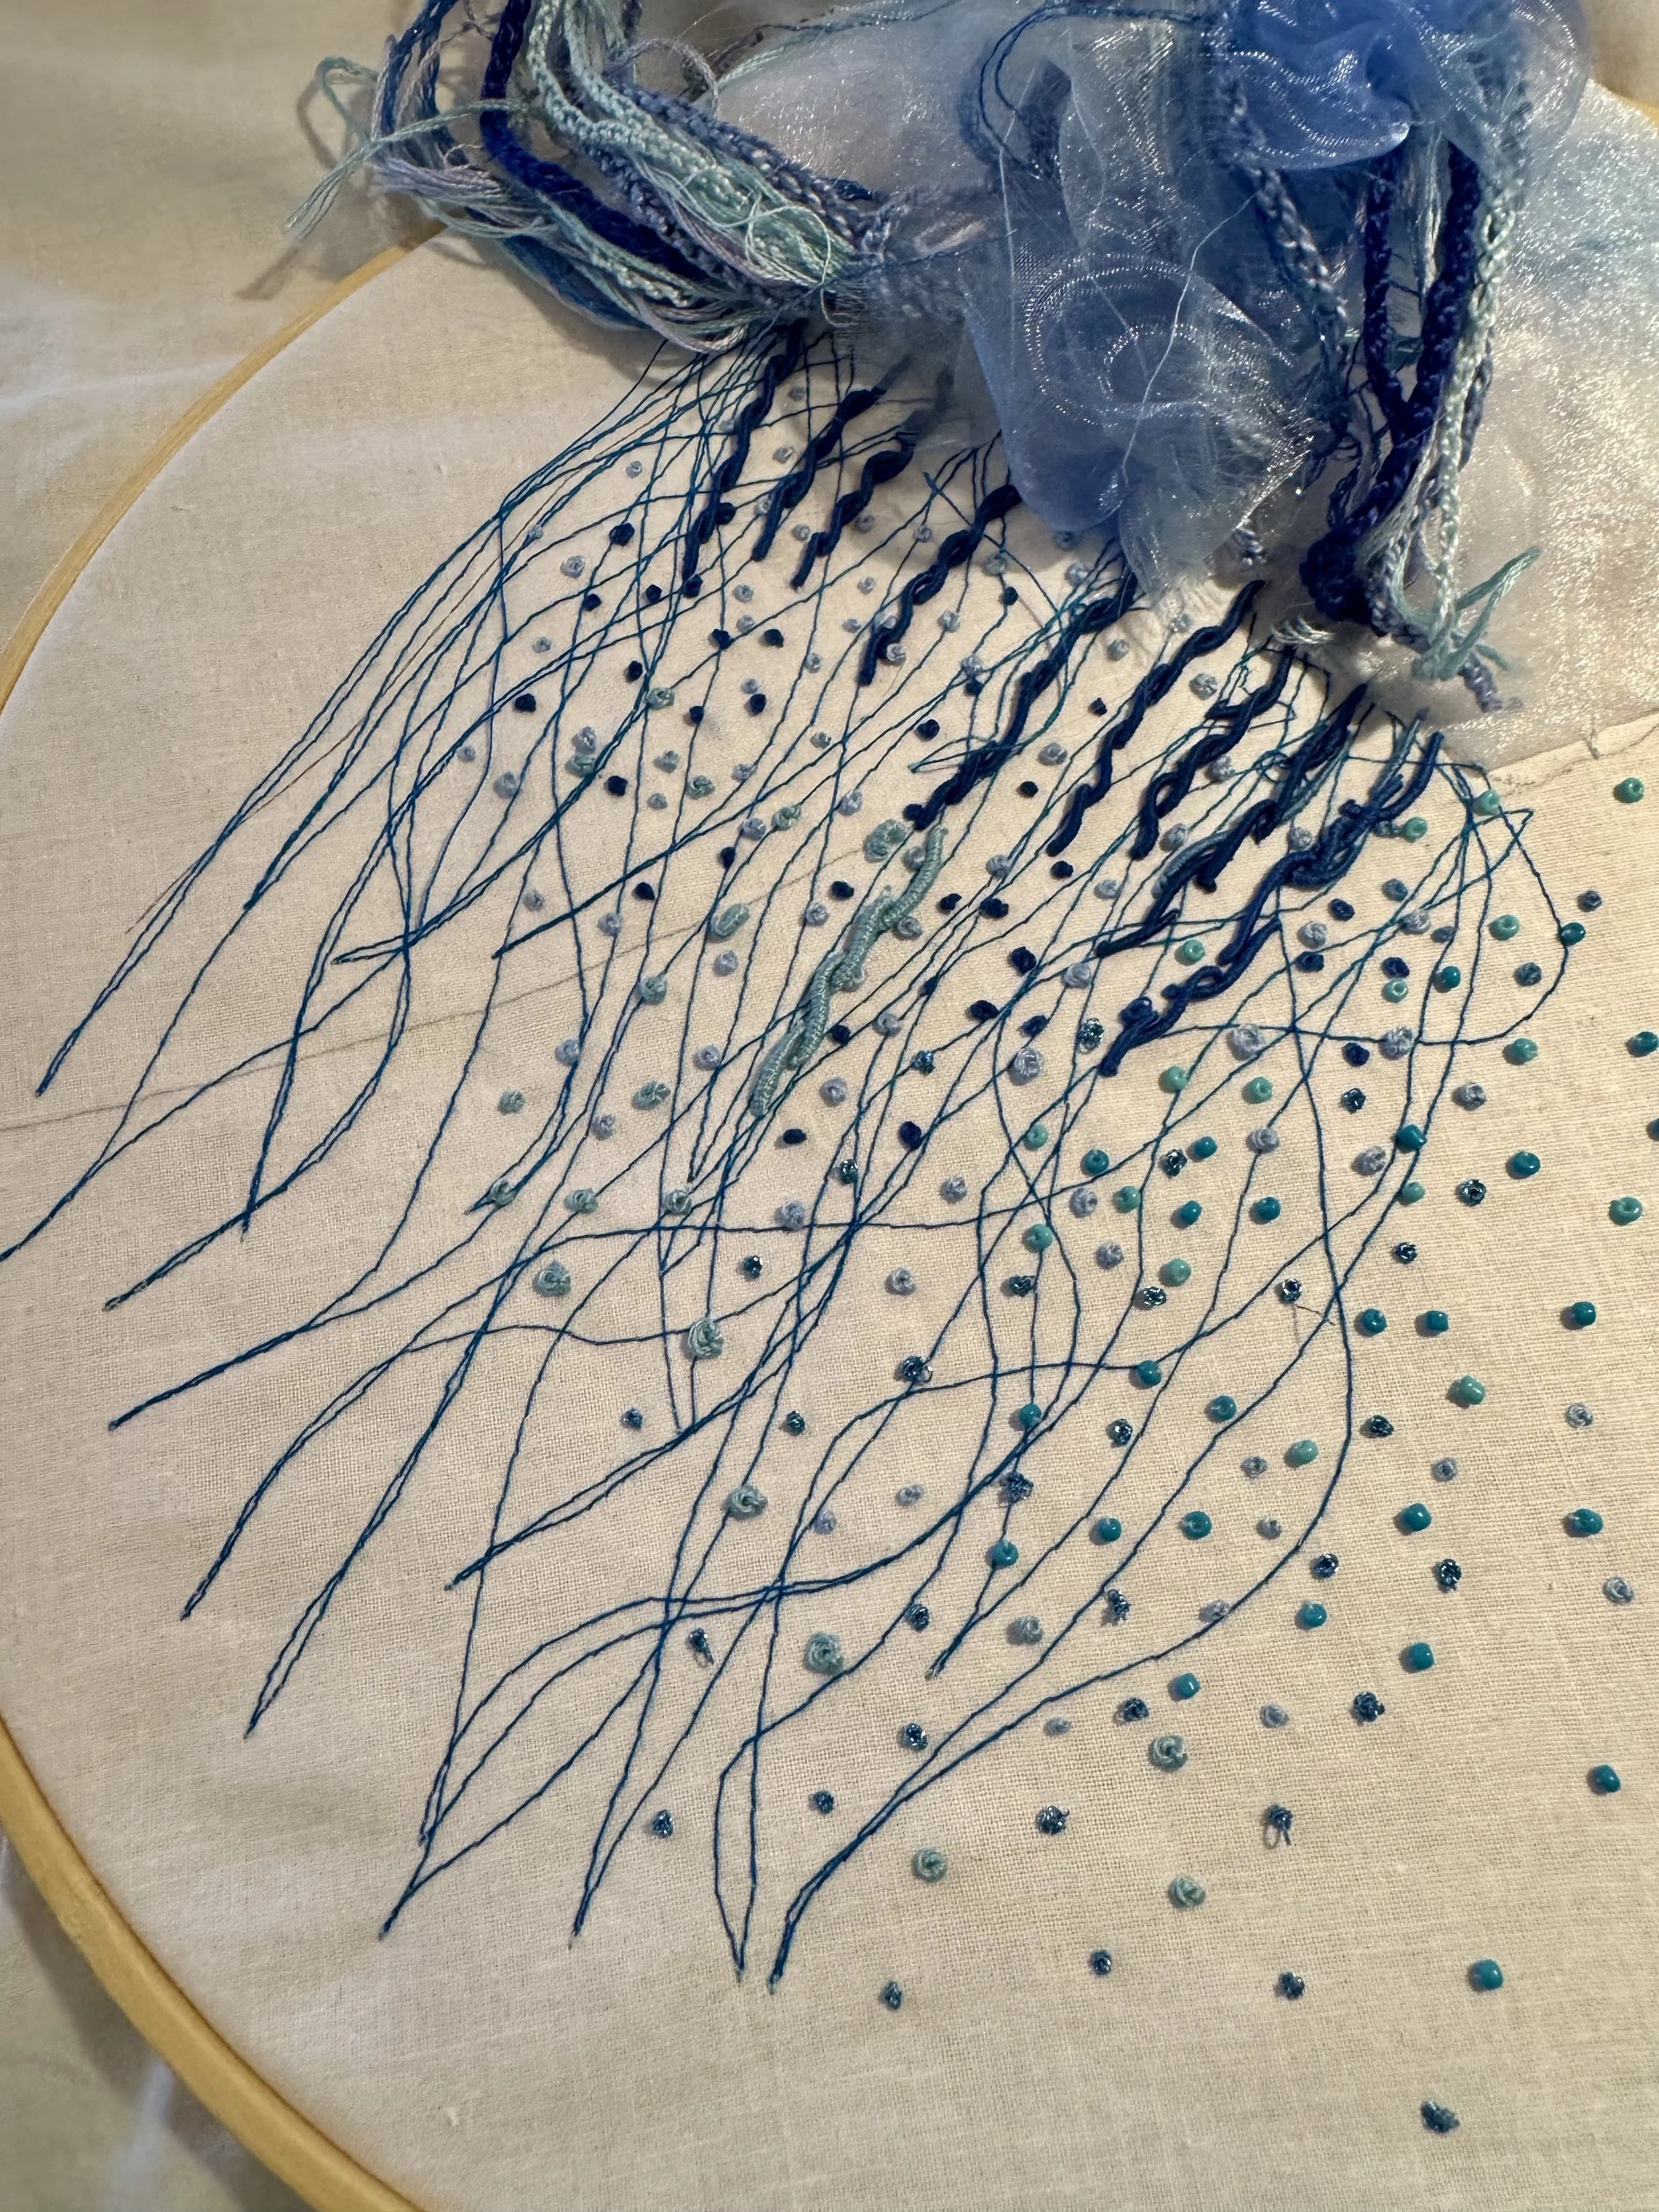
Spanish Sewing Retreat
It all begins with an idea.


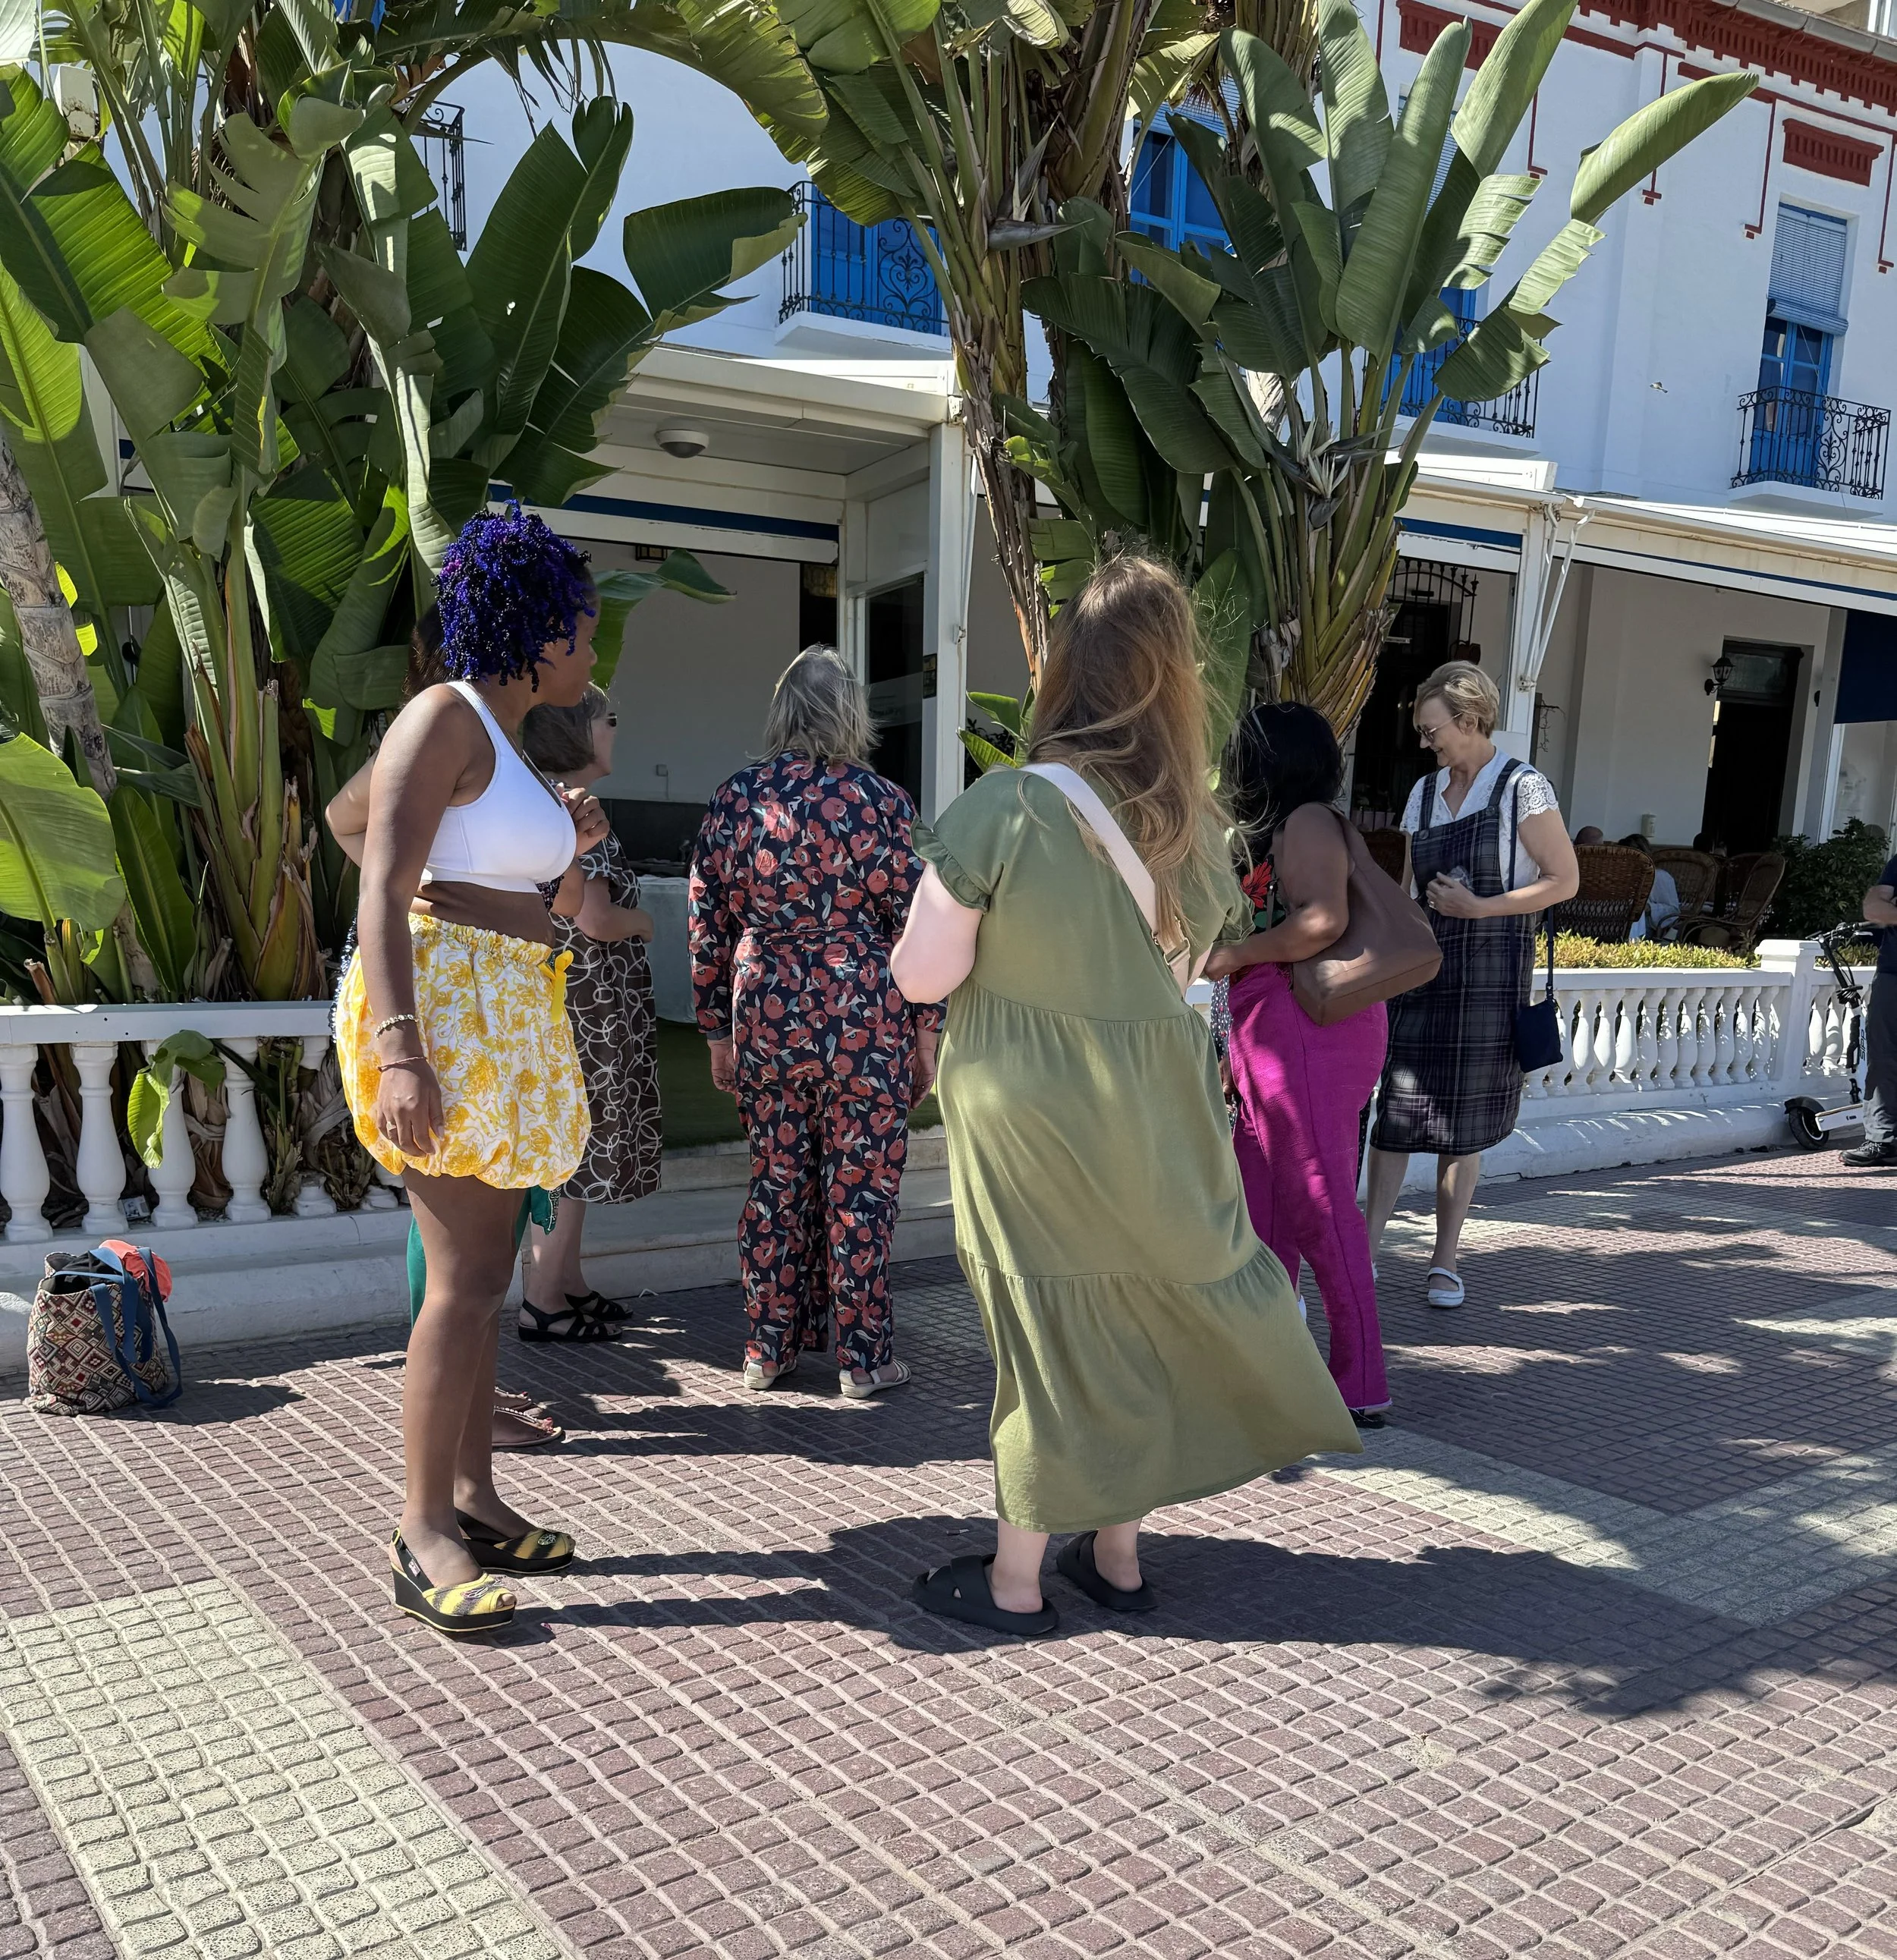
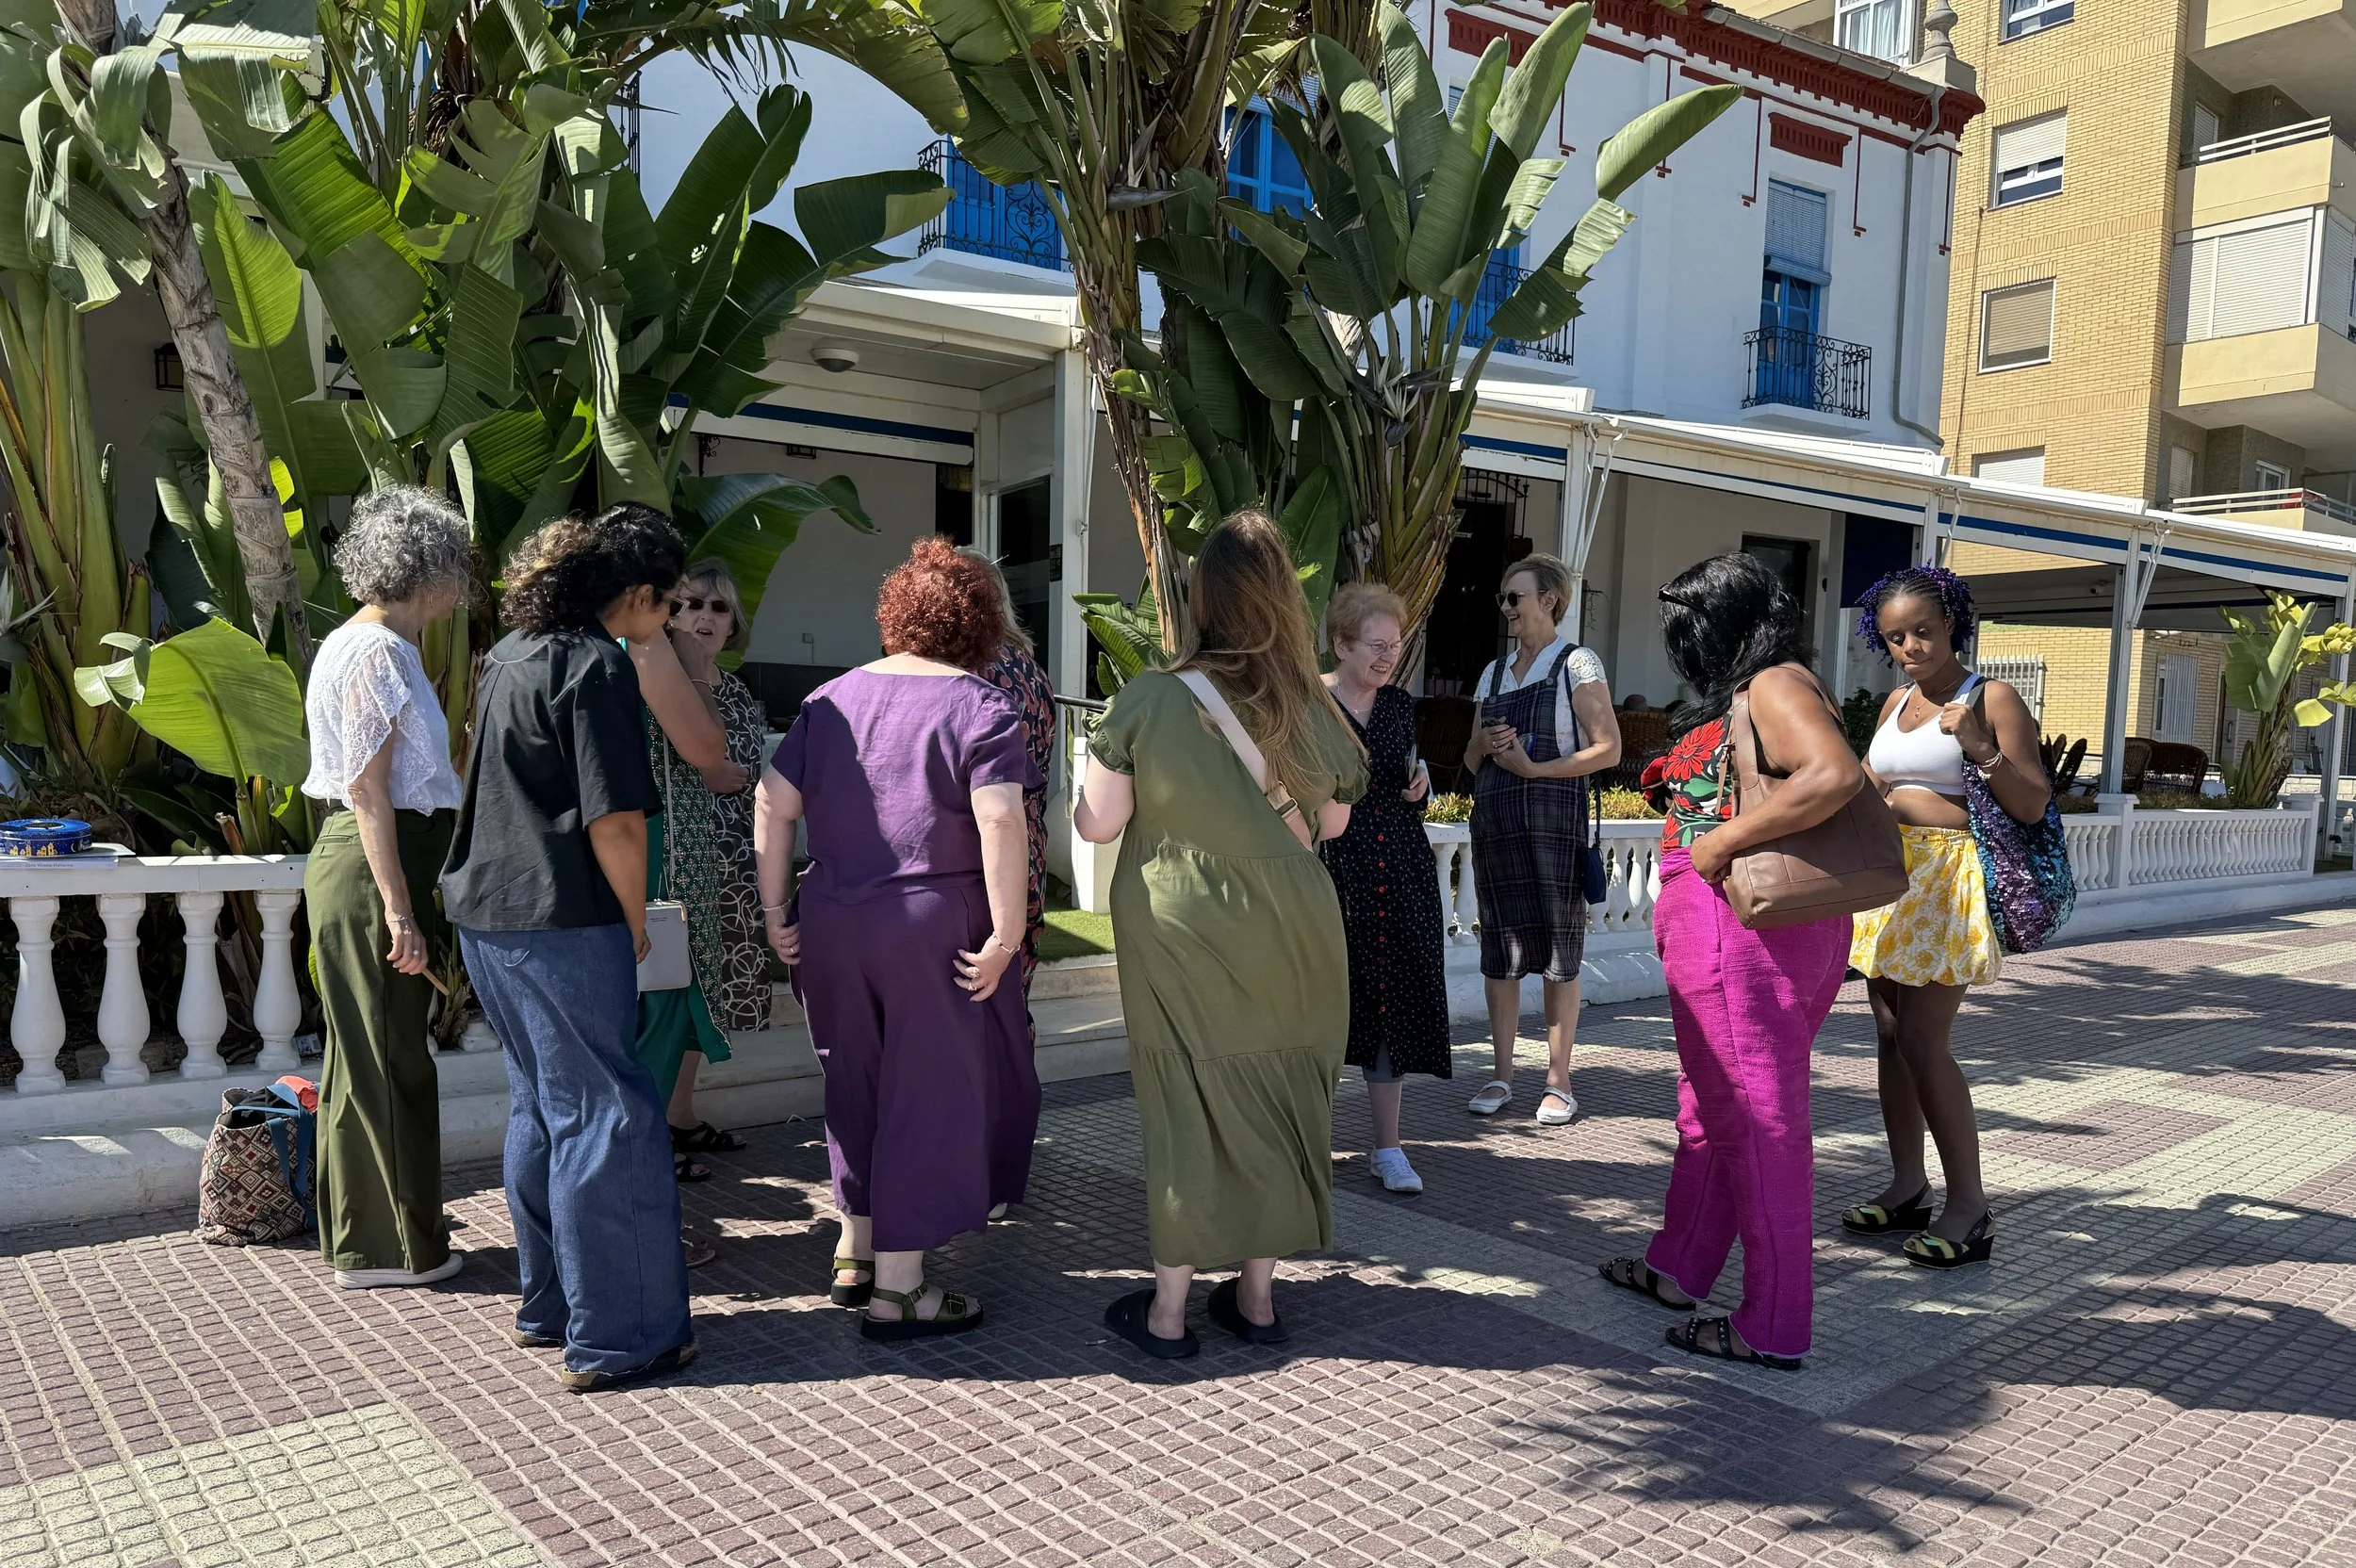
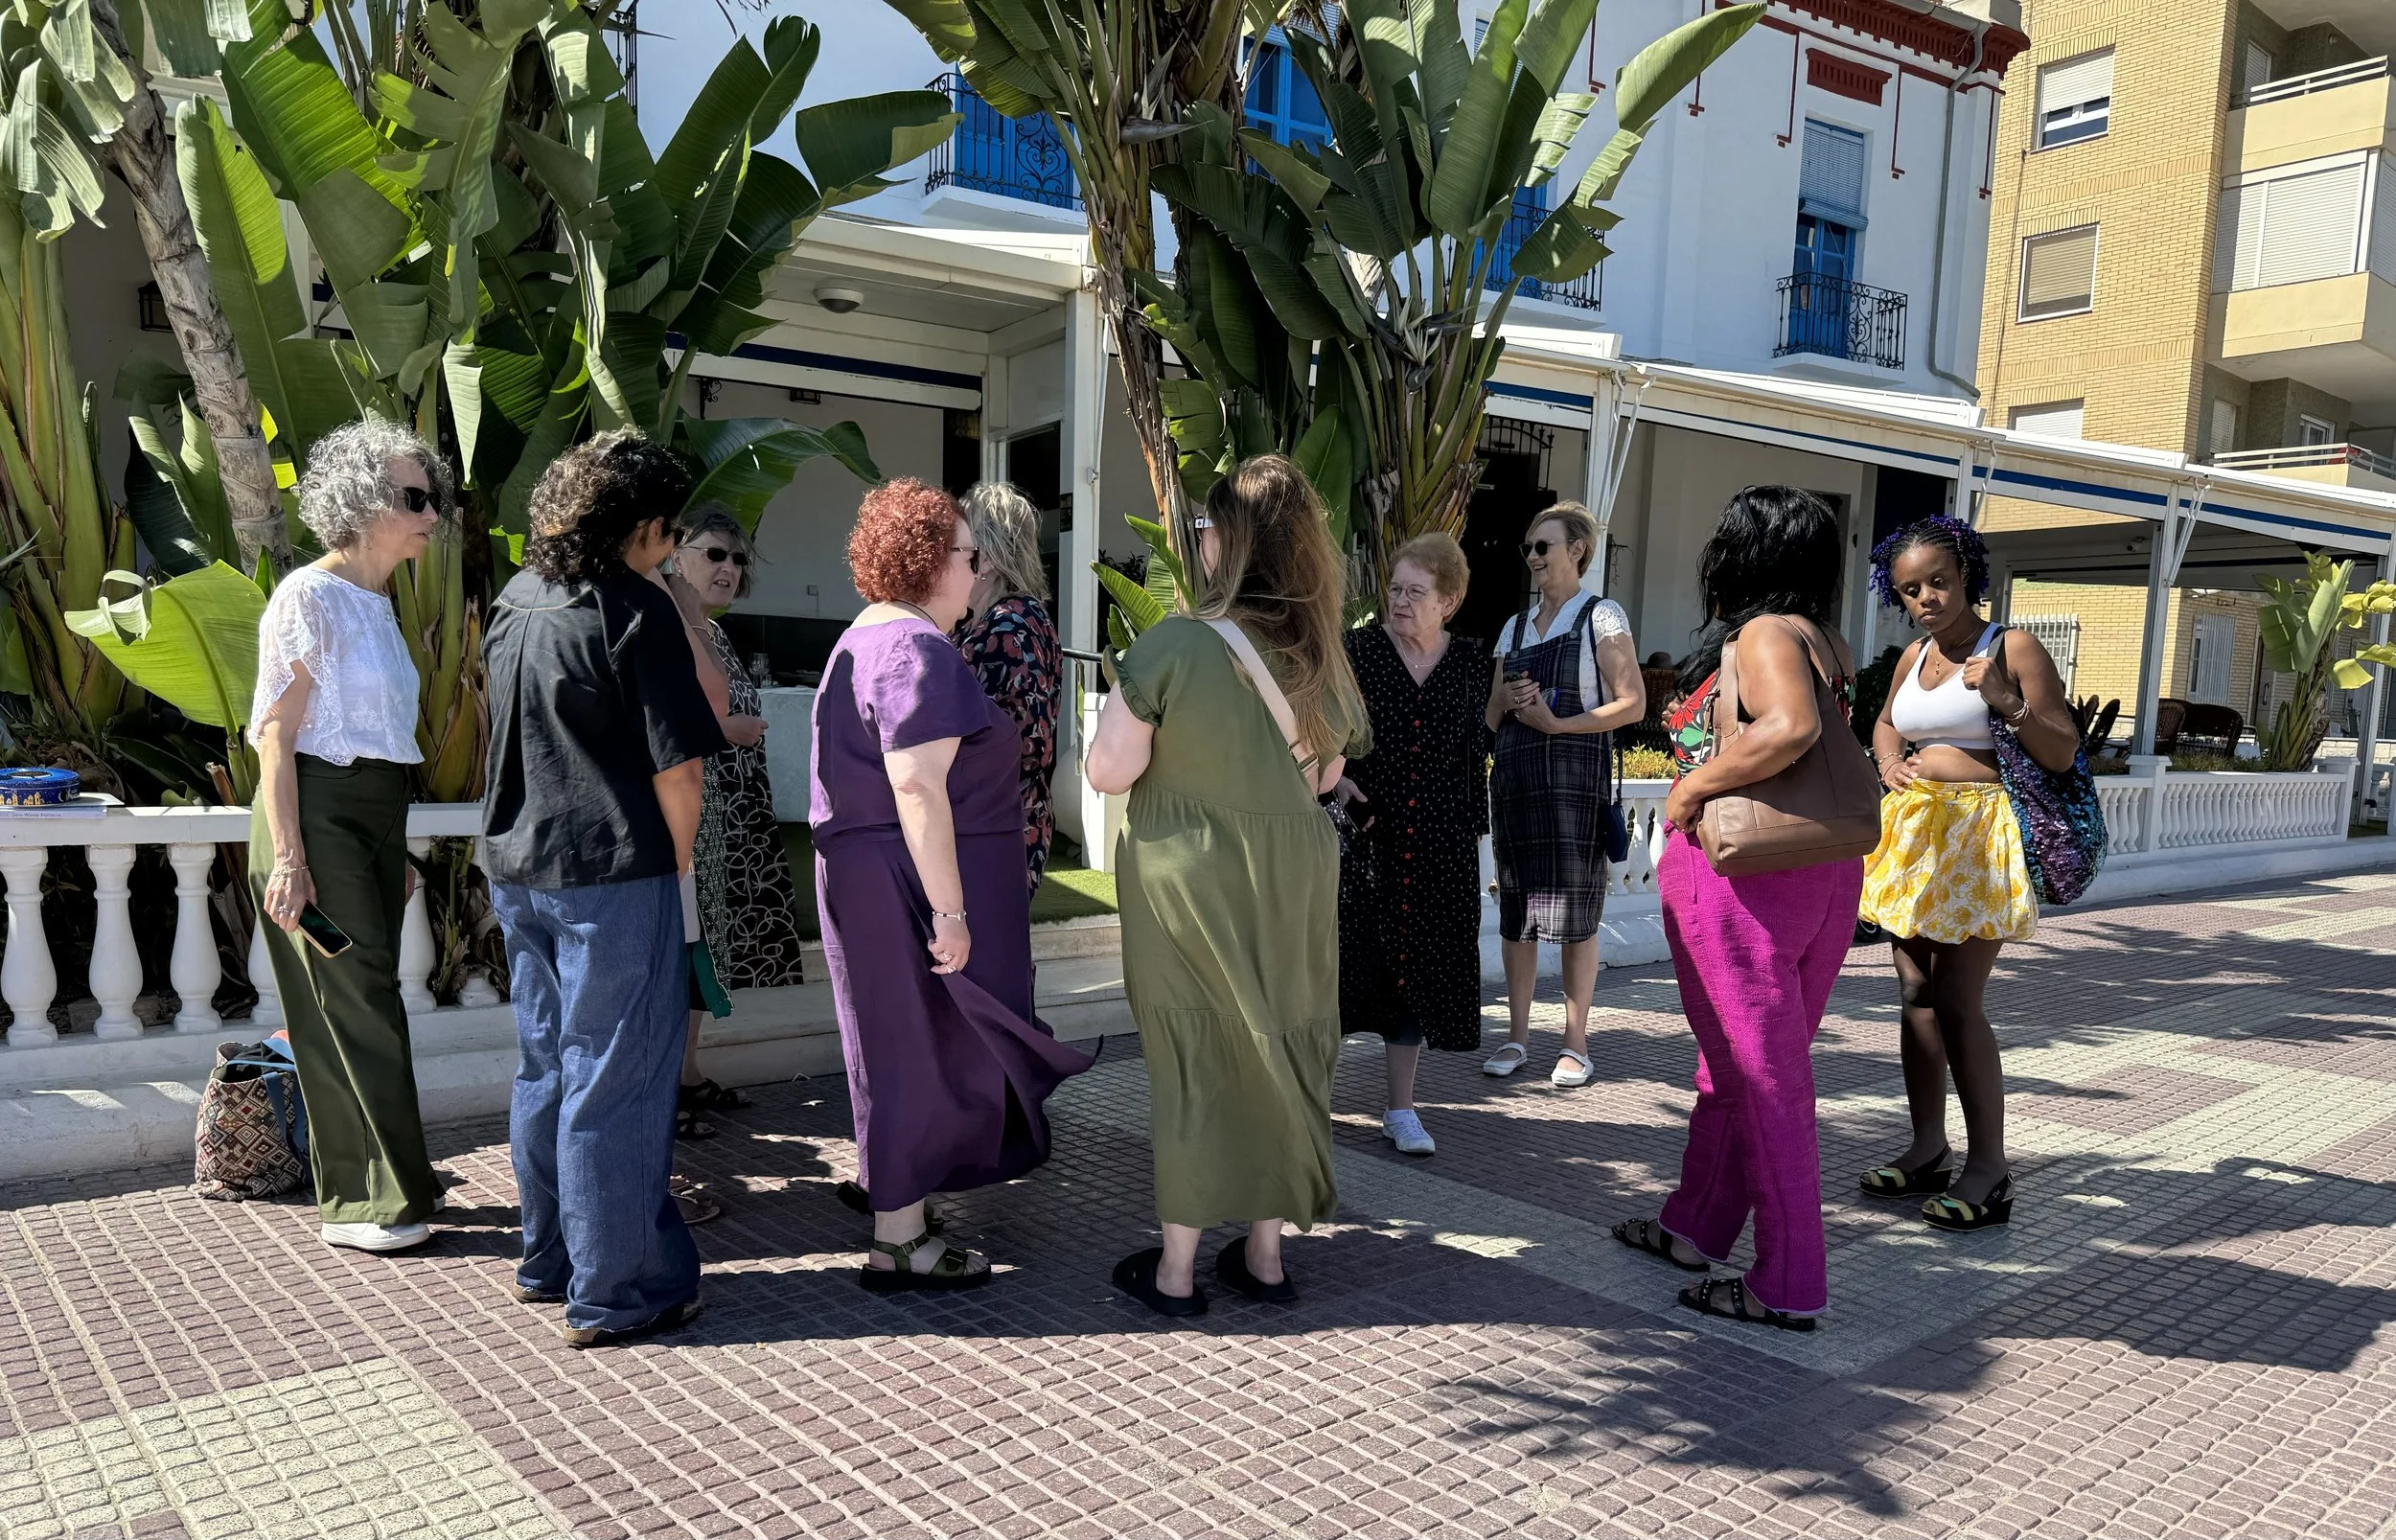
his week I have been in sunny Spain on a sewing retreat. I have had the pleasure of sharing a sewing room with eleven fabulous ladies who are all incredibly talented sewers.
We were all brought together by the lovely and talented Deb Day of Deb Day Sewing Room. Deb has been working on this retreat for at least 18 months, she’s poured everything into it to make the perfect sewing retreat.
All of the group have been producing garments, busy sewing a huge array of fabrics into gorgeous, dresses, trousers, tops and loads more. All of us were being guided by the amazing talent of Brenda Killigrew of IDC College and of course Deb.
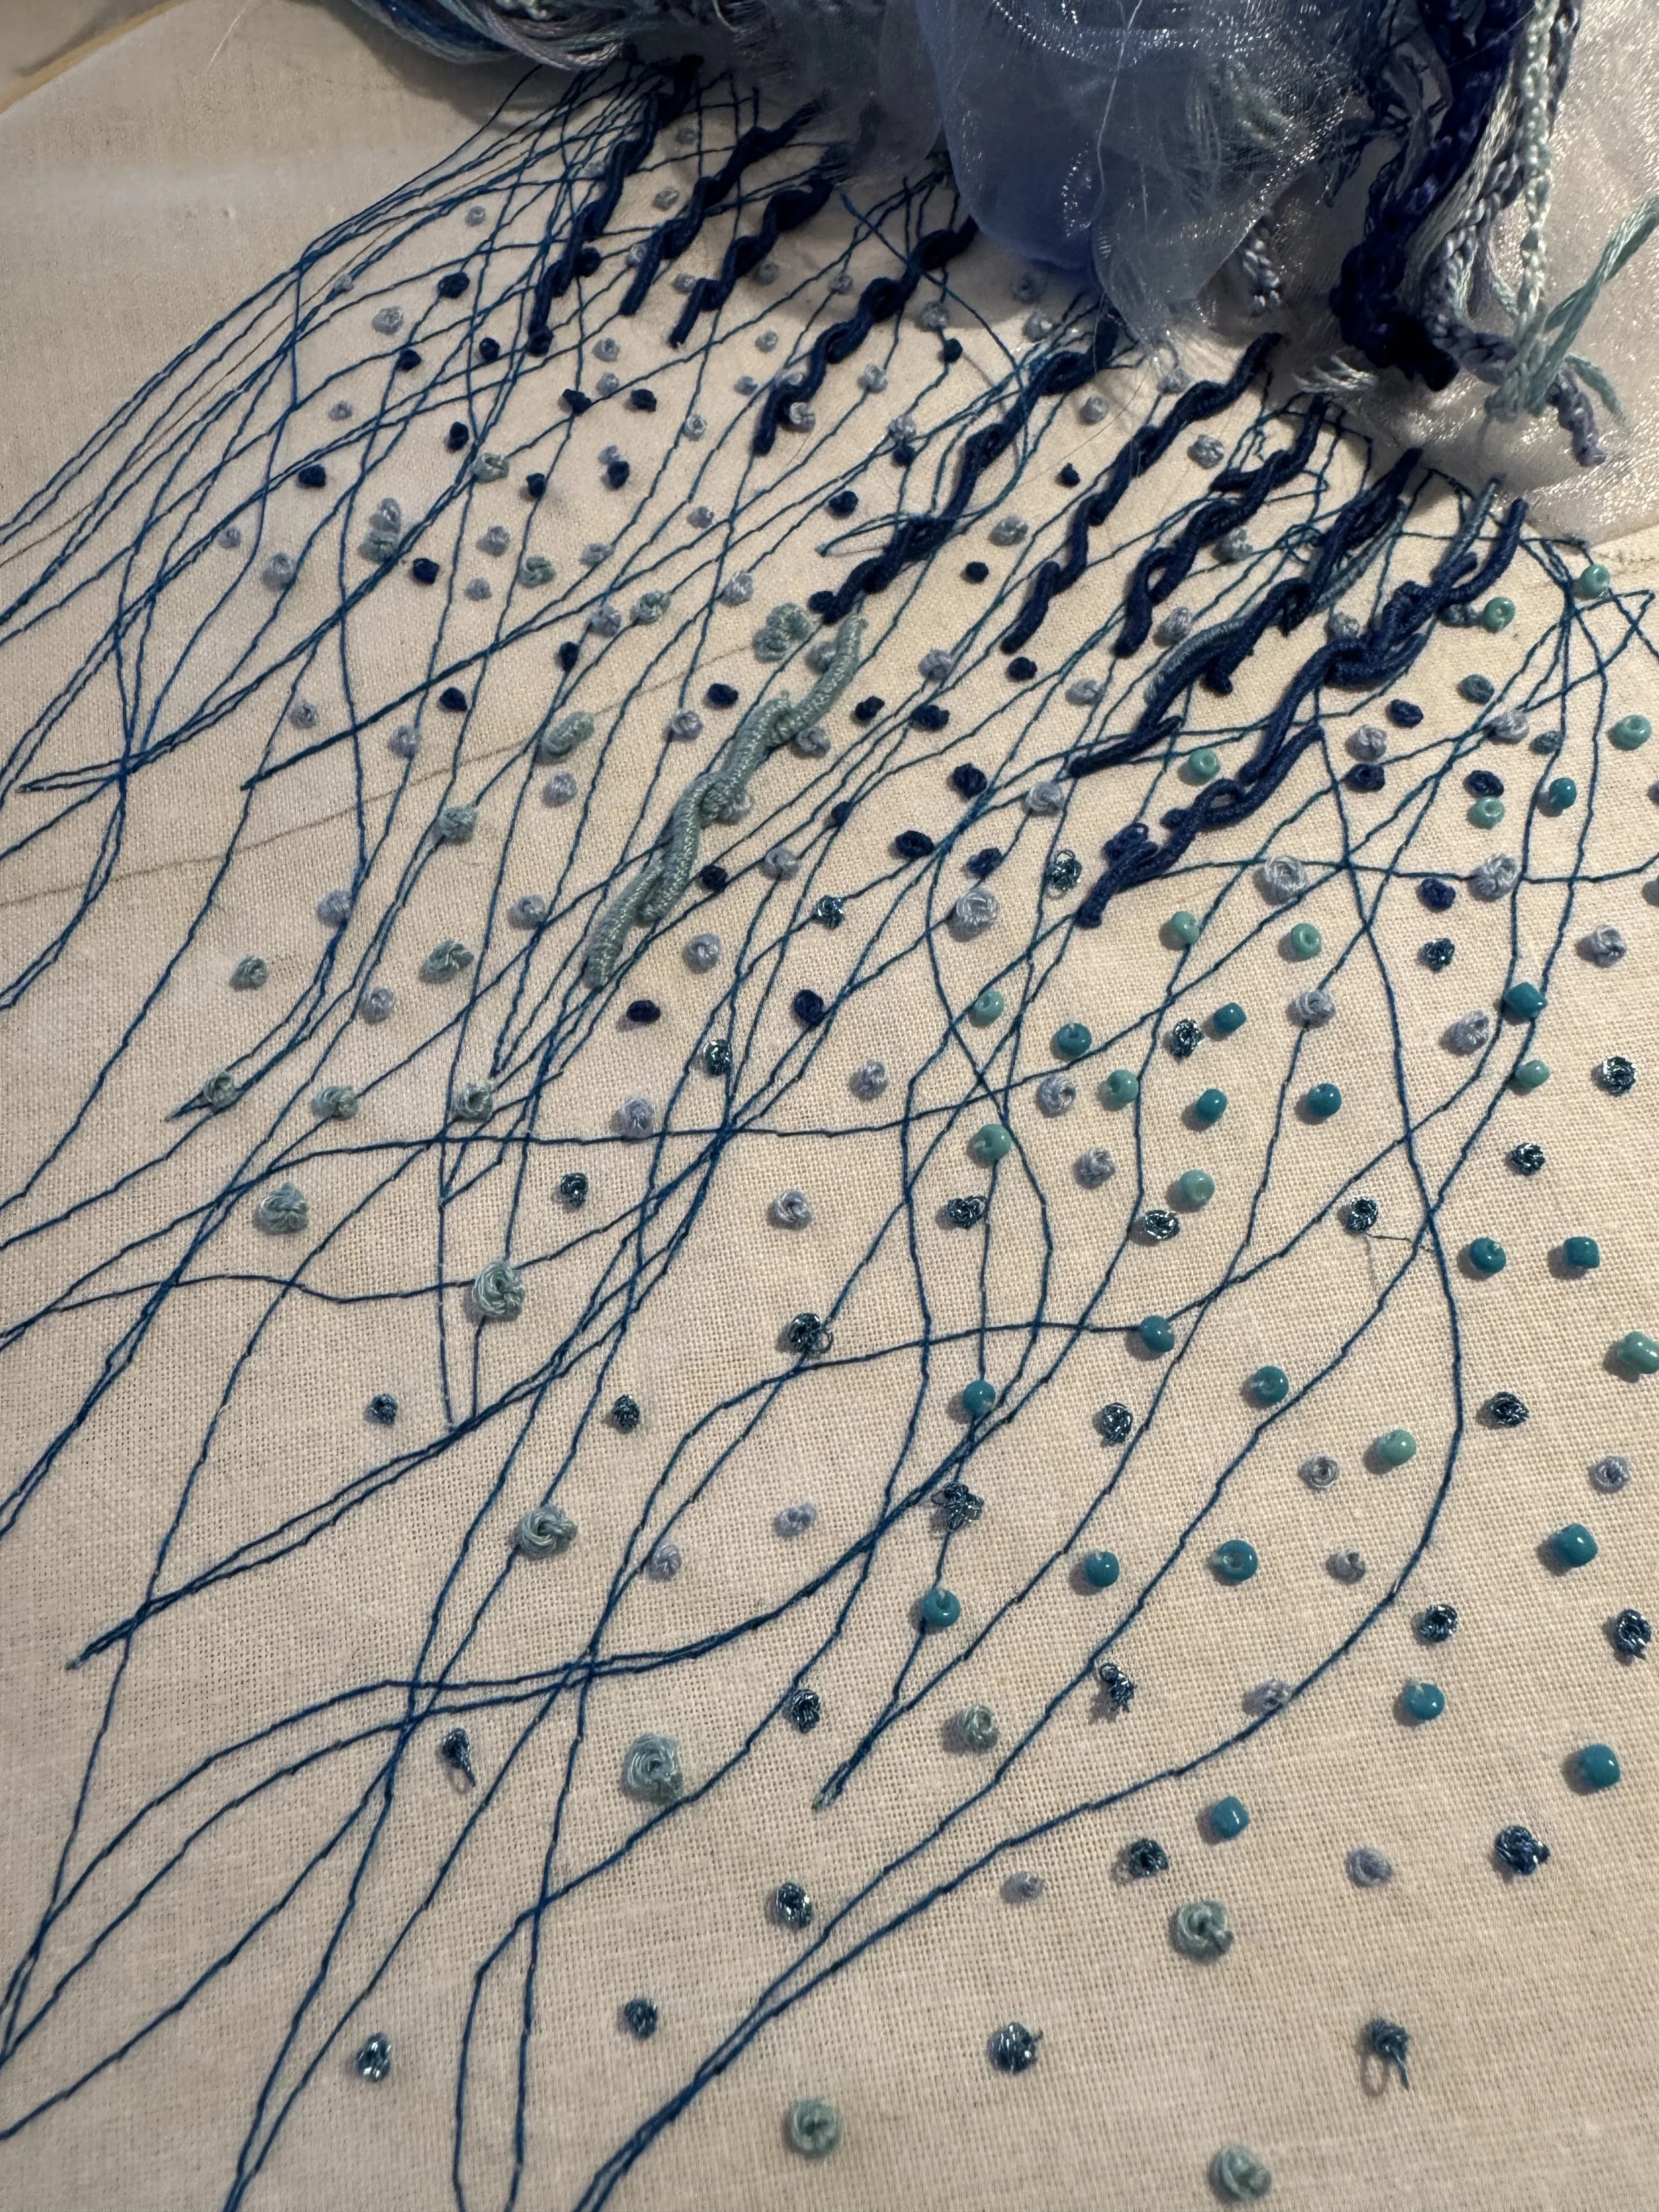
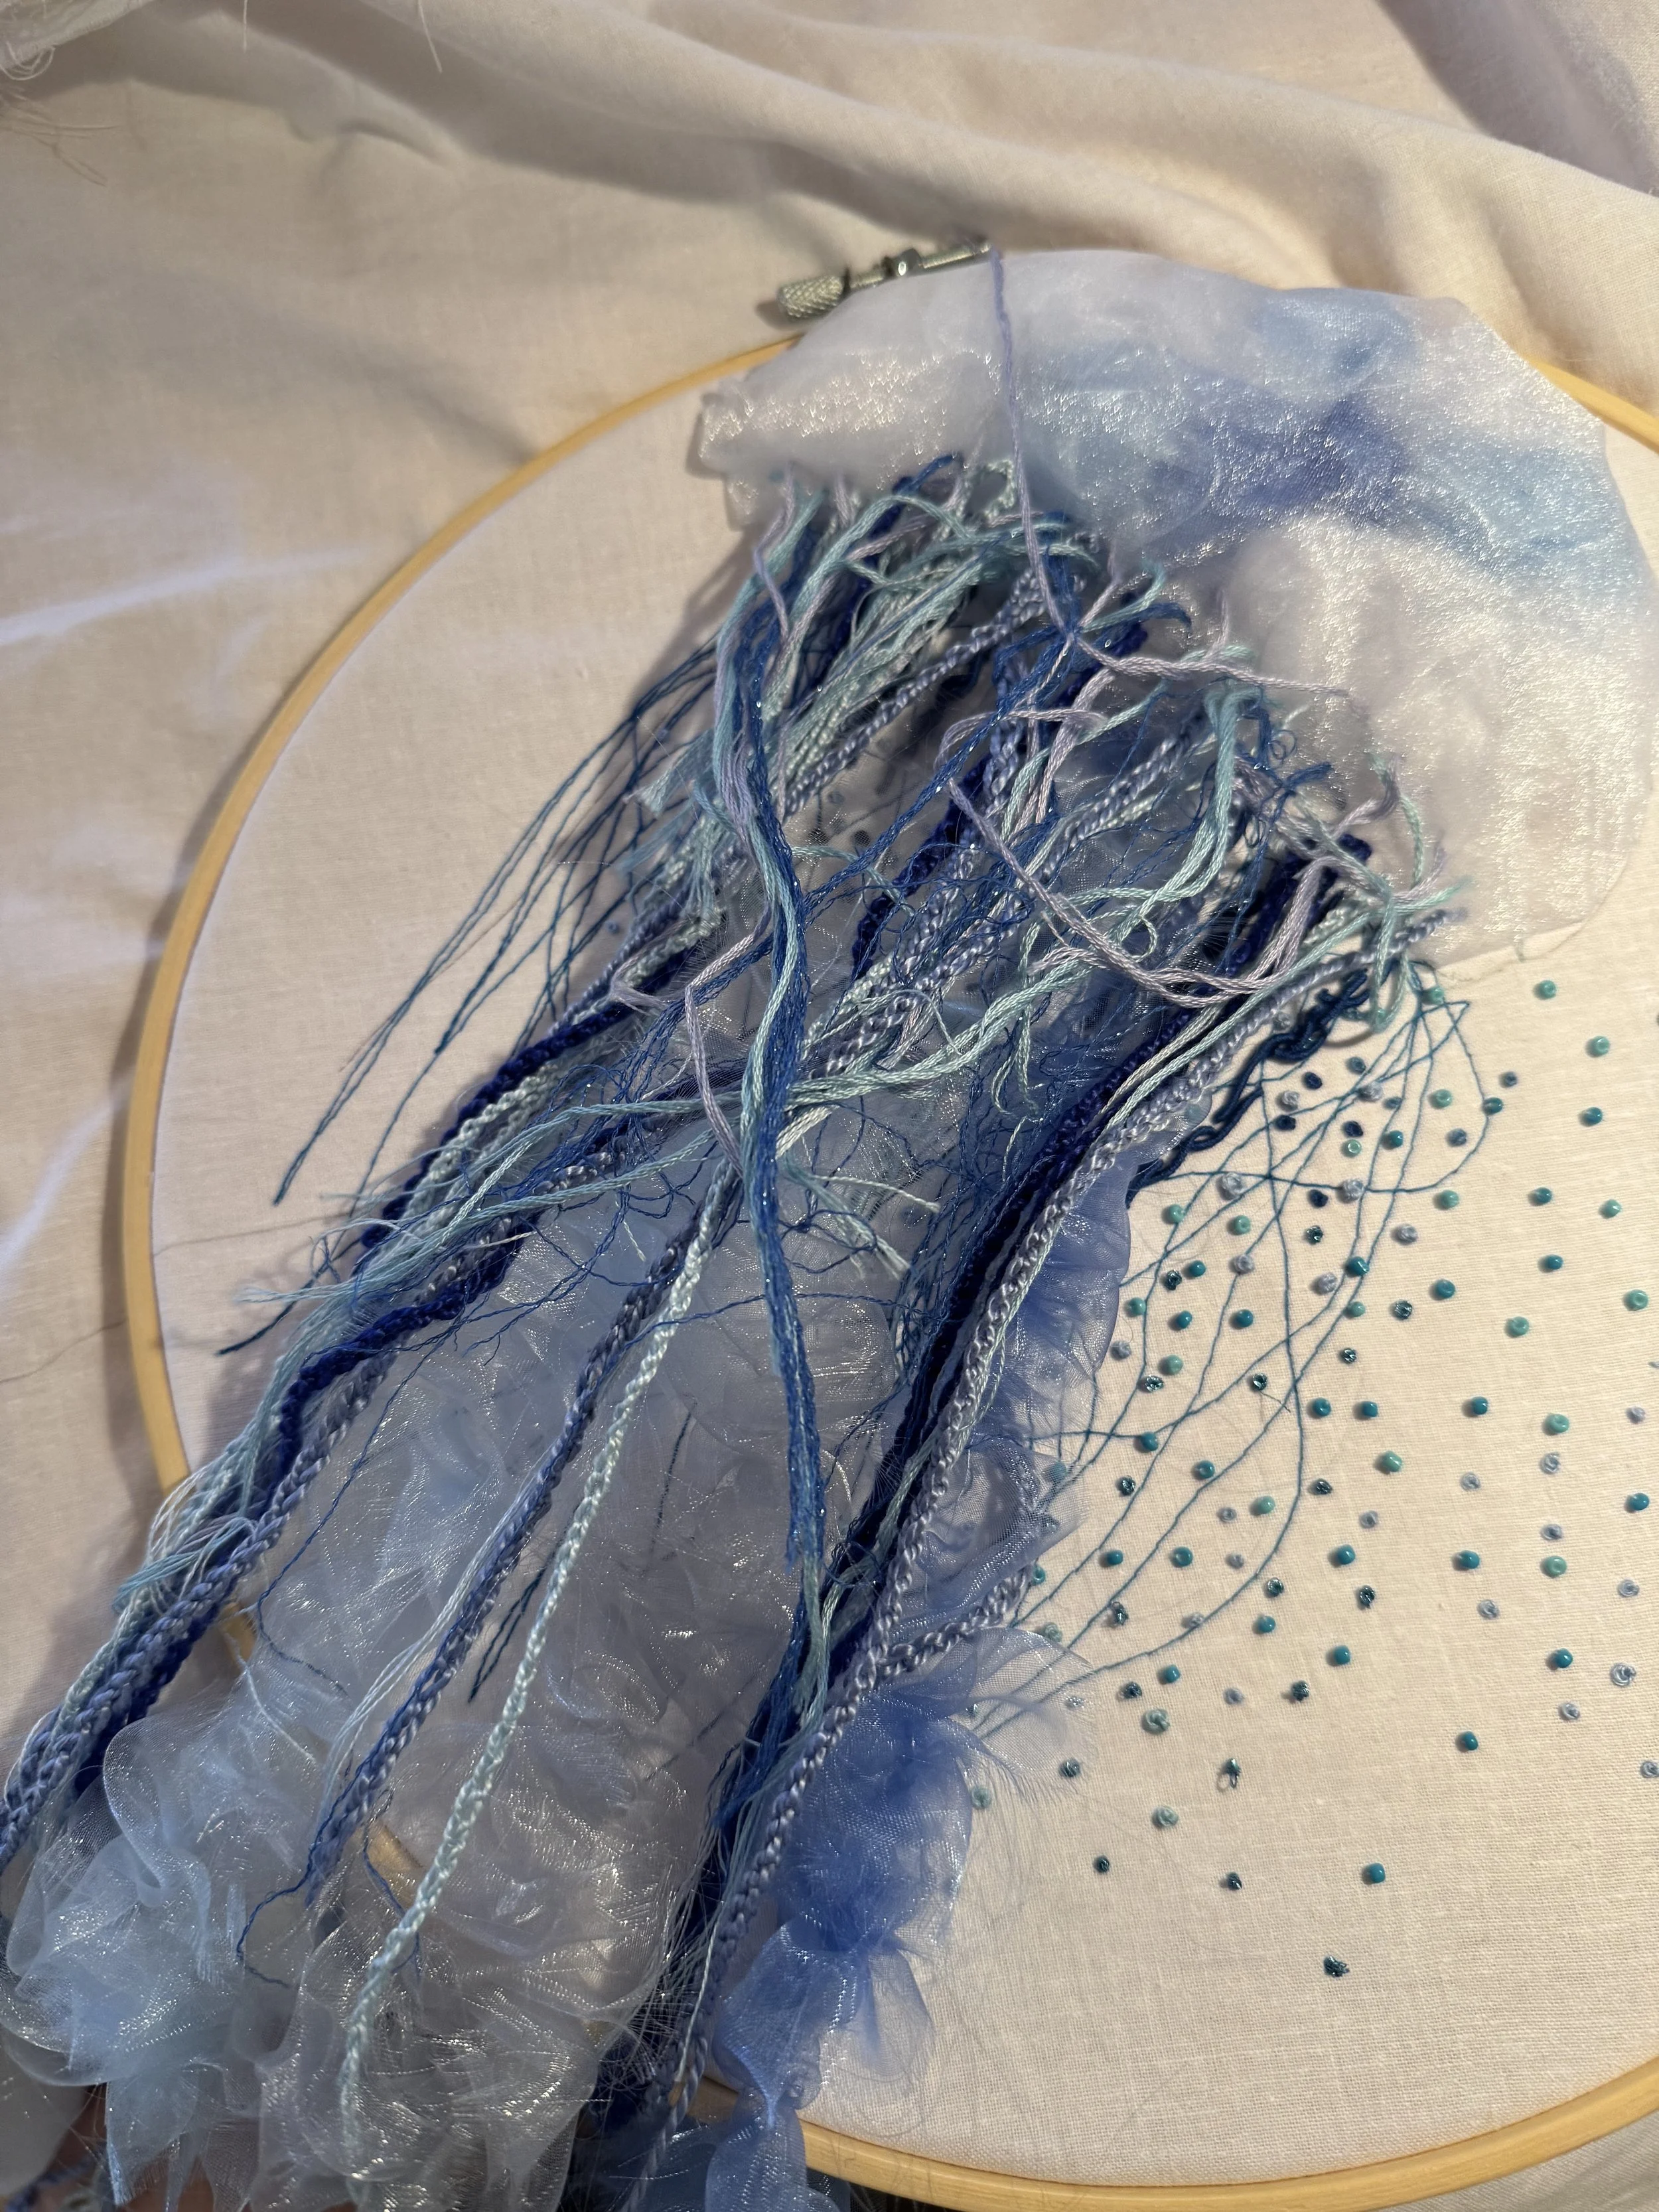
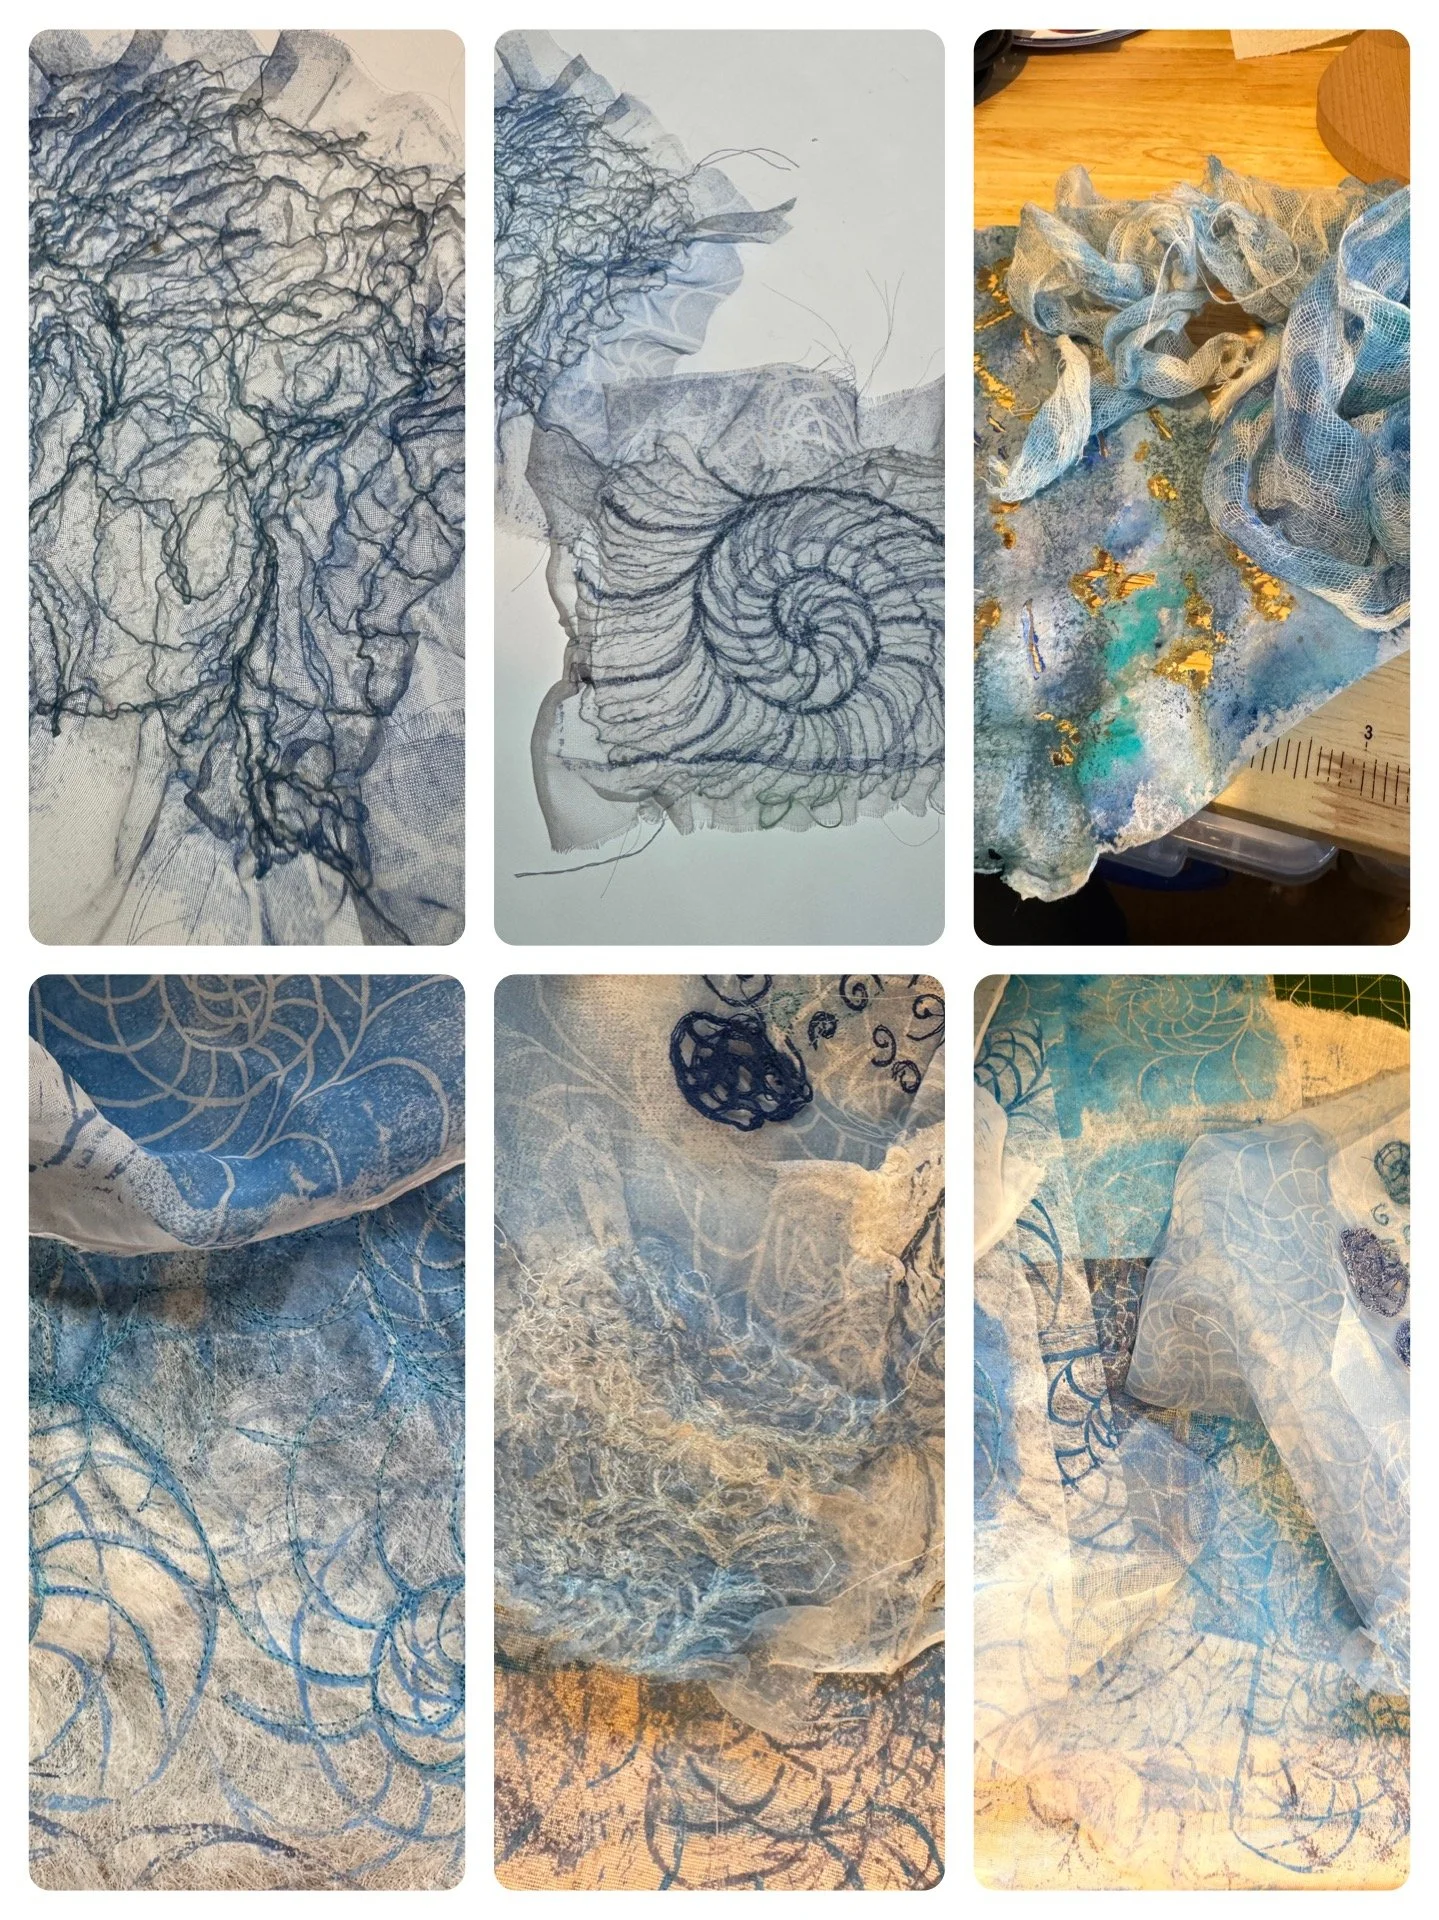
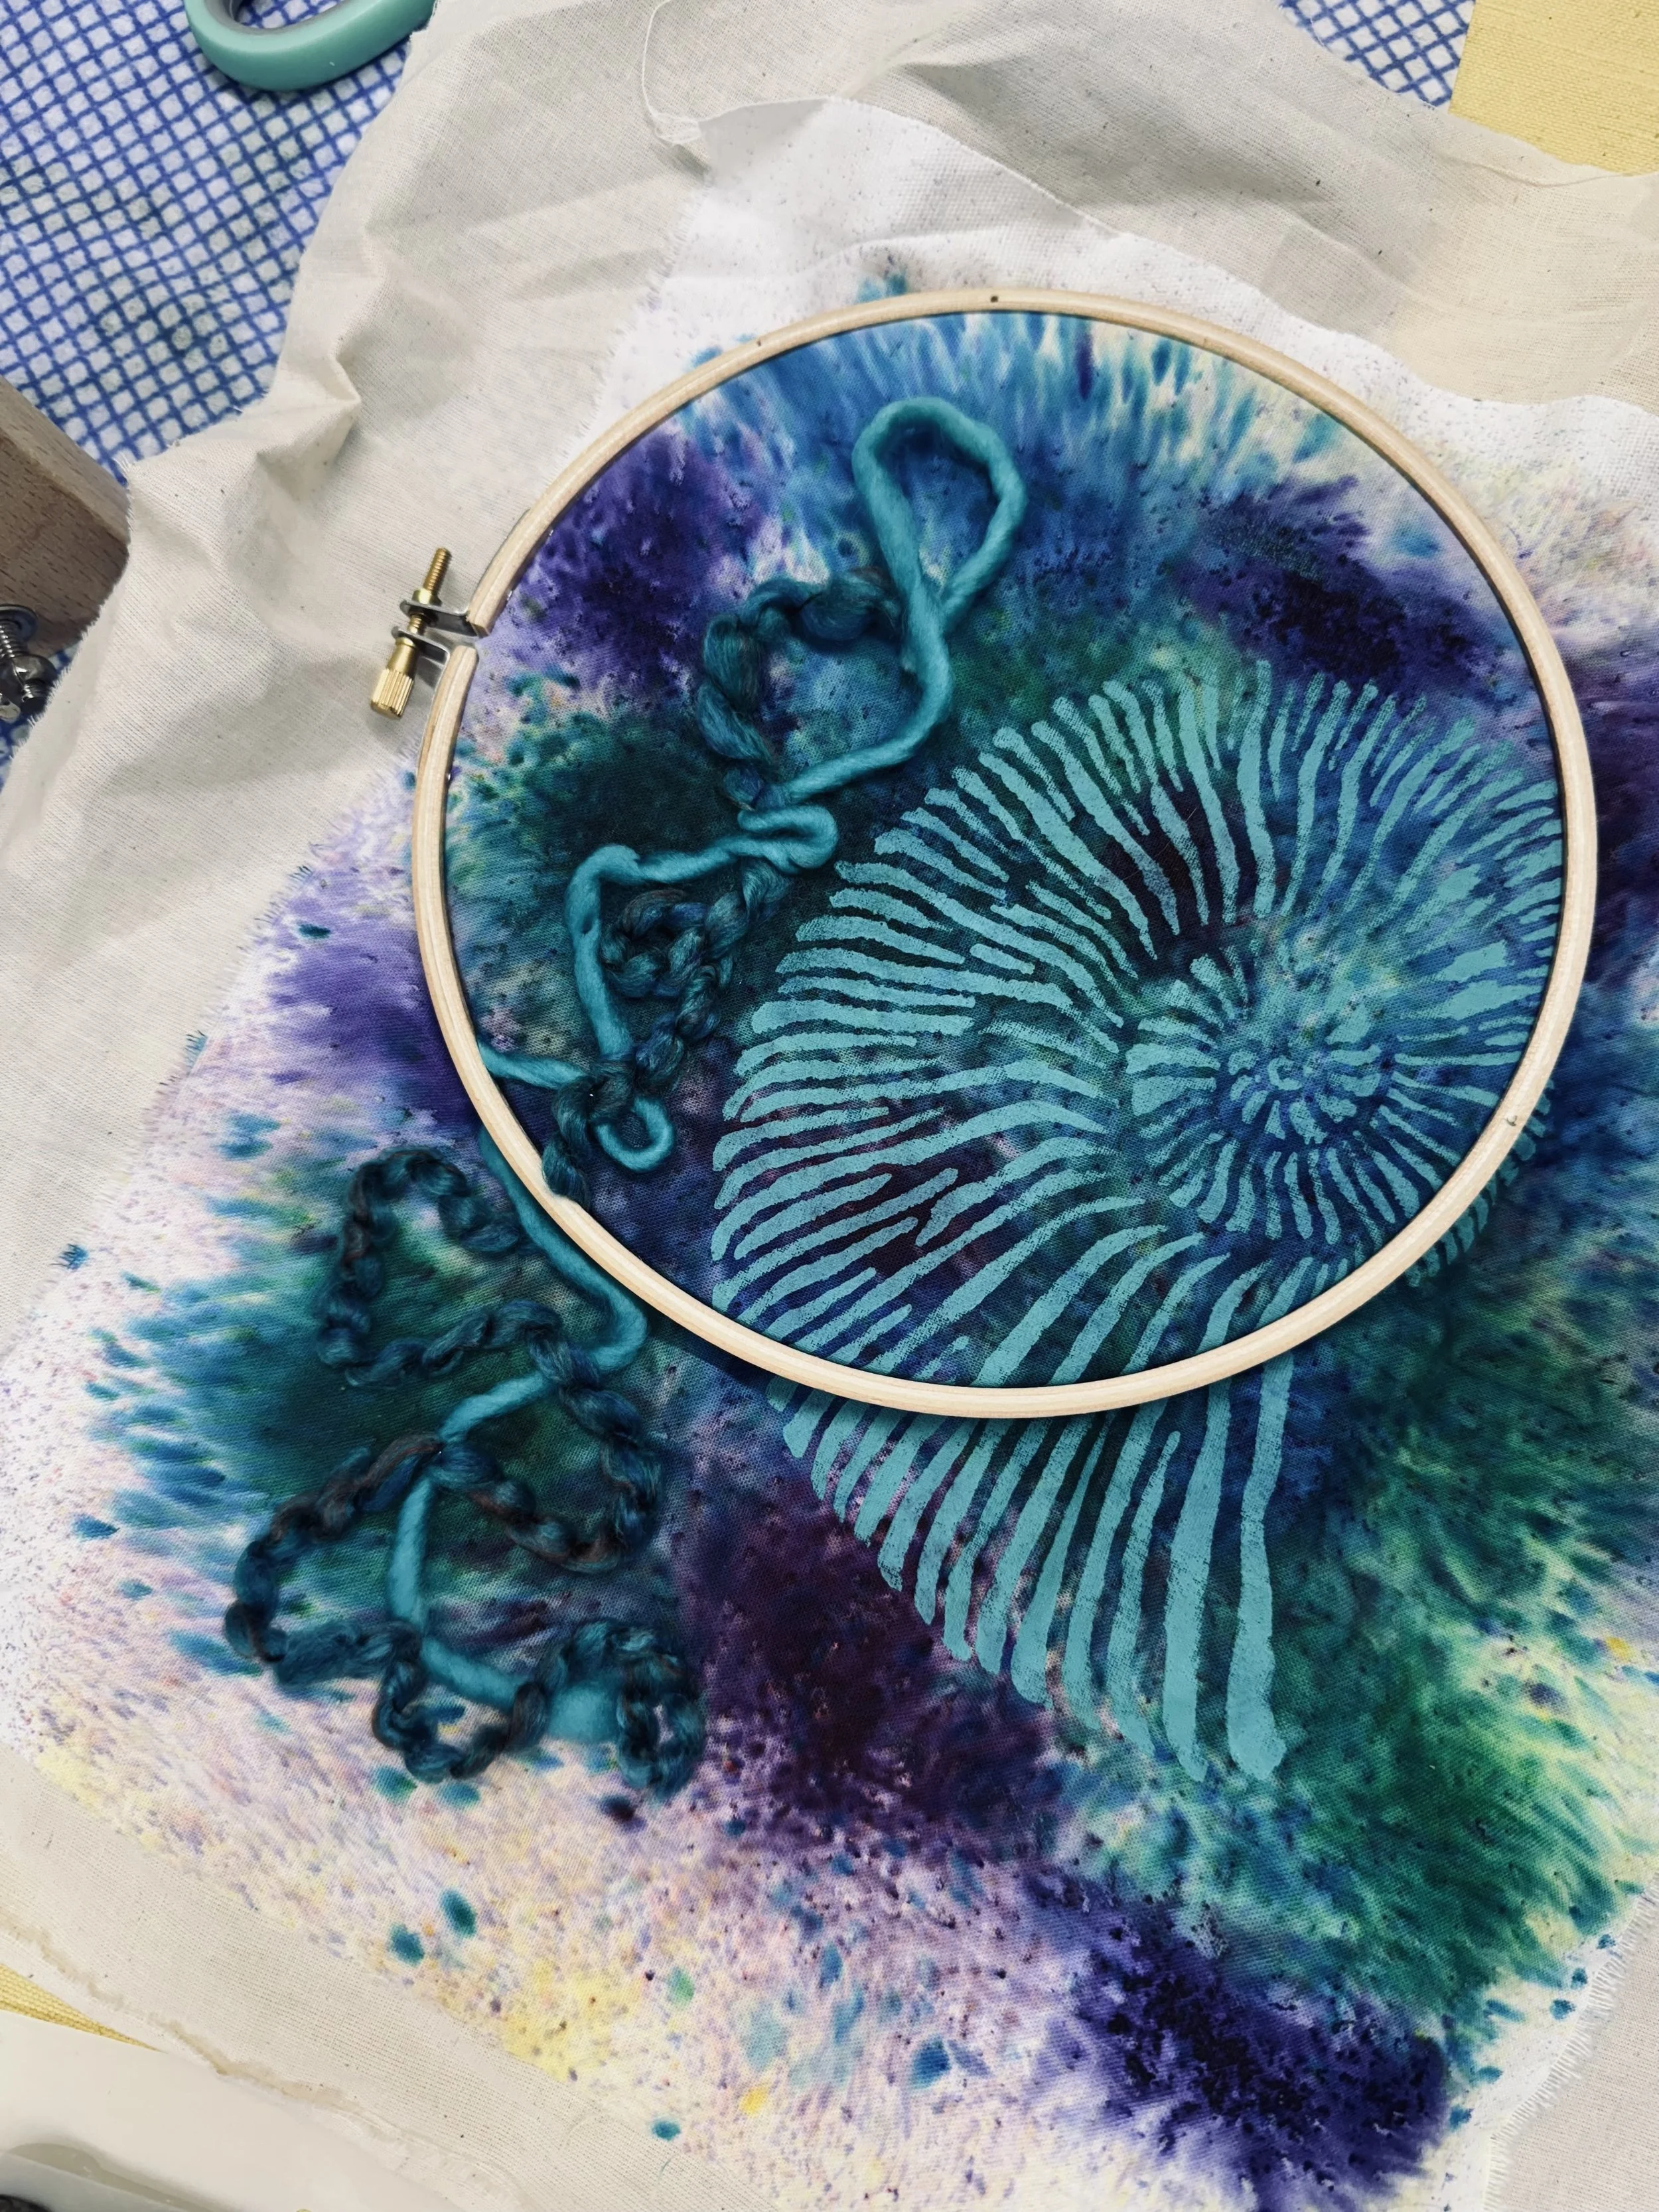
I on the other hand decided to do a piece of textile art, always the rebel. I’d had an idea for a jellyfish this time, I’d been working it out in my head for weeks and it was time to get it out of my head and onto cloth, it truly has been a privilege to create art in such a beautiful location and in the lovely sunny weather. If you’ve never been to Los Alcazares in southern Spain, you really are missing out.
Anyway, here’s my project so far.