

Create Stunning Woodland Embroidery with French Knots
irst had the idea to create a woodland floor after creating my earlier piece called Earth. Along the same principle of Earth, woodland uses thousands of French knots.
With woodland, however I had decided that plant and tree roots were needed to give the impression that it wasn’t just grasses and moss, it needed to have a series of root systems showing. To create this I used bullion knots which twist and turn with each other to create tangles of roots.
As well as creating roots using bullion knots, I used a further technique based on the principle of a bullion knot, but made it detached from the fabric, this creates the illusion of vines or root systems that were then added to the design at the end, I think you’ll agree that this gives added interest and looks really cool.
Many people shy away from French knots and find them quite intimidating, but with practice they really are simple to do and create great texture in any embroidery piece, so how are they done? Here’s a quick tutorial on how to create the perfect French knot.
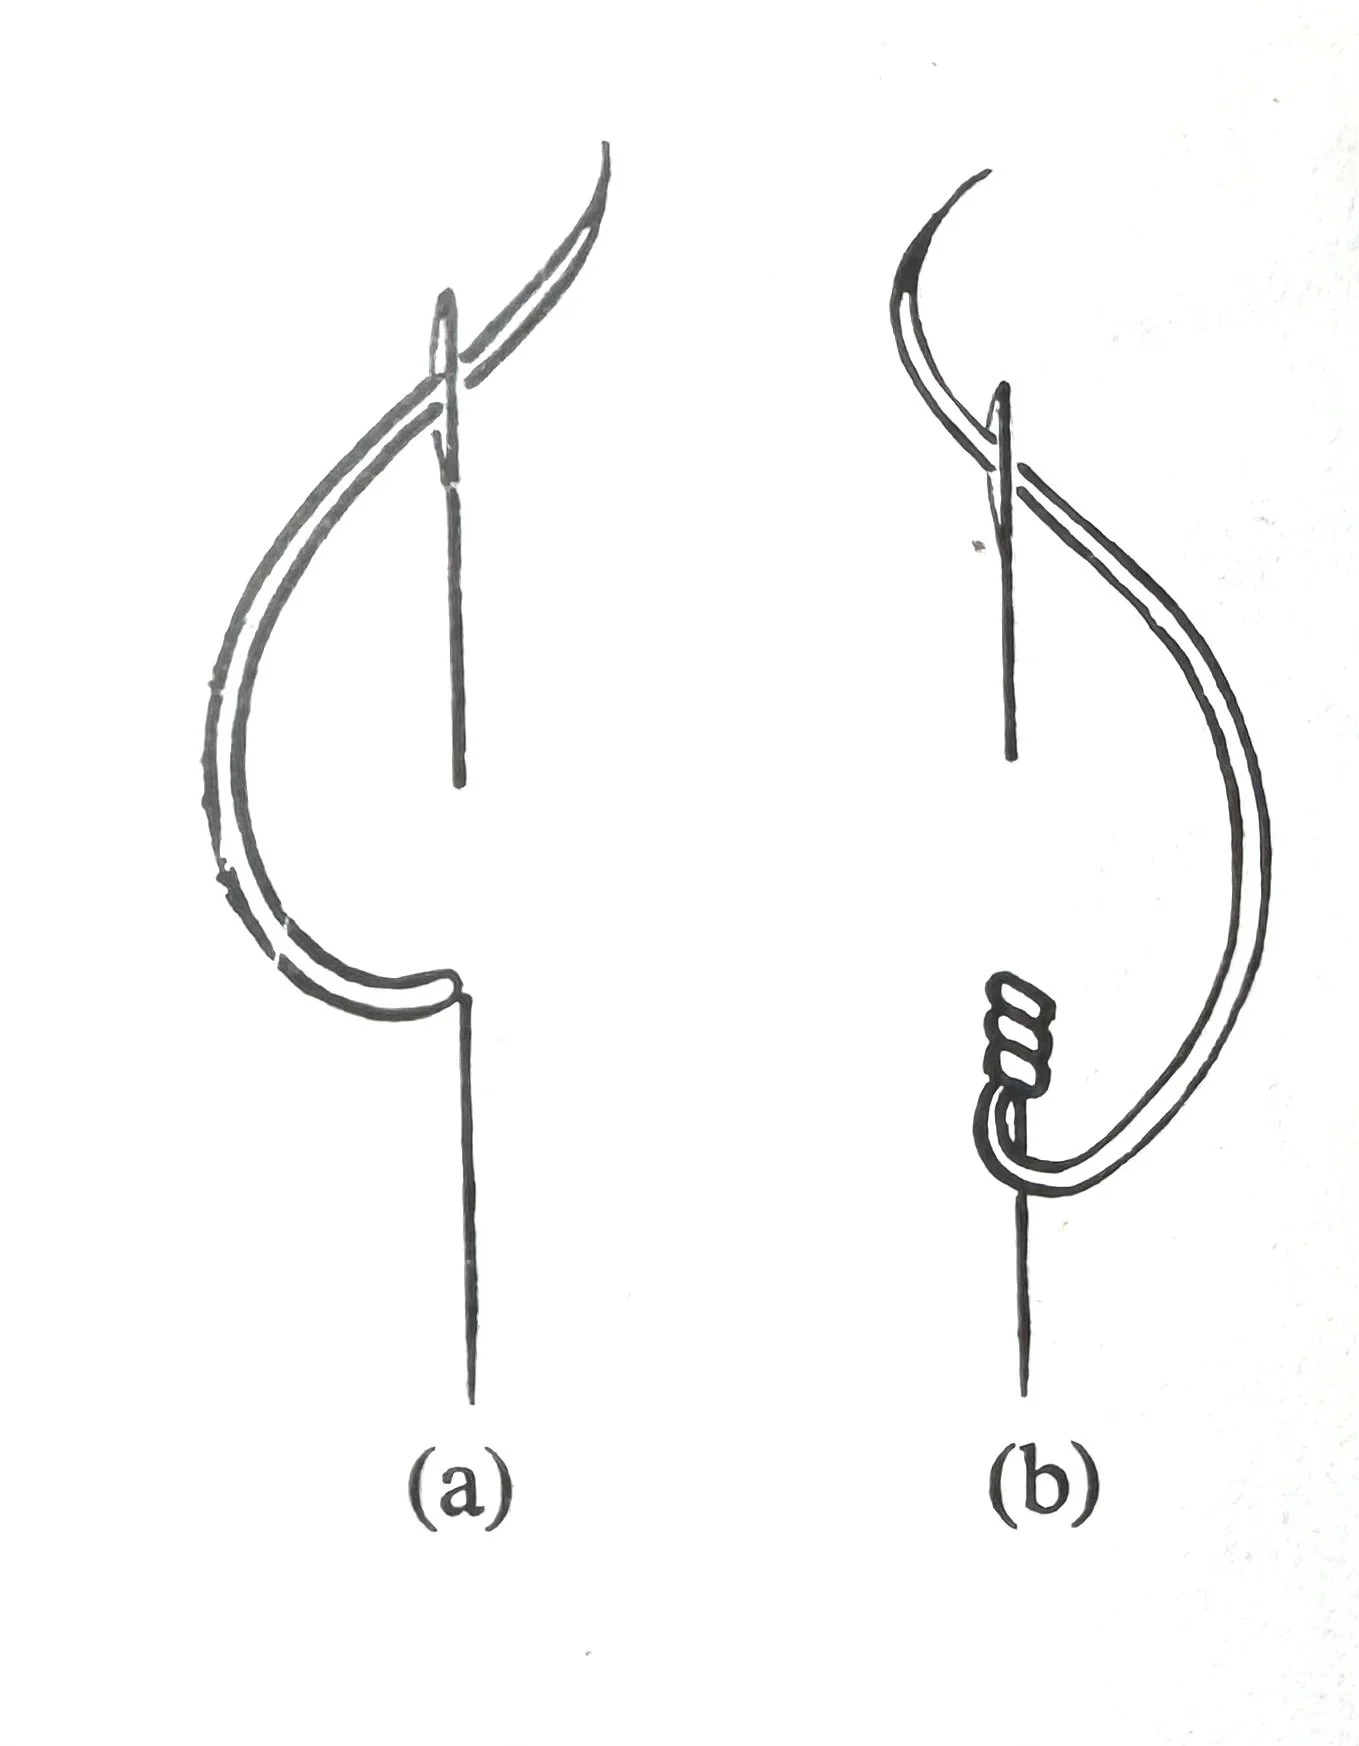
Firstly, come up through the fabric at point one (see fig a) hold the thread between the thumb and index finger and wrap the thread around the needle twice. Still holding the thread, turn the point of the needle round and insert it at point 2. Pull the thread through to the back, whilst holding the thread firmly but not too tightly or it will be too tight for the thread to pass through.

Diagram of French Knots
Practice these on a scrap piece of fabric and I promise you that French knots will be part of your repertoire in no time. I would advise that you use a hoop and a stand, either a lamp stand or clamp stand so you have both hands free to work the stitches.
Bullion knots are a little trickier to do, but again with patience, practice and knowledge you can master them, I would suggest that you look at some YouTube videos for assistance, but I’ll try to explain here as best I can.
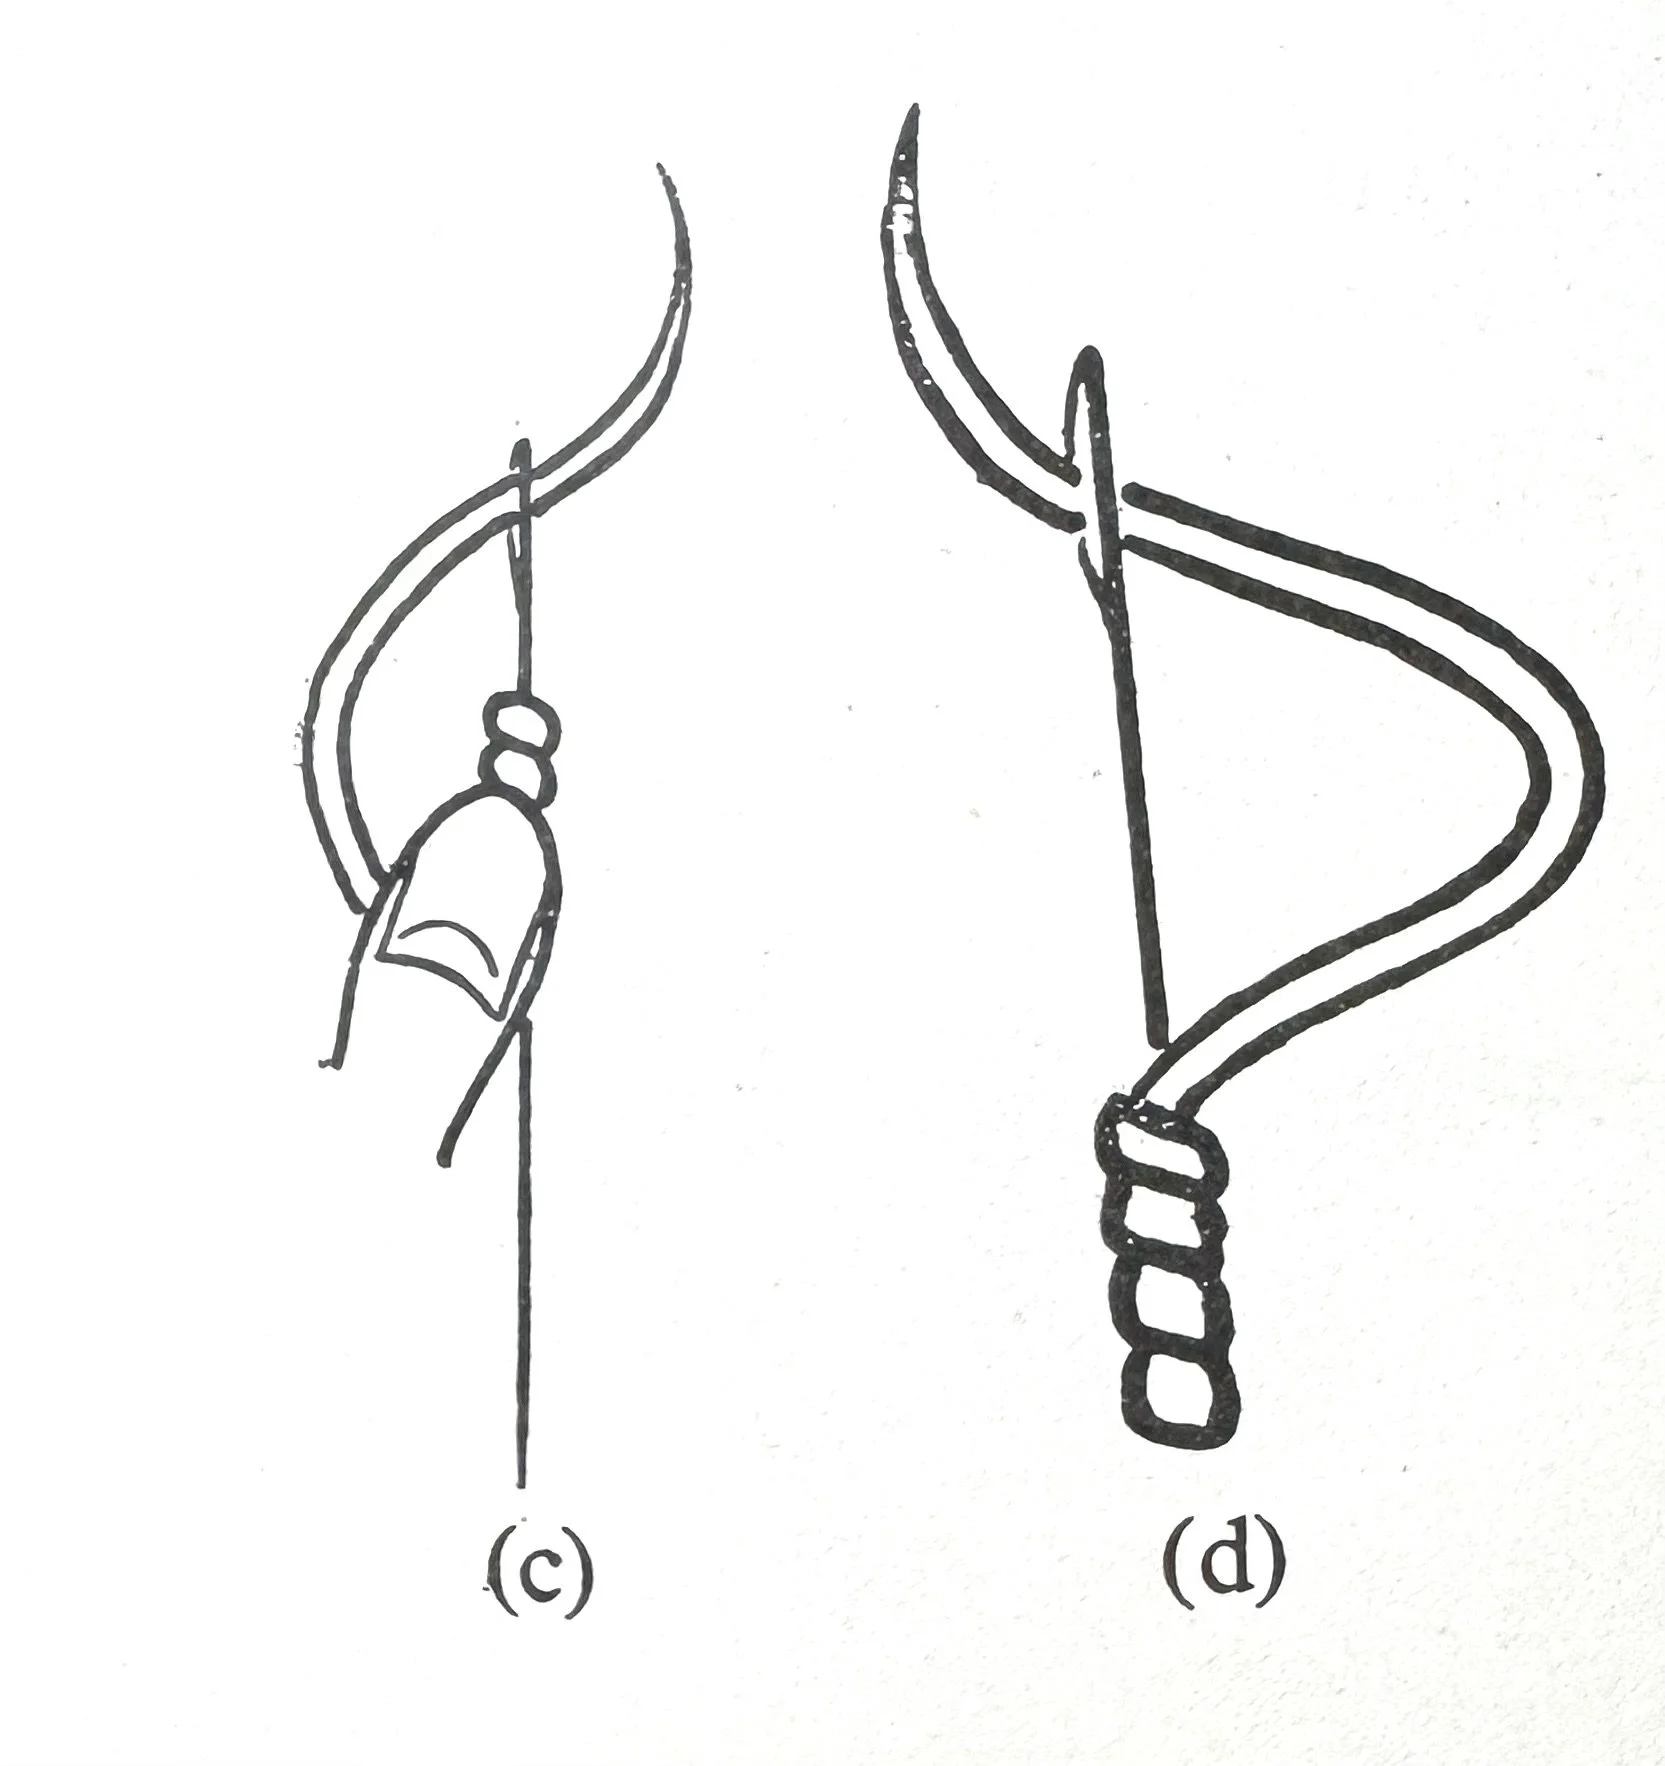
Using a needle with as small an eye that is possible for the thread being used, for DMC stranded cotton I use an embroidery needle size 7, you need the thread to pass easily through the twists. Pull the thread through to the right side of the fabric and take a back stitch emerging at point (a). Twist the thread over the needle as many times as you need to cover the space of the back stitch you’ve made (b).
Put your thumb on the twisted thread and pull the needle right through the twists (c). Insert the needle at the other end of the back stitch (d) to tie down the twists and make one bullion stitch.
Sarah Homfray has some brilliant videos demonstrating embroidery stitches, here’s a link to her video showing bullion knots https://www.youtube.com/watch?v=0veAN4O0tcI&t=3s